Table of Contents >> Show >> Hide
- At a glance
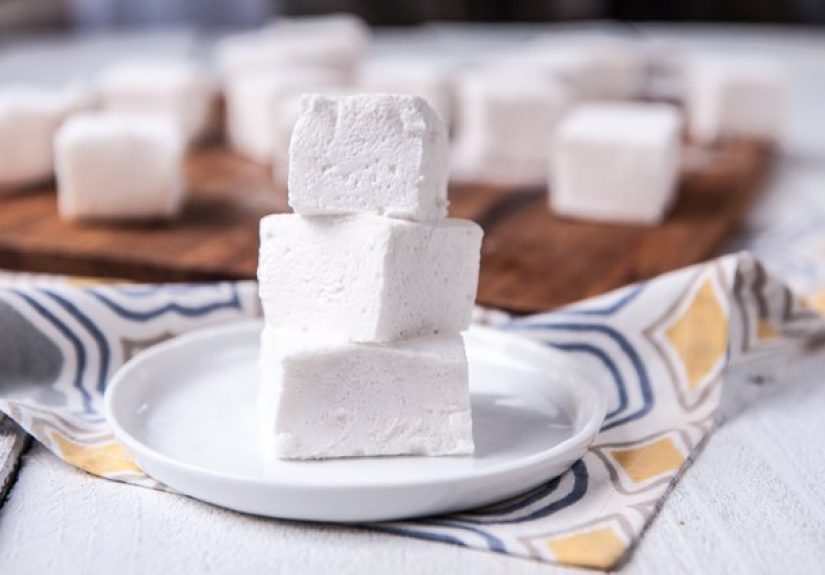
- Homemade Marshmallow Recipe (Vanilla)
- Marshmallow science (the “why” behind the fluff)
- Troubleshooting (because sugar has opinions)
- Flavor variations (easy upgrades)
- How to use homemade marshmallows
- Storage and make-ahead
- Experience notes (the last 500-ish words, from “first batch jitters” to marshmallow confidence)
- SEO tags (JSON)
Store-bought marshmallows are fine. They’re dependable. They’re… loyal. But homemade marshmallows? Homemade marshmallows are like biting into a tiny vanilla-scented cloud that got a promotion and now has benefits. They’re softer, fresher, and weirdly satisfying to makelike a middle-school science project that ends in dessert.
This in-depth guide walks you through a reliable homemade marshmallow recipe using everyday ingredients and one “fancy” tool (a candy thermometer). You’ll learn what the ingredients actually do, how to avoid sugar-syrup drama, and how to cut neat, non-sticky squares instead of wrestling a sweet, clingy marshmallow mattress.
At a glance
- Flavor: classic vanilla (with easy variations)
- Texture: fluffy, bouncy, pillowy
- Active time: ~25–35 minutes
- Set time: 6 hours to overnight
- Makes: about 9×13-inch slab (around 50–80 pieces depending on size)
Homemade Marshmallow Recipe (Vanilla)
Ingredients
- Unflavored gelatin: 3 packets (about 0.75 oz / 21g)
- Cold water: 1 cup (240ml), divided
- Granulated sugar: 1 1/2 cups (300g)
- Light corn syrup: 1 cup (240–325g depending on brand/measure style)
- Fine salt: 1/4 teaspoon
- Pure vanilla extract: 1 tablespoon
For the “anti-sticky force field” coating
- Powdered sugar (confectioners’ sugar): 1 cup (120g)
- Cornstarch: 1/4 cup (20g)
Equipment
- Stand mixer with whisk attachment (a hand mixer works, but your arm may file a complaint)
- Candy thermometer (clip-on style is easiest)
- Medium heavy-bottom saucepan (3-quart is a great size)
- 9×13-inch glass or ceramic pan (or line with parchment and grease well)
- Pastry brush + a small cup of water (for preventing sugar crystals)
- Nonstick spray or neutral oil
- Fine mesh sieve (for dusting coating evenly)
- Greased knife or bench scraper (for cutting)
Step-by-step instructions
- Prep the pan (do this first, future-you will thank you).
Grease a 9×13-inch glass or ceramic pan with nonstick spray. In a bowl, whisk powdered sugar + cornstarch together. Sift a light layer into the pan so the bottom and sides look dusted like a ski slope. Set the remaining mixture aside. - Bloom the gelatin.
Pour 1/2 cup (120ml) cold water into the stand mixer bowl. Sprinkle the gelatin evenly over the water. Let it sit while you make the syrup. This “blooming” step hydrates the gelatin so it dissolves smoothly later. - Cook the sugar syrup to the soft-ball stage.
In a saucepan, combine the remaining 1/2 cup (120ml) water, granulated sugar, corn syrup, and salt. Stir over medium heat just until the sugar dissolves. Clip on the candy thermometer (don’t let it touch the bottom). Once it starts boiling, stop stirring and cook until it reaches 240°F (soft-ball stage). If you see crystals on the sides, brush them down with a wet pastry brush. - Pour the syrup into the gelatin (carefully, it’s lava).
Turn the mixer on low. Slowly stream the hot syrup down the side of the bowl into the gelatinavoid pouring directly onto the whisk. Once all the syrup is in, gradually increase speed to high. - Whip until thick, glossy, and fluffy.
Beat on high until the mixture turns bright white, triples in volume, and forms thick ribbons. This usually takes 8–14 minutes depending on your mixer. The bowl should feel lukewarm, not hot. Add vanilla during the last 30–60 seconds of mixing. - Spread, dust, and let it set.
Quickly scrape the marshmallow fluff into the prepared pan (it will behave like delicious glue). Lightly grease a spatula or use damp hands to smooth the top. Sift a generous layer of the sugar/cornstarch mixture over the top. Let set at room temperature for at least 6 hours, ideally overnight. - Cut without chaos.
Dust a cutting board (or parchment on the counter) with coating. Dust the top of the slab too. Loosen the edges, flip out the slab, then cut into squares with a greased knife or bench scraper. Re-coat the blade as needed; dipping the blade in hot water and wiping it dry can help make clean cuts. - Finish the coating.
Toss each piece in the remaining sugar/cornstarch mixture so every side is covered. If any pieces feel tacky, give them another dusting. Sticky marshmallows are great in hot cocoaless great in a storage container.
Marshmallow science (the “why” behind the fluff)
Why 240°F matters
Marshmallows set because your syrup hits the soft-ball stagea sugar concentration sweet spot that cools into a chewy, flexible structure. Too low and the marshmallows can stay soft or weepy; too high and they can turn firmer than you want. A thermometer turns this from “vibes-based candy making” into “repeatable success.”
What corn syrup actually does
Corn syrup helps prevent crystallization and keeps the texture softer and more elastic. It’s an anti-graininess bodyguard for your sugar syrup. If you’ve ever made candy that went sandy, you’ve met the villain. Corn syrup is the bouncer.
Gelatin: powerful, but not invincible
Gelatin provides the bouncy structure. But it can weaken if it’s exposed to very high heat for too long, which is why many marshmallow methods have you stream the syrup into the gelatin while mixing, and why letting an extra-hot syrup cool briefly can help prevent oddly soft results.
Troubleshooting (because sugar has opinions)
My marshmallows didn’t set (too soft or gooey)
- Syrup didn’t reach 240°F: Thermometers can be miscalibrated, or the tip may have touched the hot pan bottom (false high reading).
- It was humid: Marshmallows can absorb moisture from the air and stay softer than intended. Choose a cool, dry day if possible.
- Gelatin got overheated: If your recipe cooks syrup above soft-ball stage, let it cool briefly before mixing it into gelatin.
- Not enough whip time: Under-whipping = less structure and less volume.
My syrup crystallized (grainy, seized, or looked like wet sand)
- Once boiling, don’t stir. Stirring can encourage crystals.
- Brush down sugar crystals on the pot sides with a wet pastry brush.
- Use a clean saucepan and clean utensilstiny leftover sugar crystals can seed the whole batch.
My marshmallows are sticking to everything
- Use the powdered sugar + cornstarch blend and be generous with dusting.
- Grease the pan well and dust it before you pour in the fluff.
- Re-coat your knife/bench scraper between cuts (yes, constantly; welcome to marshmallow life).
My marshmallows are too firm or rubbery
- Syrup may have gone above 240°F, concentrating sugar too much.
- Over-measuring gelatin (especially with different brands) can make them bouncier than intended.
Flavor variations (easy upgrades)
Extract swaps
- Peppermint: replace half the vanilla with peppermint extract (start smallpeppermint is enthusiastic).
- Almond: add 1/4 to 1/2 teaspoon for a bakery vibe.
- Orange or lemon: use citrus extract, or add finely grated zest at the end (avoid adding lots of juiceacid can weaken gelatin).
Fun mix-ins
- Toasted coconut: press onto the top after spreading, then dust lightly.
- Chocolate swirl: drizzle cooled melted chocolate over the top and swirl with a skewer.
- Color: add a drop or two of gel food coloring with the vanilla near the end of whipping.
Swap the corn syrup (yes, you can)
If you prefer not to use corn syrup, you can often substitute another invert sugar like honey, golden syrup, or brown rice syrup. Expect a mild flavor change (honey tastes like honeyshocking, I know).
How to use homemade marshmallows
- Hot cocoa: the obvious classic, but homemade ones melt into a creamy top layer that feels fancy.
- S’mores: toast them and watch them puff like they’re auditioning for a movie.
- Rice Krispie treats: melt them down for a noticeably richer, fresher flavor.
- Gifts: wrap individually in wax paper twists and you’ll look like someone who has their life together.
- Coffee topper: float one on a latte and pretend it’s a tiny edible hat.
Storage and make-ahead
- Room temp is best: Store in an airtight container in a cool, dry place.
- Separate layers: Use parchment/wax paper between layers to prevent sticking.
- Timeline: They can keep for up to about 2 weeks when stored well, though freshness is best in the first week.
- Avoid the fridge: Refrigeration can create condensation and make marshmallows sticky.
Experience notes (the last 500-ish words, from “first batch jitters” to marshmallow confidence)
The first time you make homemade marshmallows, there’s a good chance you’ll think: “This seems too simple. Where is the trap?” The trap is stickiness. Marshmallow fluff is basically sweet adhesive with excellent PR. That’s why the single most underrated step is prepping your pan and workspace before you start whipping. Once the mixer’s running, you don’t want to realize your pan is ungreased and your sieve is in another dimension (also known as “the drawer you never open”).
Here’s what most people notice right away: the transformation is dramatic. The mixture goes from “watery gelatin swamp” to glossy, thick, white fluff that piles up on the whisk like soft-serve ice cream. It’s oddly therapeutic to watch. You’ll also learn the sound of readiness: at first, the mixer whirs like it’s mixing cake batter. Later, it changes pitch slightly because the marshmallow is thicker and the whisk is dragging through it. When you lift the whisk and the ribbon holds for a moment before sinking back, you’re in the zone.
Cutting is the next rite of passage. If you cut too soon, you’ll discover “marshmallow lava” is a real thingslow-moving, sticky, and absolutely committed to your knife. If you wait until the slab is fully set, dust the top generously, and keep re-coating your blade, cutting becomes almost… pleasant. Almost. A bench scraper makes you feel like a professional candy maker, even if your only other candy experience is eating a fun-size bar in the pantry with the lights off.
Once you’ve made a couple batches, you start noticing small choices that make a big difference. A slightly larger pan gives you thinner marshmallows that are perfect for hot cocoa. A smaller pan makes thick, dramatic squares that toast beautifully for s’mores. A little extra vanilla feels warmer and more “bakery.” Peppermint is a holiday instant replay. Coffee extract (or a tiny spoonful of espresso powder dissolved in the blooming water) gives you a grown-up flavor that pairs ridiculously well with dark chocolate.
You’ll also develop candy instincts: don’t rush the syrup, don’t stir once it boils, and don’t ignore suspicious sugar crystals on the pot walls. Those crystals are like a rumorif you don’t shut them down early, they spread and ruin the whole party. And yes, weather matters more than you’d think. On a humid day, marshmallows can feel a touch tacky even after coating; on a cool, dry day they practically behave like they’re trying to impress you.
The best “experience upgrade,” though, is what happens after you taste the result: homemade marshmallows aren’t just softer. They’re cleaner-tasting, more fragrant, and they melt differentlyless “spongy foam,” more “creamy vanilla cushion.” Put one in hot chocolate and it becomes a silky cap. Toast one and the outside caramelizes while the inside turns gooey in the most photogenic way. After that, the bagged ones will still be fine… but they’ll feel like the economy seat you take when first class exists.


