Table of Contents >> Show >> Hide
- What the Dremel 7134 Actually Is (and Why It’s Different)
- Why Diamond Grit Is Such a Big Deal
- Best Uses for the Dremel 7134 Diamond Wheel Point
- How to Use the Dremel 7134 Like You Meant to Do That
- Common Mistakes People Make with the 7134
- Maintenance: Getting More Life Out of Your Diamond Wheel Point
- Project Ideas That Make the 7134 Feel Like Cheating
- Dremel 7134 vs. Other Diamond Bits: How to Choose
- Safety Notes (Quick, But Worth It)
- Conclusion: Is the Dremel 7134 Worth It?
- Real-World Shop Notes: of “Experience” You Can Actually Use
Some tools arrive with fireworks. Others show up looking like a tiny teal lollipop and quietly become the MVP of your “how is this even possible?” projects. The Dremel 7134 Diamond Wheel Point is firmly in the second categorysmall enough to lose in a drawer, precise enough to sign your name in glass, and tough enough to make stubborn materials reconsider their life choices.
In this guide, we’ll break down what the 7134 is, what it’s great at (fine detail work on hard stuff), what it’s not (a magical glass-drilling unicorn), and how to use it without accidentally “engraving” your fingerprints into your next DIY masterpiece. Expect real specs, practical speed advice, and a few laughably common mistakes to avoid.
What the Dremel 7134 Actually Is (and Why It’s Different)
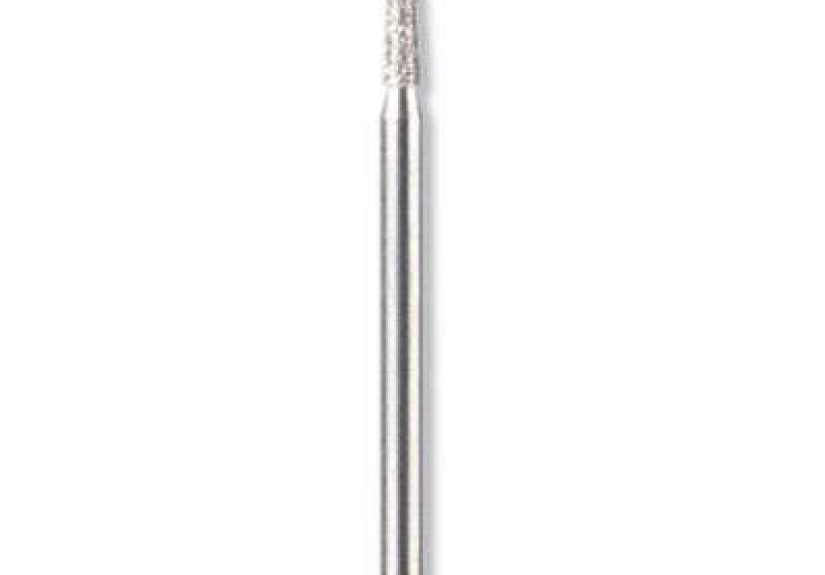
The Dremel 7134 is a diamond-coated rotary tool accessory designed for fine detail work: engraving, carving, touch-ups, and finishing on hard materials. Instead of sharp cutting flutes (like a carbide burr), it uses a diamond particle coating to abrade and “grind” material away in a controlled way.
Quick specs that matter in real life
- Working diameter: about 2.0 mm (5/64″)built for detail, not bulk removal.
- Shank size: 3.2 mm (1/8″)fits most Dremel rotary tools and standard collets/chucks.
- Accessory length: about 46 mmenough reach for tight spots without feeling floppy.
- Shape: a thin, flat-head “wheel point” profilehandy for narrow grooves and crisp edges.
- Max RPM guidance: commonly listed as up to 25,000 RPM on product specs; always defer to packaging/tool manual for your setup.
Translation: the 7134 is a precision bit. It’s meant to nibble, not chomp.
Why Diamond Grit Is Such a Big Deal
Diamond is prized here for one simple reason: hard materials laugh at ordinary bits. Glass, ceramic, porcelain, stone, and hardened steel can be brutal on traditional cutting edges. Diamond grit doesn’t rely on sharpness; it relies on hardness and abrasion. That means:
- Consistent contact: You get a steady “sanding” action instead of grabbing and chattering.
- Better control for detail: Especially useful for engraving lines, small notches, and fine shaping.
- Works on mixed materials: Great when your project includes a hard inlay, glaze, or mystery “stone-ish” component.
The trade-off? Diamond grit likes light pressure and patience. If you bully it, the coating can wear faster than your motivation on a Monday morning.
Best Uses for the Dremel 7134 Diamond Wheel Point
1) Glass engraving and etching (the “ooh, fancy” category)
The 7134 shines when you want controlled etching on glass: monograms on tumblers, frosted designs on mirrors, or cleaning up tiny chips on glass edges. The small diameter helps you work like you’re drawing with a pencilexcept the pencil is spinning at “tiny tornado” speed.
Pro tip: for cleaner lines, use painter’s tape as a guide and make multiple light passes. Your first pass is the sketch; later passes are the “ink.”
2) Ceramic and porcelain touch-ups
If you’ve ever cut tile and ended up with a sharp edge that could audition as a knife, you’ll appreciate the 7134 for smoothing and refining. It’s also useful for minor glaze cleanup or shaping small areas where a bigger wheel would be clumsy.
3) Stone and semi-precious materials (small-scale shaping)
The 7134 is frequently recommended for hard materials like stone and semi-precious pieces where detail matters. Think: refining a small groove, smoothing a sharp corner, or adding texture. It’s not a sculptor’s chisel for massive removal it’s more like a jeweler’s gentle persuasion.
4) Hardened steel (careful finishing, not aggressive grinding)
Diamond-coated bits can work on hardened steel, especially for light finishing, deburring tiny edges, or engraving marks. The key is realistic expectations: this is precision work, not “remove half a bolt.”
5) Wood (yes, woodsometimes)
Wood is softer than the 7134’s usual “hard materials” crowd, but it can still be useful on dense hardwoods, resin-heavy wood, or when you want a textured effect rather than a clean-cut carve. It’s also handy for touch-ups where you don’t want a sharp cutter to grab the grain.
How to Use the Dremel 7134 Like You Meant to Do That
Step 1: Mount it correctly (because wobble is the enemy)
The 7134 uses a standard 1/8″ shank, so it fits directly into a Dremel collet or chuckno mandrel required. Insert the shank deep enough to be secure (but not so far you bottom out), tighten firmly, and give it a quick spin test at low speed. If it wobbles, reseat it.
Step 2: Choose a speed that matches the material (and your stress level)
For diamond bits, higher speed often improves cutting action on hard materialsup to the safe limits for the accessory and tool. Many Dremel speed charts suggest high ranges for diamond wheel points on hard materials, but specific product listings may specify a max RPM for the accessory itself. The safest approach:
- Start in the mid-to-high range for glass/ceramic/stone, then adjust for control and heat.
- Use lighter pressure instead of more speed when you need precision.
- When in doubt, stay under the accessory’s stated max RPM and let technique do the heavy lifting.
Step 3: Let the grit do the work (seriously)
Pressing harder doesn’t help. It usually creates heat, increases chatter, and wears the diamond coating faster. Use a “feather touch,” like you’re trying not to wake a sleeping cat that’s on your lap but you also really need the TV remote.
Step 4: Use cooling when needed (glass and ceramic love a spa day)
Glass and ceramic can heat up quickly. A little water as a coolant can help reduce heat and dust. For some projects, a shallow water bath (with the workpiece partially supported) can keep things coolerjust keep electrical safety in mind, avoid splashing the tool, and work carefully.
Step 5: Control the dust (because lungs aren’t shop vacs)
Grinding glass, ceramic, and stone can create fine dust. Use eye protection, consider a respirator rated for fine particles, and work with ventilation or dust extraction. Your future self will thank you.
Common Mistakes People Make with the 7134
Mistake #1: Trying to drill holes in glass
This one is legendary. The 7134 is for engraving and shapingnot drilling. If you need holes, use a dedicated glass drilling bit designed for that job, and use proper lubrication and technique.
Mistake #2: Using it like a bulldozer
Diamond grit works best with light contact and steady movement. Heavy pressure can strip performance quickly and leave you wondering why your “diamond” bit suddenly feels like a sad pencil eraser.
Mistake #3: Staying in one spot too long
Holding the bit in one place builds heat and can cause localized damage (especially on glass). Keep the bit moving and use repeated light passes.
Mistake #4: Expecting it to remove a ton of material fast
The 7134 is a detail tool. If you need major shaping, start with a more aggressive accessory (a larger diamond bit, a grinding stone, or a cutting wheel depending on the material), then switch to the 7134 for refinement.
Maintenance: Getting More Life Out of Your Diamond Wheel Point
Diamond-coated bits can “load up” with residue, especially when working on softer materials or composites. To keep performance up:
- Clean the bit periodically with a soft brush (an old toothbrush is perfect) and mild cleaner appropriate for the residue.
- Use light passes instead of forcingheat and pressure are the fastest way to shorten lifespan.
- Store it smart so the diamond head isn’t rattling against harder bits in a drawer like it’s in a rock tumbler.
Project Ideas That Make the 7134 Feel Like Cheating
- Personalized glassware: Monograms, dates, simple line art, and “please return this cup” messages for the office.
- Tile edge refinement: Smooth a cut edge so it looks intentional instead of “oops, I sneezed.”
- Stone detail work: Small grooves or texture on decorative stones or carvings.
- Tool marking: Add identifying marks to metal tools (lightly) so your favorite wrench stops “mysteriously relocating.”
Dremel 7134 vs. Other Diamond Bits: How to Choose
If you’re shopping within Dremel’s diamond lineup, the main difference is shape. The 7134’s thin, flat head is great for fine lines and small grooves. Other diamond wheel points or sets may include rounded or conical shapes for different contours. If you do a variety of engraving and shaping, a multi-shape set can be a cost-effective way to cover more ground. If you mostly do fine-line work, the 7134 is a focused, “right tool for the job” pick.
Safety Notes (Quick, But Worth It)
- Eye protection: Non-negotiable. Tiny chips move fast.
- Secure your work: Clamps are cheaper than emergency room co-pays.
- Mind dust: Especially for glass/ceramic/stoneuse ventilation and consider a respirator.
- Use the right bit for the job: Engraving bits engrave. Drill bits drill. Your project deserves clarity.
Conclusion: Is the Dremel 7134 Worth It?
If you want clean, controlled engraving and detail shaping on hard materials, the Dremel 7134 Diamond Wheel Point is a smart little upgrade. It’s precise, versatile, and genuinely useful for glass, ceramic, porcelain, stone, and careful finishing on metal. Treat it like a detail instrument (not a demolition tool), and it’ll reward you with crisp results and fewer “why did I do that?” moments.
Real-World Shop Notes: of “Experience” You Can Actually Use
Here’s what you can expect the first time you put a Dremel 7134 to workbased on the patterns that show up again and again in maker projects, DIY forums, and tool-bench reality.
First: the sound. Diamond bits have a particular high-pitched “ssss” that makes you think you’re either doing precision craftsmanship or summoning a tiny robot mosquito. That sound is normal. What’s not normal is a harsh chatter or rattling. If you hear that, stop and check seatingmost “my lines look shaky” problems are really “my bit is wobbling.”
Second: you’ll learn very quickly that pressure is not progress. With cutters, pushing can sometimes speed things up. With diamond grit, pushing often just heats everything, wears the coating, and makes you question your career choices. The best results usually come from a light, steady touch and repeated passes. Your first pass is usually faint and disappointinglike a pencil sketch. That’s fine. The second and third passes build the line cleanly. By the fourth pass, you start to feel like you have superpowers.
Third: glass is dramatic. You may start on a glass bottle thinking, “I’ll just draw a little leaf.” Two minutes later you realize glass has the emotional stability of a soap opera character. It heats, it squeaks, it sheds dust, and it punishes hesitation. The workaround is simple: keep the bit moving, cool the work as needed, and don’t try to carve deep trenches in one go. If you want a frosted look, you’re often better off shading an area with many light strokes rather than pressing down for a deep cut.
Fourth: templates are your secret weapon. Painter’s tape, vinyl stencils, or even a printed pattern taped behind clear glass can make your results look “professionally intentional.” Freehand is fun, but stencils turn “I hope this looks okay” into “I should charge for this.”
Fifth: you’ll probably try to drill with it at least once. Don’t feel badthis is a rite of passage, like getting glue on your elbow during a woodworking project. The 7134 can start a divot in glass, but it’s not meant to drill a clean hole. If your project needs an actual hole, you’ll save time and frustration by switching to a real glass drill bit and using the correct technique (support, lubricant, patience).
Finally: the 7134 is a detail finisher that rewards planning. Use a more aggressive accessory for big shaping, then bring in the 7134 for the crisp edges, the small grooves, the clean corners, and the “how did you do that?” moments. It’s not the bit you use to win a raceit’s the bit you use to make the trophy look expensive.


