Table of Contents >> Show >> Hide
- What Does “Chair Revival” Really Mean?
- Why Chair Revival Is a Hometalk Favorite
- Choosing the Right Chair to Revive
- Tools and Supplies You’ll Actually Use
- Step-by-Step Chair Revival Process
- Design Ideas That Work Every Time
- Common Chair Revival Mistakes (and How to Avoid Them)
- The Emotional Payoff of Chair Revival
- Extended Experiences: Real-Life Lessons From Chair Revival Projects (500+ Words)
- Final Thoughts
Chair revival is one of those magical DIY transformations where a tired, wobbly, “should-I-just-toss-this?” chair becomes a statement piece you’re weirdly proud of. On Hometalk, chair revival projects are everywhereand for good reason. They’re affordable, beginner-friendly, endlessly customizable, and deeply satisfying. Few DIY wins can beat rescuing a sad chair from the curb and turning it into something guests actually compliment.
This guide dives deep into the art and joy of chair revival, drawing from best practices shared by seasoned DIYers, furniture refinishers, home bloggers, and renovation pros across the United States. We’ll break down techniques, tools, common mistakes, design ideas, and real-life lessonswithout the fluff, without the copy-paste, and with a sense of humor intact.
What Does “Chair Revival” Really Mean?
Chair revival isn’t about chasing perfection. It’s about restoring function, improving appearance, and extending life. That might mean anything from tightening loose joints to stripping decades-old varnish, reupholstering a seat, or boldly painting a mismatched dining set into visual harmony.
On platforms like Hometalk, chair revival typically includes:
- Structural repairs (fixing wobble, cracks, or loose joints)
- Surface refresh (paint, stain, or sealant)
- Seat upgrades (reupholstery, cane repair, cushion replacement)
- Style changes (modernizing, distressing, or color-matching)
The best part? You don’t need a fancy workshop or professional training. Just patience, curiosity, and a chair that’s willing to cooperate.
Why Chair Revival Is a Hometalk Favorite
1. Low Cost, High Impact
Unlike full room remodels, chair revival projects usually cost under $50and often much less. Paint, fabric, wood glue, and sandpaper go a long way. For many DIYers, the biggest expense is resisting the urge to buy more chairs “just to revive.”
2. Beginner-Friendly Learning Curve
Chairs teach essential DIY skills: sanding, painting, stapling fabric, aligning joints. Mess up? Most mistakes are fixable. This makes chair revival an ideal starter project before tackling larger furniture.
3. Sustainability Without Sacrificing Style
Reviving a chair keeps usable furniture out of landfills while preserving solid wood craftsmanship that’s often better than modern mass-produced options. Eco-friendly never looked so good.
Choosing the Right Chair to Revive
Not all chairs are created equal. Before committing, inspect with a critical eye:
Good Candidates
- Solid wood frames (oak, maple, beech)
- Minor wobble or looseness
- Cosmetic damage (scratches, worn finish)
- Upholstery issues without frame damage
Proceed with Caution
- Severe rot or termite damage
- Broken load-bearing joints
- Particle board frames under veneer
If the chair feels sturdy once joints are tightened, it’s usually worth saving.
Tools and Supplies You’ll Actually Use
You don’t need a pro-grade workshop. Most chair revival projects rely on a simple toolkit:
- Wood glue (high-quality, clamp-friendly)
- Clamps or ratchet straps
- Sandpaper (80–220 grit)
- Paint or stain + sealer
- Staple gun (manual works fine)
- New foam or batting (for seats)
Optional but helpful: a palm sander, tack puller, and painter’s tape for crisp lines.
Step-by-Step Chair Revival Process
Step 1: Structural Fixes First
Never paint a wobbly chair. Disassemble loose joints if possible, clean out old glue, apply fresh wood glue, clamp firmly, and let cure fully. This alone can transform the feel of a chair.
Step 2: Surface Prep (Yes, This Matters)
Light sanding helps new finishes adhere. You don’t always need to strip to bare woodespecially if paintingbut you do need a clean, scuffed surface.
Step 3: Finish With Intention
Paint offers instant drama. Stain highlights wood grain. Distressing adds character. The key is consistencycommit to the look and follow through.
Step 4: Revive the Seat
Replacing fabric is easier than it looks. Lay out new fabric, center the seat, pull taut, and staple evenly. Rotate sides to avoid wrinkles. Trim excess fabric only after you’re satisfied.
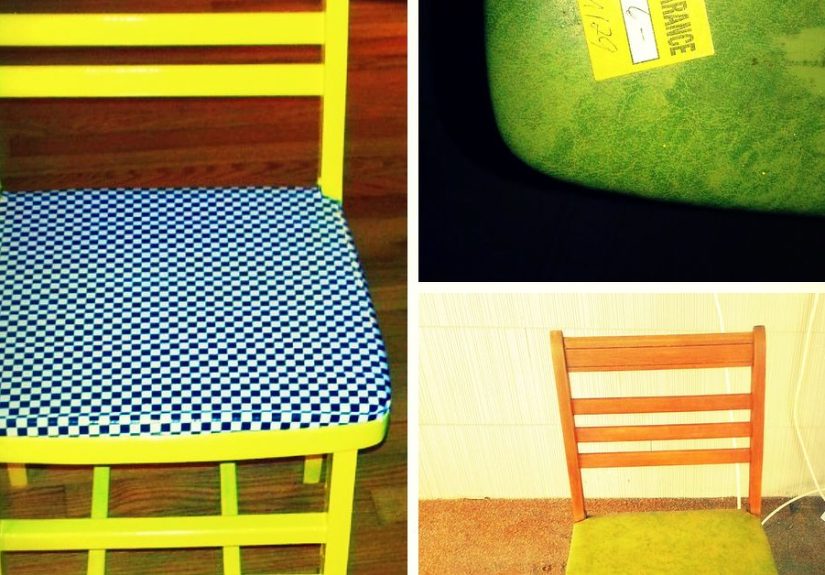
Design Ideas That Work Every Time
- Classic white frames with neutral upholstery
- Bold black chairs for modern dining spaces
- Two-tone paint and wood combinations
- Natural wood paired with patterned fabric
On Hometalk, the most loved transformations are often the simplest. Clean lines. Intentional color. Comfortable seating.
Common Chair Revival Mistakes (and How to Avoid Them)
- Skipping repairs: Paint won’t fix wobble.
- Rushing dry time: Let glue and paint cure fully.
- Over-sanding: More isn’t always better.
- Cheap fabric: Chairs take abusechoose durability.
The Emotional Payoff of Chair Revival
There’s something deeply satisfying about using furniture you saved yourself. Every scratch you repaired, every staple you firedthose become part of the story. Chair revival isn’t just DIY. It’s reclamation.
Extended Experiences: Real-Life Lessons From Chair Revival Projects (500+ Words)
Anyone who has tackled a chair revival remembers their first attempt. Mine involved a dining chair that looked “mostly fine” until it nearly collapsed under basic human weight. That moment taught a core truth of chair revival: structure always comes first.
Many DIYers discover that chairs expose shortcuts from past repairs. Old nails where glue should have been. Layers of paint hiding cracked joints. Chair revival becomes part detective work, part therapy. You slow down. You listen to what the furniture needsnot what looks good on social media.
One of the most common emotional arcs shared by Hometalk contributors goes like this: excitement, frustration, doubt, adjustment, pride. Sanding takes longer than expected. Paint drips appear out of nowhere. Fabric refuses to sit flat. And yet, something remarkable happens near the endyou start problem-solving instead of panicking.
Chair revival also sharpens decision-making. Should you preserve original wood or modernize with paint? Replace upholstery or keep the vintage fabric? Over time, DIYers report trusting their instincts more. They stop chasing perfection and start chasing cohesion.
Another powerful lesson is respecting quality materials. Solid wood chairs from decades past reveal craftsmanship rarely found in fast furniture. Mortise-and-tenon joints. Balanced proportions. Restoring these pieces builds appreciation for durability and designand often changes how people shop afterward.
Then there’s the practical side: revived chairs get used. Kitchen chairs see daily meals. Desk chairs support long workdays. Accent chairs become reading spots. Unlike decorative crafts, chair revival delivers daily utility.
Many DIYers also note how chair revival builds confidence beyond furniture. Once you’ve disassembled a chair, re-glued joints, refinished wood, and reupholstered a seat, hanging shelves or refinishing a table feels less intimidating. Chairs become a gateway project.
Perhaps the most meaningful takeaway is connection. Chairs often carry memoriesgrandparents’ dining sets, thrift finds from early apartments, curb rescues from neighborhood cleanups. Reviving them preserves stories. That’s why chair revival resonates so strongly within the Hometalk community. It’s not about flawless results. It’s about hands-on creativity and giving overlooked things another chance.
Final Thoughts
Chair revival proves that small projects can deliver big satisfaction. With basic tools, thoughtful steps, and a willingness to learn, anyone can transform an ordinary chair into something functional, stylish, and personal. That’s the heart of Chair Revival on Hometalkand why it never goes out of style.


