Table of Contents >> Show >> Hide
- Why Gel Eyeliner Dries Out So Fast
- Way #1: Warm the Closed Pot Gently
- Way #2: Remove the Dried Top Layer
- Way #3: Add a Cosmetic Mixing Medium
- Way #4: Revive Only What You Need on a Mixing Palette
- What You Should Never Do to Dried Out Eyeliner Gel
- How to Tell When It Is Time to Toss the Liner
- How to Keep Gel Eyeliner From Drying Out Again
- Final Thoughts
- Experience Notes: What People Usually Learn the Hard Way About Dried Gel Eyeliner
- SEO Tags
Few beauty disappointments are more personal than opening your favorite gel eyeliner and finding a sad little puck of hardened drama staring back at you. Yesterday it was creamy, glossy, and ready to help you serve a razor-sharp wing. Today it looks like it survived a drought. Rude.
The good news is that dried out eyeliner gel is not always a lost cause. In many cases, the formula has simply lost some flexibility from air exposure, heat, age, or repeated dipping with a brush. The better news is that you do not need to go full kitchen-scientist and start pouring random liquids into a product that sits millimeters from your eyeballs. There are smarter ways to rescue it.
In this guide, you will learn 4 ways to fix dried out eyeliner gel, plus what causes gel liner to dry out, what not to do, when to stop trying to revive it, and how to keep a fresh pot creamy for longer. If your liner is only slightly stiff, you may be able to bring it back. If it smells funny, looks weird, or has turned into a flaky brick, this article will also help you recognize when it is time to let it go with dignity.
Why Gel Eyeliner Dries Out So Fast
Before you fix the problem, it helps to know why gel eyeliner dries out in the first place. Gel liners are designed to strike a tricky balance: soft enough to glide, firm enough to set, and stable enough to stay put. That means the formula usually contains waxes, oils, pigments, and film-formers. Once too much air gets into the jar, the surface starts to dry and stiffen. With repeated exposure, the creamy texture turns patchy, crumbly, or resistant to your brush.
Here are the most common reasons it happens:
1. The lid is not fully sealed
This is the big one. Even a slightly loose cap can let in enough air to dry the top layer. Gel liner is basically the beauty version of leftovers: leave it uncovered and it pays you back with regret.
2. It is stored in the wrong place
Hot cars, sunny vanities, steamy bathrooms, and freezing temperatures all work against a gel formula. Extreme heat can weaken preservatives and alter texture, while repeated temperature swings can make the product separate or stiffen.
3. Dirty tools are changing the formula
Every time you dip a brush into the pot, you bring in traces of skin oil, old makeup, dust, and bacteria. That can shorten the life of the liner and make the texture less reliable over time.
4. It is simply old
Not every dry liner is fixable. Sometimes a pot is not “a little thirsty.” Sometimes it is just old. Eye makeup has a shorter useful life than many people realize, especially if it is a wetter formula or used frequently.
Way #1: Warm the Closed Pot Gently
If your gel eyeliner is only mildly dry, this is the easiest and safest first move. Gentle warmth can soften the waxes and emollients in the formula enough to restore some slip without changing the product too much.
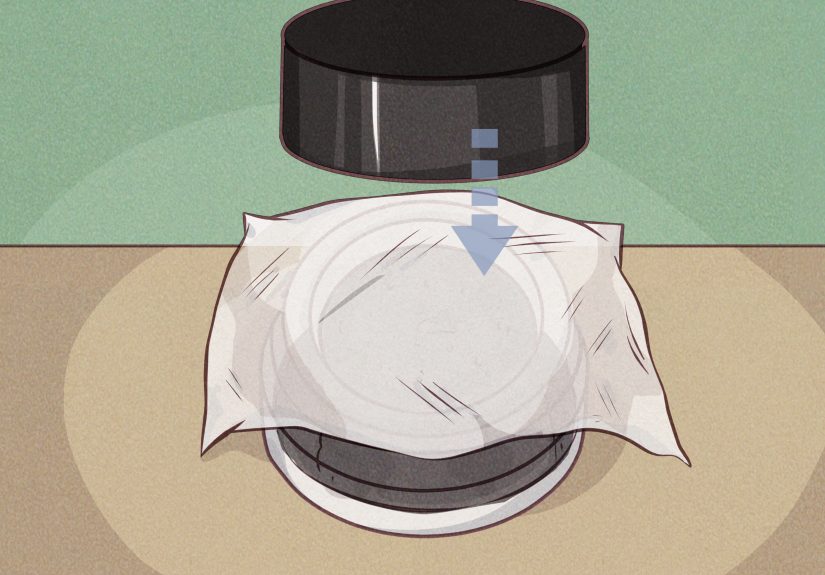
How to do it
Make sure the jar is tightly closed. Place it in a mug or bowl of warm, not boiling water for about 3 to 5 minutes. You can also wrap it in a warm washcloth if you prefer. Remove the jar, dry the outside thoroughly, open it, and test the texture with a clean angled brush or sanitized spatula.
Why it works
Gel eyeliner often dries from the surface down. Heat softens that stiff top layer and can make the product underneath easier to access. If your liner was still fine last week but suddenly feels draggy, this method often helps.
Best for
Lightly dried gel liners that still look normal in color and smell fine.
What to watch out for
Do not microwave the jar. Do not use boiling water. Do not let water get inside the container. Your goal is a gentle spa day for the eyeliner, not a near-death experience.
Way #2: Remove the Dried Top Layer
Sometimes the problem is not the whole pot. It is just the crusty top. In that case, trying to stir the dry layer back in can make the texture worse. A cleaner fix is to remove the hardened surface and get to the product underneath.
How to do it
Wash your hands first. Then use a sanitized cosmetic spatula, the back of a clean metal cuticle pusher, or another clean beauty tool to gently scrape away the dry film on top. You do not need to dig aggressively. Just lift off the hardened layer until you reach the softer product below.
Why it works
Air exposure hits the surface first. Underneath that top shell, the liner is often smoother and more usable. This method is especially helpful when the liner feels dry on top but still leaves pigment behind when you press into it.
Best for
Gel eyeliner that has a stiff, cracked, or slightly shrunken surface but still has creamy product below.
Pro tip
After scraping, smooth the surface flat, close the lid tightly, and store the pot upside down for a few hours. That will not magically reverse age, but it can help the remaining emollients settle more evenly near the top.
Way #3: Add a Cosmetic Mixing Medium
If your gel liner is truly dry but still within its usable life, a cosmetic mixing medium is usually the best rescue option. This is the more polished, makeup-bag-approved solution for people who want their liner to behave like eyeliner again instead of turning into an accidental smoky shadow.
How to do it
Add one tiny drop of a mixing medium designed for makeup to the pot. Start small. Then use a sanitized spatula or clean brush handle to fold and press the product until it becomes smoother. Test it on the back of your hand. If it still feels too stiff, add another micro-drop. That is it. Go slowly.
Why it works
Unlike random household liquids, a proper mixing medium is designed to play nicely with cosmetic pigments and long-wear formulas. It can restore glide, improve blendability, and help the liner maintain better performance than makeshift fixes.
Best for
Moderately dried gel liners that are still safe-looking but no longer apply evenly.
What not to do
Do not pour in a puddle. Too much liquid can turn your precise gel liner into a slippery mess that never fully sets. This is a case where restraint is not boring. Restraint is chic.
Way #4: Revive Only What You Need on a Mixing Palette
If your pot is nearly done, somewhat old, or dry in a way that makes you suspicious, the smartest move may be to rehydrate only a one-use amount instead of reworking the whole jar. This is the “save the wing, not the whole civilization” method.
How to do it
Use a sanitized spatula to scrape out a pea-sized amount of eyeliner onto a clean palette, metal tray, or the back of a sanitized hand palette. Add a pin-drop of cosmetic mixing medium and blend until smooth. Then use that for your makeup application and keep the rest of the jar untouched.
Why it works
This method reduces repeated contamination of the full pot and gives you better control over texture. It is especially useful when the jar is not consistently dry throughout or when you only need enough product for one look.
Best for
Almost-empty liners, expensive formulas you want to stretch a little longer, or products that are borderline dry but not obviously spoiled.
Bonus benefit
You can customize consistency more easily. Want a crisp cat-eye? Keep the mix thicker. Want a softer smudged line? Blend it slightly looser. Tiny batch, big main-character energy.
What You Should Never Do to Dried Out Eyeliner Gel
The internet is full of beauty hacks that sound clever until you remember the product goes on your eyelids. Here is what to skip:
Do not add tap water
Water can dilute the preservative system and increase contamination risk. Even if it seems harmless, it is not the most eye-friendly choice for a jar you will keep reopening.
Do not add saliva
This deserves a firm absolutely-not. Saliva introduces bacteria, and eye-area products are not the place for experimental biology.
Be cautious with kitchen oils
Some beauty tips suggest coconut oil, baby oil, or jojoba oil. While a tiny amount may soften a stubborn formula, oils can change wear time, reduce staying power, and make a gel liner more likely to smudge. If you have sensitive eyes, this becomes even less appealing.
Do not “fix” a liner that is clearly expired
If it smells off, changes color, feels gritty, makes your eyes sting, or has been open for ages, do not try to rehabilitate it out of loyalty. That is not frugality. That is emotional attachment dressed up as budgeting.
How to Tell When It Is Time to Toss the Liner
Sometimes the best fix is a trash can. Not glamorous, but honest. You should replace your gel eyeliner instead of reviving it when:
- It smells sour, chemical, or different from when you bought it.
- The color has changed or the formula has separated oddly.
- It feels gritty, flaky, or impossible to smooth out.
- Your eyes sting, water, itch, or get red after using it.
- You used it during an eye infection.
- You have no idea how long it has been open and it has clearly entered ancient-artifact territory.
If you wear contacts, have sensitive eyes, or are prone to irritation, be even stricter. Saving a few dollars is not worth gambling with your eyes.
How to Keep Gel Eyeliner From Drying Out Again
Once you rescue the product, give it a better life than before:
- Close the lid tightly every single time.
- Wipe the jar threads clean so the cap seals properly.
- Use a clean brush for every application.
- Store it in a cool, dry place away from heat and bathroom steam.
- Do not leave it open while doing the rest of your makeup.
- Consider scooping out a small amount for each use instead of dipping directly into the jar if you use it often.
That last tip sounds extra, but so does rebuying the same eyeliner three times because you keep accidentally turning it into decorative asphalt.
Final Thoughts
If you were searching for 4 ways to fix dried out eyeliner gel, here is the bottom line: start with gentle heat, remove the hardened surface, use a cosmetic mixing medium if needed, and revive only a small amount on a palette when you want the safest, smartest rescue. Those methods give you the best odds of saving the product without making it less wearable or more questionable near your eyes.
And remember, not every eyeliner pot is meant to be saved. A liner that is merely dry can often be revived. A liner that is old, contaminated, or irritating should be retired immediately. Beauty is fun. Eye infections are not. That is the entire TED Talk.
Experience Notes: What People Usually Learn the Hard Way About Dried Gel Eyeliner
One of the most common real-world experiences with gel eyeliner is that the product rarely goes from perfect to terrible overnight for no reason. Usually, there are clues. The lid starts closing a little crooked because product has built up around the rim. The brush picks up less color than usual. You need to press harder. Your wing stops looking crisp and starts looking like it was negotiated under pressure. Most people do not notice these warning signs until the formula is already half-dry.
Another pattern shows up with storage. A lot of people keep eye makeup in the bathroom because that is where they get ready. It makes sense logistically, but it is not ideal for a jar formula. Steam, heat, and humidity can quietly mess with the consistency. Plenty of makeup lovers discover that the same gel liner lasts longer when it is stored in a bedroom drawer or vanity instead of near the shower. That sounds like a tiny change, but it often makes a noticeable difference.
People also tend to learn that “using less product” does not always mean “making it last longer.” With gel eyeliner, repeatedly dipping a brush into the pot can introduce residue from old makeup, skin oils, and tiny bits of dust. Over time, the liner becomes less smooth and more temperamental. Many experienced users eventually switch to scooping out a little product onto a palette for each application, especially when doing detailed looks or makeup on other people. It feels more professional because, frankly, it is.
Then there is the emotional phase: denial. Nearly everyone who loves a particular eyeliner eventually has a moment where they stare at a half-dry pot and insist, “It is still fine.” Sometimes they are right. Sometimes they spend ten minutes trying to draw one eye and end up creating a look best described as Victorian grief. The lesson here is simple: if the product is fighting you every morning, the cost is no longer just the price of the liner. It is your time, your patience, and possibly your entire mood before 9 a.m.
Makeup artists and long-time beauty fans also learn quickly that rescue methods are not all equal. Warmth helps. Mixing medium helps. Clean tools help. Random mystery hacks from the internet do not always help. In practice, the most successful fixes are the boring ones: tiny adjustments, clean handling, and realistic expectations. A revived gel liner may become usable again, but it may not feel exactly as fresh as it did on day one. That is normal. The goal is not perfection. The goal is getting a smooth, safe application without turning your eyeliner pot into a home chemistry project.
Finally, people who have dealt with irritated eyes, contact lenses, or a past eye infection tend to become much less sentimental about old makeup. Once you have experienced even a minor eye irritation from a questionable product, you stop romanticizing the idea of “using every last bit.” The experience usually changes your habits for good: cleaner brushes, tighter lids, better storage, and a much faster decision to toss anything suspicious. In other words, dried gel eyeliner teaches a surprisingly adult lesson. Sometimes the smartest beauty move is not buying more. Sometimes it is knowing exactly what to save, what to sanitize, and what to stop arguing with.