Table of Contents >> Show >> Hide
- Before You Start: What to Know About Painting Inside Mason Jars
- Method 1: The Pour-and-Swirl Method
- Method 2: The Brush-and-Coat Method
- Method 3: The Translucent Stained-Glass Method
- Which Method Should You Choose?
- Creative Mason Jar Painting Ideas
- Troubleshooting: Why Your Painted Mason Jar Did Not Turn Out Right
- Safety and Care Tips
- Real-Life Experience: What Painting the Inside of Mason Jars Teaches You
- Conclusion
Painting the inside of a mason jar is one of those crafts that looks suspiciously fancy for something you can do on a covered kitchen table with a jar, a little paint, and the confidence of someone who has definitely ruined a sponge brush before. The best part? Painting the inside keeps the outside glass smooth, glossy, and easy to wipe clean while giving the jar a rich, colored look from within.
Whether you want farmhouse flower vases, party centerpieces, holiday lanterns, desk organizers, or a row of jars that make your craft shelf look like it has its life together, inside-painted mason jars are simple, affordable, and endlessly customizable. The trick is choosing the right method for the finish you want. A soft matte pastel jar needs a different approach than a translucent stained-glass lantern, and a bold decorative vase may need something sturdier than regular craft paint.
Below are three practical ways to paint the inside of a mason jar: the classic swirl method, the brush-and-coat method, and the stained-glass or translucent method. Each one has its own personality. Think of them as three craft friends: one is fast and dramatic, one is neat and reliable, and one shows up glowing like it owns a tiny art gallery.
Before You Start: What to Know About Painting Inside Mason Jars
Before the paint party begins, it helps to understand what you can and cannot do with a painted mason jar. Paint inside the jar is decorative. It is not meant for storing food, drinking, or direct contact with anything edible. Even paints labeled for glass or ceramics often state that they should not touch food directly. So, use your painted jars for flowers, faux stems, wrapped treats, battery-operated fairy lights, makeup brushes, pencils, craft tools, or display pieces.
If you want to use the jar as a vase for fresh flowers, place a smaller waterproof cup or liner inside the painted jar. Water sitting directly against interior paint can soften, peel, bubble, or stain the finish. For candles, be cautious. Battery-operated tea lights are the safest choice because real candle heat can affect paint and glass, especially if the jar is coated heavily on the inside.
Supplies You May Need
- Clean mason jars or recycled glass jars
- Rubbing alcohol or isopropyl alcohol
- Paper towels or lint-free cloth
- Acrylic craft paint, glass paint, chalk paint, latex paint, or stained-glass paint
- Disposable cups or plates
- Foam brush, soft brush, or sponge
- Craft sticks for stirring
- Parchment paper, wax paper, or a disposable tray
- Gloves, especially for spray or enamel products
- Painter’s tape, if decorating the rim or adding labels
Clean the Glass First
Paint and greasy fingerprints are not best friends. Wash the jar with warm, soapy water, remove label glue, rinse well, and dry completely. Then wipe the inside with rubbing alcohol and let it air-dry. This step sounds boring because it is boring. It is also the difference between a smooth finish and paint that flakes off like it has somewhere better to be.
Method 1: The Pour-and-Swirl Method
The pour-and-swirl method is the most popular way to paint the inside of a mason jar because it gives excellent coverage with very few tools. You pour paint into the jar, rotate the jar until the inside is coated, drain the extra paint, and let it dry upside down. It is easy, satisfying, and just messy enough to feel like a real craft.
Best For
This method works beautifully for solid-color mason jar vases, farmhouse centerpieces, baby shower decorations, wedding table jars, seasonal displays, and pastel home decor. It is especially good when you want the outside of the jar to stay shiny and glassy while the color appears smooth behind the glass.
Best Paints to Use
For decorative jars, acrylic craft paint is budget-friendly and widely available. Latex wall paint also works well if you want a creamy, opaque finish and have leftover paint from a room makeover. Glass paint or enamel paint can be more durable, especially if the product is designed for glass surfaces. Always check the label for drying and curing instructions.
Step-by-Step Instructions
- Prepare the jar. Clean and dry the jar thoroughly, then wipe the inside with rubbing alcohol.
- Add paint. Pour about 2 to 4 tablespoons of paint into the jar, depending on jar size. A pint jar usually needs less than you think.
- Swirl slowly. Tilt and rotate the jar until paint coats every interior surface. Roll it gently rather than shaking it like a salad dressing bottle.
- Coat the shoulder and rim area. Tip the jar carefully so paint reaches the curved top area. Avoid getting paint on the outside if you want a clean look.
- Drain excess paint. Turn the jar upside down over parchment paper, a disposable plate, or a cup. Let extra paint drip out.
- Move the jar as it drains. After 15 to 30 minutes, lift and move the jar to a clean spot so the rim does not glue itself to a puddle of paint.
- Dry completely. Leave the jar upside down for several hours, then turn it upright to finish drying. Thick paint may need 24 to 72 hours.
Pro Tips for a Smooth Finish
Use thin paint, but not watery paint. If acrylic paint is too thick to flow, add a few drops of water or pouring medium and stir well. Do not add too much water or the paint may look streaky and weak. If the first coat dries patchy, let it dry completely and repeat the swirl with a second thin coat.
Choose lighter colors for a soft vintage look. White, cream, blush, sage, dusty blue, and pale yellow are classic mason jar colors. Dark colors look dramatic, but they may show uneven spots more easily when light shines through the glass.
Common Mistakes to Avoid
The biggest mistake is using too much paint and leaving the jar upside down in the same place for too long. That creates a thick ring around the rim. Another mistake is rushing the drying time. Interior paint dries slower because air circulation inside the jar is limited. If the paint still smells strong or feels tacky, it is not ready for use.
Method 2: The Brush-and-Coat Method
The brush-and-coat method gives you more control than pouring. Instead of swirling paint around, you apply paint directly to the inside with a brush or sponge. This method is useful when you want a thinner coat, a textured look, layered colors, or partial coverage. It is also handy for jars with unusual shapes that do not coat evenly when swirled.
Best For
Use this technique for rustic jars, distressed-style decor, ombré interiors, two-tone designs, holiday jars, painted lanterns, and projects where you want some brush texture. It is also a good choice if you are using specialty glass paint that performs better in thin coats.
Best Paints to Use
Glass paint, multi-surface acrylic paint, acrylic enamel, and chalk-style paint can all work. For a cleaner finish, choose paint that lists glass as an approved surface. A soft brush creates smoother coverage, while a sponge creates a frosted or stippled effect. If you want a truly opaque finish, expect to apply more than one thin coat.
Step-by-Step Instructions
- Clean the jar. Wash, dry, and wipe the inside with alcohol.
- Load the brush lightly. Dip only the tip of the brush or sponge into the paint. Too much paint causes drips.
- Start at the bottom. Paint the base first, then work up the sides in long, even strokes.
- Use thin coats. Thin coats stick better and dry more evenly than one gloopy coat.
- Let each coat dry. Follow the paint label, but many craft paints need at least 1 to 2 hours between coats.
- Add a second coat. Apply another thin layer if you want richer color or better opacity.
- Cure the paint. Let the jar cure according to the product instructions before using it for decor.
How to Create an Ombré Interior
To make an ombré mason jar, paint the bottom third with your darkest color. While it is still slightly wet, blend a medium color above it, then finish with a lighter color near the top. Use a sponge to tap where the colors meet. Do not overblend unless you enjoy accidentally creating “mystery beige.”
How to Make a Distressed-Look Jar Without Sanding
Traditional distressed jars are often painted on the outside and sanded, but you can mimic a softer version from the inside. Use a dry brush with very little paint and leave some glass slightly uneven. From the outside, the jar will look aged and cloudy, but the surface will remain smooth.
Common Mistakes to Avoid
Avoid stiff, cheap brushes if you want a smooth finish because they can leave obvious lines. Do not paint over wet or tacky paint unless the product instructions say to do so. Also, avoid painting too close to the rim if people might handle the jar frequently. The rim gets touched the most, so paint there is more likely to wear away.
Method 3: The Translucent Stained-Glass Method
The stained-glass method is perfect when you want color that still lets light through. Instead of an opaque painted jar, you get a glowing, jewel-toned effect. This is the method to choose for lanterns, window displays, Halloween jars, Christmas luminaries, fairy-light jars, and colorful party decor.
Best For
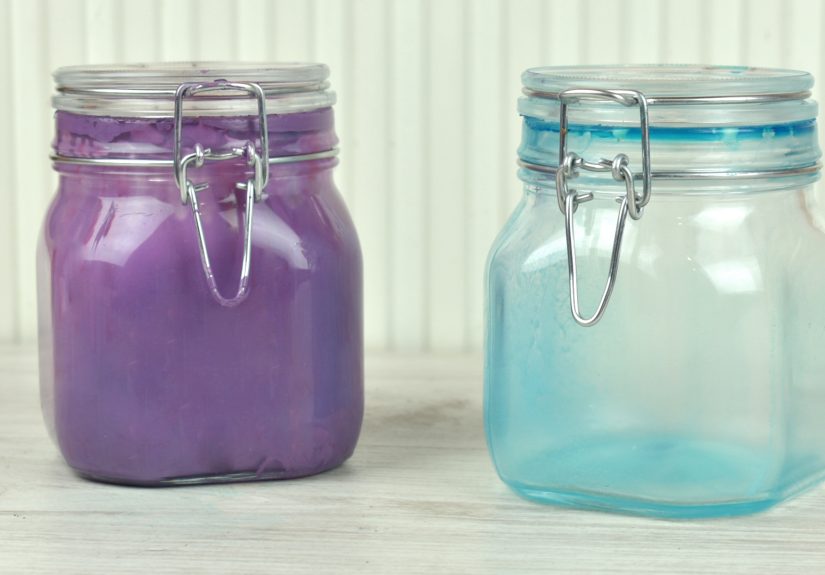
Translucent interior paint works best for decorative lighting and seasonal crafts. A blue jar with fairy lights can look coastal and calm. Amber or orange jars feel cozy for fall. Green, red, and gold jars turn into instant holiday decor. Purple jars? Mysterious. Possibly magical. Definitely judging your bookshelf.
Best Paints to Use
Use stained-glass paint, transparent glass paint, or a clear gloss medium mixed with a small amount of acrylic paint. True glass paints usually give the clearest, most durable translucent finish. Some glass paints can be air-cured, while others may include baking instructions for better durability. Always follow the product label, especially because curing temperatures vary by brand.
Step-by-Step Instructions
- Clean the jar carefully. Translucent paint shows streaks and dust more than opaque paint.
- Mix the color. If using transparent glass paint, stir gently. If tinting a clear medium, add paint one drop at a time.
- Pour or brush the paint inside. For an even tint, pour a small amount into the jar and swirl. For a handmade look, brush it on.
- Drain the excess. Turn the jar upside down briefly if you used the swirl method.
- Check for heavy puddles. Thick areas may dry cloudy or tacky.
- Let it cure. Dry and cure according to the paint instructions. Some glass paints need several days before handling.
- Add lights or decor. Use battery-operated fairy lights, faux flowers, twinkle branches, or seasonal picks.
How to Get a Frosted Sea-Glass Look
For a soft sea-glass effect, choose pale aqua, green, or blue paint. Apply a thin translucent coat with a sponge instead of a brush. Tap lightly and build the color gradually. The result looks especially pretty with shells, sand, faux pearls, or dried grasses.
How to Make a Lantern Jar
Paint the inside with a thin translucent coat, let it cure, then place a battery-operated tea light or fairy-light strand inside. Do not use real flames unless the paint manufacturer confirms the product is suitable for heat exposure and your jar is designed for that use. In most cases, flameless lights are easier, safer, and less likely to turn your craft project into a tiny drama.
Which Method Should You Choose?
If you want the easiest beginner-friendly result, choose the pour-and-swirl method. It gives smooth color and requires very little skill. If you want more control, choose the brush-and-coat method. It lets you create texture, ombré, and layered finishes. If you want glowing decor, choose the translucent stained-glass method.
| Method | Finish | Best Use | Difficulty |
|---|---|---|---|
| Pour-and-Swirl | Smooth, opaque color | Vases, centerpieces, organizers | Easy |
| Brush-and-Coat | Controlled, textured, or layered | Rustic decor, ombré jars, holiday crafts | Easy to Medium |
| Translucent Stained Glass | Light-filtering, colorful glow | Lanterns, fairy lights, seasonal displays | Medium |
Creative Mason Jar Painting Ideas
Farmhouse Flower Vases
Use white, cream, sage, or dusty blue paint inside the jar. Tie jute twine around the neck and add faux lavender, eucalyptus, or baby’s breath. For fresh flowers, place a small plastic cup inside to protect the paint from water.
Holiday Candy Jars
Paint the inside of the jar, then fill it only with wrapped candies. Red and white jars are perfect for Christmas, orange and black for Halloween, and soft pink for Valentine’s Day. Keep unwrapped food away from painted surfaces.
Desk Organizers
Use bold colors like navy, emerald, mustard, or coral. Painted mason jars make cheerful holders for pens, scissors, rulers, makeup brushes, or craft tools. They also make your desk look organized even when your email inbox is doing parkour.
Baby Shower or Wedding Centerpieces
Choose colors that match the event palette. The swirl method is ideal because you can paint many jars in batches. Add ribbon, lace, name tags, or faux flowers for a finished look.
Glow Jars for Parties
Use translucent glass paint and battery fairy lights. Line several jars along a mantel, patio table, or walkway. They create a cozy glow without the worry of open flames.
Troubleshooting: Why Your Painted Mason Jar Did Not Turn Out Right
The Paint Looks Streaky
Streaks usually happen when the glass was not clean, the paint was too thin, or the coat was brushed too heavily. Let it dry completely and add another thin coat. For future jars, clean with alcohol and use a softer brush or swirl technique.
The Paint Is Pooling at the Bottom
You used too much paint or did not drain it long enough. Turn the jar upside down longer, then move it to a clean spot as excess paint collects. If the bottom remains thick, it may need several days to dry.
The Paint Is Peeling
Peeling can happen when the jar was greasy, the paint was not made for glass, or the jar was exposed to water before curing. Use glass-compatible paint and follow curing times carefully.
The Jar Smells Like Paint
Interior paint takes longer to cure because the air inside the jar does not circulate well. Leave the jar open in a ventilated area until the smell fades. Do not fill or seal it while it still smells strongly of paint.
Safety and Care Tips
Work in a well-ventilated area, especially if using spray paint, enamel paint, or products with stronger fumes. Wear gloves if you have sensitive skin. Keep paint away from children and pets unless the project is supervised and uses kid-friendly materials.
Do not put inside-painted mason jars in the dishwasher unless the paint product specifically says the cured finish is dishwasher-safe and you followed the curing instructions exactly. Even then, hand-washing is usually kinder to decorative crafts. Wipe the outside with a damp cloth and avoid soaking the inside.
Most importantly, do not use inside-painted jars for canning. Mason jars used for food preservation need clean, unpainted interiors and proper lids. A painted jar may be adorable, but it has retired from the jam business.
Real-Life Experience: What Painting the Inside of Mason Jars Teaches You
The first thing you learn when painting the inside of a mason jar is that gravity is very involved. You may begin the project thinking you are the artist, the creative director, and the boss of the paint. Then the paint slides down the side of the jar in one dramatic ribbon and reminds you that gravity has seniority.
In practice, the pour-and-swirl method feels almost too easy at first. You pour in the paint, rotate the jar, and suddenly it looks like something from a boutique home store. Then you turn it upside down and discover the secret: drying takes patience. The jar may look finished from the outside, but inside, the paint can stay tacky for a surprisingly long time. The best experience-based advice is to make these jars a few days before you need them. Do not start them two hours before guests arrive unless your party theme is “wet paint and regret.”
Another lesson is that color changes behind glass. A paint color that looks bold in the bottle may appear softer once it is inside the jar. White can look creamy, pink can look vintage, and dark green can look almost black if the coat is thick. Testing a small amount in one jar before painting a dozen jars is a smart move. It is much better to dislike one experimental jar than to create twelve centerpieces in a color best described as “haunted avocado.”
Brush painting teaches a different lesson: tools matter. A cheap brush can leave streaks that show through the glass, while a sponge can create a lovely frosted texture. If you want rustic, handmade charm, brush marks are not a disaster. They can actually add character. But if you want a smooth, polished finish, use thin coats, a soft brush, and a calm hand. This is not the moment to paint while drinking your third coffee.
The stained-glass method is the most magical, but it also asks for restraint. Too much translucent paint can become cloudy instead of luminous. A thin coat lets the light pass through and gives the jar that jewel-like glow. Add fairy lights, and suddenly your ordinary jar looks like it has a tiny enchanted forest internship.
One practical discovery is that painted interiors are best for dry decorating. Faux flowers, dried stems, wrapped gifts, pencils, and battery lights work beautifully. Fresh flowers are possible, but only with a liner. Without one, the water may attack the paint over time. This is especially important for event decor because jars may sit for hours with water inside. A hidden plastic cup solves the problem and keeps the outside looking elegant.
Finally, painting mason jars is a reminder that simple crafts can still look personal. You can match colors to a room, a holiday, a wedding palette, or a child’s favorite shade. You can make one jar in 20 minutes or turn an afternoon into a full production line. The project is inexpensive, forgiving, and easy to repeat. Even the imperfect jars usually find a purpose. One becomes a pencil cup. One holds paintbrushes. One sits on a shelf looking rustic and mysterious. And one, inevitably, becomes the jar where you store random buttons, because every home has a button jar whether it admits it or not.
Conclusion
Painting the inside of a mason jar is a simple DIY project with plenty of room for creativity. The pour-and-swirl method gives smooth, bold coverage. The brush-and-coat method offers control and texture. The translucent stained-glass method creates glowing jars for lights and seasonal displays. With clean glass, the right paint, thin coats, and enough drying time, you can turn plain jars into charming decor for nearly any occasion.
Just remember the golden rule: inside-painted jars are decorative, not food-safe storage containers. Treat them as vases, organizers, lanterns, and centerpieces, and they will reward you with color, charm, and the smug satisfaction of having made something cute from a jar that might otherwise have held leftover salsa.


