Table of Contents >> Show >> Hide
- Why Windows Get Stuck in the First Place
- Safety First: The 5-Minute Checklist Before You Start
- Way #1: Break the Paint Seal (Best for Painted-Shut Windows)
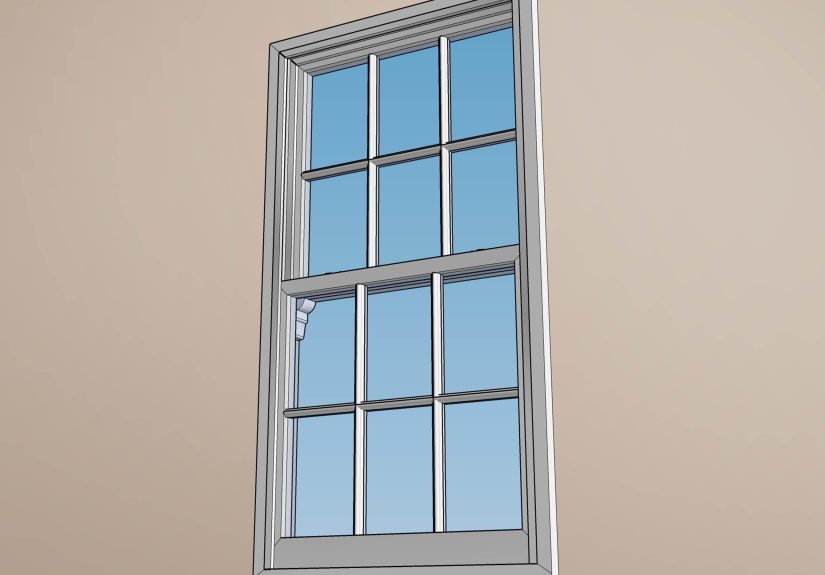
- Way #2: Clean and Lubricate Tracks, Rollers, and Hardware
- Way #3: Repair Hardware, Balances, or Alignment Problems
- Quick Troubleshooting Matrix
- How to Keep Windows from Getting Stuck Again
- Final Takeaway
- Additional Experience Section (500+ Words): Real-World Lessons from Stuck-Window Battles
You pull. You wiggle. You make the same face you made in algebra class when the teacher said, “This will be on the test.” The window does not move.
If this sounds familiar, welcome to the club nobody wanted to join.
A stuck window is more than annoying: it affects comfort, ventilation, safety, and even emergency escape planning. The good news? Most stuck windows can be freed without replacing the whole unit. The better news? You do not need superhero strengthjust the right method.
This guide breaks the process into 3 practical ways to open a stuck window, based on real-world repair guidance from U.S. home-improvement experts, window manufacturers, and safety organizations. We’ll cover:
- How to open a painted-shut window
- How to free a window jammed by dirt, friction, or dry tracks
- How to fix hardware or alignment problems that keep windows locked in place
Along the way, you’ll get pro-level troubleshooting tips, clear safety checkpoints, and examples you can actually use this weekendwithout turning your living room into a demolition site.
Why Windows Get Stuck in the First Place
Before jumping into tools, it helps to diagnose the enemy. Most stuck windows happen for one of four reasons:
1) Paint has sealed moving parts together
Common in older homes and quick “paint-everything” renovations. Paint can glue the sash to stop beads, jambs, or frame edges. If it was painted from outside too, it can feel welded shut.
2) Dirt + old lubricant = gritty glue
Tracks, rollers, and weatherstripping collect dust over time. Add humidity and airborne grime, and the window starts dragging. If oil-based products were used, they may have trapped even more debris.
3) Hardware is worn, misaligned, or overtightened
Locks, keepers, hinges, balances, and sash cords wear out. A tiny misalignment can turn normal movement into a stubborn jam.
4) Moisture and seasonal movement
Wood and surrounding materials can shift with moisture and temperature swings. Over time, that can increase friction and make operation stiffespecially in older or rarely opened windows.
Safety First: The 5-Minute Checklist Before You Start
Yes, we all want to “just try one more pull.” Don’t. A cracked sash, broken glass, or lead dust cleanup is not a fun Saturday.
- Check the build era: Homes built before 1978 may contain lead-based paint.
- Protect the area: Lay plastic sheeting and keep kids/pets away.
- Wear basics: Gloves, eye protection, and a dust mask/respirator if scraping old paint.
- Use gentle force: Controlled pressure beats sudden yanking.
- Have a vacuum ready: Capture paint chips and dust as you go.
If the window is in a child’s room, remember: screens are for bugs, not fall protection. Use approved guards/stops where needed.
Way #1: Break the Paint Seal (Best for Painted-Shut Windows)
If the window hasn’t moved since flip phones were trendy, paint seal is your likely culprit.
Tools You’ll Need
- Utility knife or painter’s 5-in-1 tool
- Putty knife (thin and flexible)
- Small pry bar
- Hammer (light tapping only)
- Vacuum
Step-by-Step
- Unlock the window first. Sounds obvious, gets forgotten constantly.
- Score the seams. Run a sharp blade where sash meets stop/jamb/meeting rail. Go slowly and repeat passes instead of forcing depth.
- Work both sides. If possible, score from inside and outside. Exterior paint often keeps the sash trapped.
- Use a putty knife to break deeper paint bonds. Slide into the seam and gently tap around the perimeter.
- Pry carefully. Place a flat pry bar under a sturdy point of the sash and lift gradually. Avoid sudden jerks.
- Cycle the sash gently. Once it moves, open and close it a little at a time to widen the motion path.
Pro Tip
If you want to preserve surrounding paint, use a utility blade for cleaner scoring. If repainting is already planned, a sturdier painter’s multi-tool can speed up thick-buildup removal.
Common Mistakes to Avoid
- Forcing before scoring all edges
- Ignoring the exterior seam
- Prying from weak trim instead of structural sash points
- Using too much heat on vinyl components (warping risk)
Way #2: Clean and Lubricate Tracks, Rollers, and Hardware
If your window moves a little but feels like dragging a sofa across gravel, friction is likely the issue.
Where to Clean
- Sliding tracks and corners
- Sill channels and jamb paths
- Rollers, pivot points, and visible hardware
- Weep holes (keep them clear for drainage)
How to Clean
- Vacuum loose debris first.
- Wipe grime with mild soap solution.
- Dry thoroughly (moisture left behind can attract more dirt).
How to Lubricate the Right Way
Apply a dry silicone or dry-film lubricant to moving contact points. This helps reduce friction without creating sticky buildup.
- Use light coats, then cycle the window several times.
- Wipe off excess product.
- Avoid heavy grease or oily sprays in tracks where dust collects.
Window-Type Notes
Sliding windows: Focus on tracks and rollers. Clean first, lube second, then test.
Double-hung windows: Clean side channels and check balance paths for debris.
Casement windows: Lubricate hinges and crank mechanism; test lock/unlock action.
Example Scenario
A kitchen slider that only opens 2 inches often has grease + dust in the lower track. Ten minutes of vacuuming, light brushing, and dry silicone can restore smooth glide without replacing parts.
Way #3: Repair Hardware, Balances, or Alignment Problems
If paint is cut and tracks are clean but operation is still stubborn, hardware is usually the bottleneck.
What to Check First
- Lock alignment: Misaligned keepers can make windows feel jammed.
- Overtightened lock screws: Some casement systems get hard to lock/unlock from overtightening.
- Sash cords/balances: Worn cords or failed balances can cause sticking or uneven movement.
- Stop bead pressure: Too tight against sash can create constant drag.
Basic Fix Path
- Confirm lock is fully disengaged and moving freely.
- Tighten loose hardware and lightly adjust keeper/strike position if needed.
- For older double-hung units, inspect sash cords and replace if frayed or broken.
- Reassemble and test movement in short cycles (don’t slam open/closed).
When You Should Stop DIY
- Glass cracks, frame warping, or severe rot
- Impact-resistant units that won’t open even after standard steps
- Repeated lock failure after adjustment
- Any job requiring removal of large sash assemblies you’re not comfortable handling
At this point, calling a qualified window technician is cheaper than replacing broken components you accidentally forced.
Quick Troubleshooting Matrix
If the window is totally immobile:
Start with Way #1 (paint seal).
If the window moves but drags/grinds:
Start with Way #2 (clean + dry lubricant).
If it unlocks but still won’t operate correctly:
Start with Way #3 (hardware/alignment/balance).
How to Keep Windows from Getting Stuck Again
- Open and close each operable window monthly (yes, even the “guest room museum” one).
- Vacuum tracks every season.
- Lubricate moving hardware periodically with dry products.
- Keep weep holes clear.
- Touch up peeling paint before it bonds across moving seams.
- Check locks and keepers annually for easy engagement.
Final Takeaway
Most stuck windows can be fixed with patience, sequencing, and zero heroics. Think in order:
break seal → remove friction → correct hardware. If you follow that flow, you’ll solve most cases without replacing the entire window.
And next time a window refuses to cooperate, you’ll know it’s not a mysteryit’s a method.
Additional Experience Section (500+ Words): Real-World Lessons from Stuck-Window Battles
Over the years, I’ve seen stuck windows in almost every personality type: the dramatic one, the sneaky one, and the “I swear it worked yesterday” one.
The most useful lessons came from jobs that looked simple at first and turned out to be layered problems.
Experience #1: The “Paint Prison” in a 1940s Bedroom.
A homeowner was convinced the sash was rotten and needed full replacement. The clue? The window looked freshly painted, and every seam had a tiny paint bridge.
We scored the perimeter with a utility knife, then switched to a 5-in-1 tool for deeper seams where paint had pooled. The sash moved only a few millimeters at first.
That tiny movement was the victory point. We worked it up and down in small cycles, vacuuming chips as we went.
Result: no replacement needed, just careful seal-breaking and post-clean lubrication. The homeowner saved a large chunk of money and learned that “won’t move” doesn’t automatically mean “must replace.”
Experience #2: The Kitchen Slider That Felt Like Sandpaper.
This one opened, technically. But every pull sounded like two robots arguing. We removed visible grit from the lower track, then discovered compacted dust in the corners where normal wiping never reaches.
After vacuuming, we used mild soap, dried everything thoroughly, and applied dry silicone sparingly. The difference was immediate.
The biggest lesson? Lubricant is not a substitute for cleaning. If you spray first, you can trap grime and make operation worse.
The second lesson: less lubricant is often better than more. One light pass, cycle the sash, then wipe excess.
Experience #3: The “Stuck” Casement That Was Actually a Lock Issue.
A homeowner reported a jammed casement and feared a bent frame. But the crank moved a little, and the sash looked aligned. The real issue was lock tension and slight misalignment in the locking point.
After a careful hardware check and minor adjustment, the handle movement normalized.
No frame surgery. No panic.
This taught me to run the basic lock/keeper checklist before assuming structural failure. Many “major” window problems are tiny hardware misfits wearing a scary costume.
Experience #4: The Nursery Window and the Safety Wake-Up Call.
Parents wanted airflow but were relying on an insect screen as a safety barrier. The window itself was sticky and difficult to operate, so they usually left it half-open once they got it moving.
We freed the sash, corrected friction, and then discussed safer operation habits, including limited opening and proper child-safety devices.
This project was the best reminder that window performance and window safety are connected.
A window that’s hard to open in daily life can also be hard to use in an emergency.
Experience #5: The Seasonal Swell Myth (That Wasn’t a Myth).
In a humid spell, one older wood window became stubborn, then loosened a few weeks later. No one had touched the hardware.
The takeaway: environmental conditions can influence operation, especially in older wood systems. Routine maintenance, periodic operation, and dry-track care can reduce these seasonal surprises.
If there’s one common thread across all these stories, it’s this: the right sequence matters more than brute force.
People tend to jump to replacement because the first attempt fails. But windows usually tell you what’s wrongpaint lines, gritty tracks, stiff lock action, uneven movement.
Read those clues, go step by step, and you can solve more than you think with basic tools and a little patience.


