Table of Contents >> Show >> Hide
- What “Perfect” Eyebrows Really Means (Spoiler: Not Identical Twins)
- Way 1: Shape Like a Cartographer Map, Trim, and Clean Up
- Way 2: Fill and Define with Makeup That Looks Like Hair (Not Marker)
- Way 3: Set, Train, and Maintain Grooming, Long-Wear Options, and Brow Health
- Putting It All Together: Your 3-Step “Perfect Brow” Game Plan
- Eyebrow Diaries: Real-Life Experiences That Make the Tips Stick (Extra )
- Conclusion
Perfect eyebrows are a little like perfect sourdough: everyone wants them, everyone swears there’s a “simple trick,” and the results somehow look effortless only when someone else does it. The truth is less mystical (and far less yeasty): great brows come from a few repeatable habitssmart shaping, believable filling, and consistent maintenance.
This guide breaks it down into three practical ways to get perfect eyebrows without turning your bathroom into a high-stakes geometry lab. You’ll learn how to map your shape, groom with minimal regret, and use makeup so your brows look like browsnot like two surprised caterpillars that wandered onto your forehead.
What “Perfect” Eyebrows Really Means (Spoiler: Not Identical Twins)
Let’s set expectations before we set brow gel. “Perfect” eyebrows usually mean:
- Balanced, face-framing shape that works with your bone structure (not against it).
- Clean edges without looking over-carved.
- Natural densityeven if that density is strategically assisted.
- Soft symmetry (your brows are sisters, not clones).
Your ideal brow depends on your natural growth pattern, forehead space, eye shape, and how dramatic you like your look. A “perfect” brow for a no-makeup-makeup person may be a fluffy, brushed-up vibe; a “perfect” brow for a full-glam fan may be more defined with a crisp tail. Both are valid. The goal is intentionalnot obsessive.
Way 1: Shape Like a Cartographer Map, Trim, and Clean Up
If your brows are a house, shaping is the foundation. Makeup can decorate, but if the structure is wobbly, the whole thing feels “off.” The most reliable method is eyebrow mapping: finding where your brows should begin, peak, and end based on your face.
Step 1: Do a quick brow map (no compass required)
Grab a brow pencil, makeup brush, or even a straight-edge tool. You’ll mark three points on each brow:
- Start (head): Hold the pencil vertically from the outer edge of your nostril up toward your brow. Where it hits is a good starting zone.
- Arch (peak): Angle the pencil from the nostril through the outer edge of your iris (or just past center of the eye). That’s often where the brow naturally lifts.
- End (tail): Angle the pencil from the nostril to the outer corner of your eye. That’s your general tail endpoint.
Lightly dot those points, then connect them with a faint guideline. This isn’t a tattoo stencilit’s a “keep me from chaos” outline.
Step 2: Brush up, then trim the long stragglers
Before you pluck anything, brush brow hairs upward with a spoolie. You’ll see which hairs are simply long (and need trimming) versus truly out of place (and need removal). Use small brow scissors and trim only the tips that extend far beyond your top line.
Trimming rule: If you’re tempted to snip a lot, you’re probably holding the scissors wrongor your brows are about to enter their “why did I do that?” era. Trim slowly. Step back. Blink. Continue.
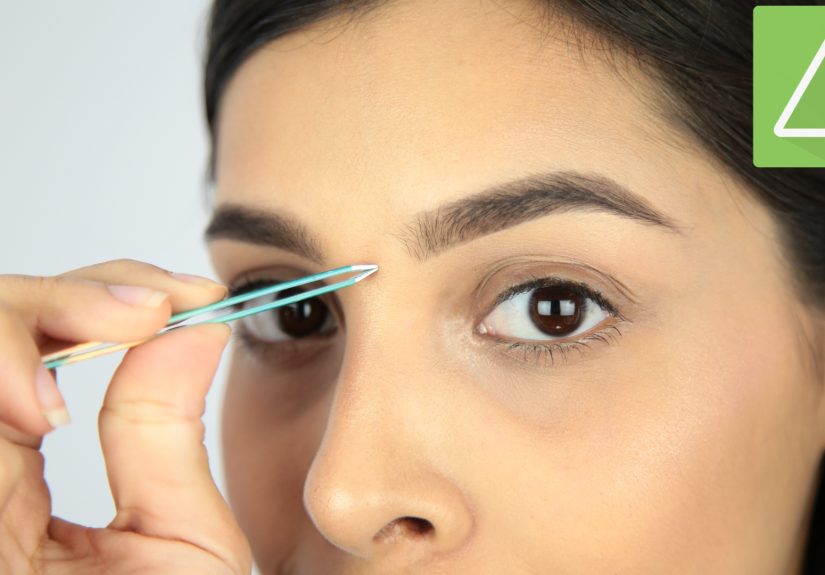
Step 3: Clean up with restraint (tweezing, threading, or waxing)
Now remove hair outside your mapped shape. Go one hair at a time, especially if you’ve ever said the sentence, “It was just one more hair…” (Famous last words.)
Tweezing: Best for precision and maintenance. Pull in the direction of hair growth, and avoid magnifying mirrors that convince you every pore is a personal insult.
Threading: Great for crisp lines and removing fine hair. It can be less irritating for some people than waxing, but it still may cause rednessplan it when you’re not heading straight to a big event.
Waxing: Fast and smooth, but higher risk of irritation if your skin is sensitive. If you use retinoids or prescription acne treatments, be extra cautiousfacial waxing can be rough on sensitized skin. When in doubt, ask a professional or choose tweezing instead.
Common shaping mistakes (and how to avoid them)
- Over-plucking the underside of the arch: This can create a harsh “permanently shocked” expression. Clean up evenly rather than hollowing out one spot.
- Shortening the tail too much: A too-short tail can make brows look blunt. Leave tail length unless it truly grows far past your endpoint.
- Chasing perfect symmetry: Brows sit on different sides of your face, which is already doing its own thing. Aim for balance, not identical blueprints.
Pro tip: If you’re growing out brows after over-tweezing, stop plucking “just a little” while you regrow. Use makeup to manage awkward phases. Future-you will be grateful.
Way 2: Fill and Define with Makeup That Looks Like Hair (Not Marker)
Once the shape is right, filling becomes easy. The key is realism: soft gradient at the front, definition through the arch, and a clean (not sharpie) tail.
Pick your product by brow type
- Micro-tip pencil: Best for sparse areas and hair-like strokes. Great for beginners who want control.
- Powder: Best for soft, natural fullness. Ideal if you want “I woke up like this” brows (with a little help).
- Pomade: Best for bold definition and long wear. Use a light hand unless you’re intentionally going full glam.
- Brow pen: Best for drawing individual hair strokes, especially at the front or in gaps.
- Tinted gel: Best for quick volume and tintespecially if you have hairs but need definition.
Shade matching: don’t let your brows steal the show
A common mistake is choosing a shade that’s too dark or too warm. For many people, a brow product that’s slightly lighter than hair color (or more neutral/ashy than expected) looks more naturalespecially in daylight. If your hair is highlighted, match your brow tone to your roots, not the brightest pieces.
A simple, foolproof filling routine
- Brush through first: Use a spoolie to see gaps and set the hairs in their natural direction.
- Start in the middle: Add product from mid-brow through the tail first. This prevents the front from getting too heavy.
- Use hair-like strokes: Think “tiny flicks,” not “coloring book.” Keep pressure light.
- Soften the front: Use what’s left on the pencil/brush to lightly shade the head of the brow. The front should be the softest part.
- Blend like you mean it: Spoolie through to melt product into hairs. Blending is half the magic.
- Set it: Clear or tinted gel locks the look and adds polish.
Specific examples: customize in 30 seconds
- Sparse tails: Use a pencil to define the tail outline lightly, then fill with tiny strokes. Finish with gel to keep it crisp.
- Patchy fronts: Use a brow pen or micro pencil for upward strokes that mimic real hair growth. Keep spacing irregular so it looks believable.
- Full but messy brows: Skip heavy filling. Use gel and a touch of powder only where needed. Your goal is grooming, not rebuilding.
Makeup mistakes that sabotage “perfect eyebrows”
- Drawing a brand-new brow: Enhancing your natural shape is easier than inventing one daily. Use mapping to guide you.
- Hard, dark front blocks: If the front of your brows looks stamped, soften with a spoolie and use less product there.
- One-tool obsession: Many “perfect” brows are a combo: pencil for gaps + gel for hold, or powder for softness + pen for detail.
Way 3: Set, Train, and Maintain Grooming, Long-Wear Options, and Brow Health
Perfect eyebrows aren’t just madethey’re maintained. This is the boring part that makes the exciting part easy. Think of it like brushing your teeth: not glamorous, but extremely effective at preventing problems.
Daily grooming that changes everything
- Brush brows into place: Up and slightly outward usually looks lifted and modern.
- Use brow gel: Clear gel for natural hold, tinted gel for quick fullness, strong-hold gel for the fluffy “brushed-up” trend.
- Spot-trim monthly: A tiny trim session beats the urge to trim every week (which leads to unevenness).
- Pluck only strays: Maintenance tweezing should feel like editing, not rewriting.
Professional options (choose your adventuresafely)
If you want longer-lasting results, you have choices. Just make sure the provider is reputable, hygiene standards are solid, and you understand aftercare.
- Brow tinting: Can make brows look fuller by darkening lighter hairs. Because products are used close to the eyes, there are safety considerationspatch testing matters, and regulations vary by location. If you have sensitive skin or a history of reactions, skip it or talk to a professional.
- Brow lamination: A chemical process that relaxes brow hairs so they lay in a fuller-looking direction. It can irritate sensitive skin, and overdoing it can damage hairs. Don’t repeat too frequently, and avoid it if you’re prone to dermatitis unless cleared by a professional.
- Microblading / micropigmentation (permanent makeup): Can be great for sparse brows, but it’s a tattoo-like procedure with real risks (infection, allergic reactions, uneven healing). Choose a qualified technician, verify sterile practices, and follow aftercare instructions carefully.
Growth and recovery: helping brows bounce back
If your brows are thinning or recovering from over-plucking, the basics help most:
- Stop over-removing: Commit to a grow-out period and use makeup to get through the awkward stage.
- Be gentle with skincare: Harsh exfoliants and strong actives around the brow can irritate the skin and weaken hairs.
- Consider a brow conditioner/serum: Many people like them for softness and the appearance of fuller brows over time. Patch test first, especially if you’re prone to reactions.
- Check the bigger picture: Sudden or significant hair loss (including brow loss) can be related to stress, skin conditions, or medical issues. If it’s new or worsening, a clinician can help you figure out why.
Maintenance schedule (simple and realistic)
- Daily: Brush + gel (30 seconds).
- Weekly: Tweeze obvious strays (2–5 minutes).
- Monthly: Brush up and micro-trim long hairs (5 minutes).
- Seasonally: Re-map your brows if your style changes, or get a professional shaping to reset your baseline.
Putting It All Together: Your 3-Step “Perfect Brow” Game Plan
If you want a quick summary you can actually follow:
- Map and shape: Find your start/arch/tail, trim long hairs, and clean up strays without overdoing it.
- Fill with realism: Start mid-brow, use light strokes, soften the front, blend with a spoolie, and set with gel.
- Maintain like a pro: Daily grooming + small upkeep beats big “fix-it” sessions that lead to regret.
Perfect eyebrows aren’t about chasing someone else’s face. They’re about making your features look intentional, balanced, and confidently you. And if one brow decides to be a little extra today? Congratulationsyour face is alive.
Eyebrow Diaries: Real-Life Experiences That Make the Tips Stick (Extra )
Most people don’t start their brow journey because they woke up one day craving facial symmetry. They start because something happenedusually involving a magnifying mirror and a moment of delusional confidence. One of the most common experiences is the “over-pluck hangover,” where you step back and realize your brows have gone from “softly shaped” to “two commas fighting for their lives.” The fix is rarely more tweezing. It’s almost always a grow-out phase paired with gentle filling. People who succeed tend to pick a date (two to eight weeks out), hide the tweezers, and use makeup as a temporary peace treaty.
Another common story: the “my brows are full but chaotic” crowd. These folks often don’t need more productthey need direction. When they start brushing brows up and out, then add a strong-hold gel, they’re shocked by the difference. The experience is usually: “Wait… that’s it?” Yes. Sometimes perfect eyebrows are just your eyebrowsfinally cooperating. A tiny trim (only the longest tips) can also reduce that unruly, wiry look without thinning the overall shape.
Then there are the people with naturally lighter or sparser brows who feel like their face disappears without makeup. Their “aha” moment often comes from switching techniques, not buying a thousand products. Instead of pressing hard with a dark pencil (which creates harsh edges), they use a lighter hand, build from the middle, and blend like it’s their job. Many also discover tinted brow gel is the fastest confidence boost: it grabs the hairs they do have, adds a touch of color, and makes everything look fuller in under a minuteperfect for mornings when coffee is the only thing with structure.
Professional treatments come with their own learning curves. People who love tinting often describe it as “my brows, but visible,” especially when they have lots of fine, light hairs. The experience that separates happy clients from unhappy ones is usually patch testing and choosing a reputable provider. People with sensitive skin who skip that step sometimes end up with irritationand suddenly “low maintenance” feels very high maintenance. Brow lamination has a similar pattern: when done well, it’s fluffy and polished; when overprocessed or repeated too soon, brows can feel dry or brittle. The common takeaway is moderation and aftercare (gentle cleansing, avoiding harsh actives nearby, keeping hairs conditioned).
Finally, a note from the “I tried to make my brows match perfectly” club: most people eventually quit that game. The most realistic experience is learning to balance them at a normal talking distance, in normal light. When you stop trying to correct every millimeter, your brows look softer, your routine gets faster, and your face looks more relaxed. In other words, the road to perfect eyebrows is paved with fewer panic plucks, more blending, and a deep respect for the spoolie brush.
Conclusion
Perfect eyebrows aren’t a secret reserved for makeup artists and celebrities with suspiciously cooperative facial hair. They’re the result of three repeatable moves: shape with mapping, fill with believable technique, and maintain with consistent grooming. Once you nail those, your brows will look polished whether you’re doing a full face or rolling into a Zoom call like a brave little burrito in a hoodie.


