Table of Contents >> Show >> Hide
- How to Make Cheap DIY Wall Decor Look Expensive
- The 15 DIY Wall Art Projects
- 1) Thrifted Frame Gallery Wall (a.k.a. The “I Definitely Have Taste” Wall)
- 2) Watercolor “Wash” Abstract on Canvas (Zen, But Make It Decor)
- 3) Textured Plaster-Style Art (Big “Boutique Hotel” Energy)
- 4) Minimalist Stripe Panel (Using an Old Door or Closet Panel)
- 5) Chevron Wood Shim Wall Art (Hardware Store, But Make Fashion)
- 6) Rope-Stamped Two-Tone Prints (DIY Printmaking Without the Fancy Attitude)
- 7) Lace + Embroidery Hoop Wall Set (Soft Texture, Big Charm)
- 8) Color-Block an Existing Print (Because “Upcycled” Sounds Cooler Than “Bored”)
- 9) Pixel-Grid Painted Panel (Geometric, Custom, Surprisingly Meditative)
- 10) Washi Tape Geometric Art (Renter-Friendly and Weirdly Addictive)
- 11) Paint-Swatch Ombré Collage (Yes, Those Free Chips Matter)
- 12) Framed Wrapping Paper or Wallpaper Samples (Designer Pattern, Dollar-Level Spending)
- 13) Calendar Art Series (12 Coordinated Prints for the Price of One)
- 14) Pressed Flower Frames (Nature, But Make It Permanent)
- 15) Yarn Line Art Canvas (Soft Texture, Kid-Friendly, Actually Cool)
- Quick Styling Moves That Upgrade Any DIY Wall Art
- of Real-World DIY Wall Art Experience (What People Learn the Fun Way)
- Conclusion
Blank walls are basically your home quietly asking, “So… are we doing a personality or…?”
The good news: you don’t need a designer budget (or a trust fund named “Aunt Linda”) to make your space look
polished. You just need a few cheap materials, a tiny bit of planning, and the willingness to accept that
“perfectly imperfect” is a real aestheticnot just something people say when their tape bled under the paint.
Below are 15 budget-friendly DIY wall art projects that can look shockingly expensive when you style them right.
You’ll see a mix of paint, paper, texture, and thrift-store wizardry. Each idea includes practical steps and
“make it look fancy” tipsbecause your wall art should say “curated,” not “I panicked in the craft aisle.”
How to Make Cheap DIY Wall Decor Look Expensive
Before we jump into the projects, here’s the secret sauce: most “high-end” wall art is just
scale + repetition + restraint. In other words, big shapes, a consistent palette, and fewer
random choices. (Yes, your neon green glitter glue is being personally attacked right now.)
- Go bigger than you think. Oversized art reads “gallery.” Tiny art reads “lost.”
- Pick a color story. Limit yourself to 2–4 colors per room, then repeat them.
- Frame it (or fake-frame it). Even paper looks legit when it’s matted or framed.
- Use consistent spacing. On gallery walls, the spacing matters more than the frames.
- Add texture. Texture (plaster, fabric, rope) instantly upgrades “DIY” into “designer.”
One more reality check: the fastest way to ruin a budget wall art project is rushing the drying time.
Paint needs time. Glue needs time. You need time to stop touching it “just to see if it’s dry.”
The 15 DIY Wall Art Projects
1) Thrifted Frame Gallery Wall (a.k.a. The “I Definitely Have Taste” Wall)
A gallery wall is the classic budget wall decor move because it’s mostly about arrangement, not expensive
artwork. The trick is making everything feel intentional instead of “random hallway of memories.”
- Materials: Thrifted frames, matching paint (optional), kraft paper, tape, nails/hooks.
- Budget tip: Buy frames with ugly art insidethose are usually cheapest.
- Collect 6–12 frames in varied sizes. Mix is good; chaos is not.
- If frames are mismatched, paint them all one color (matte black, warm white, or soft brass spray paint).
- Cut kraft paper templates the size of each frame and tape them to the wall first.
- Rearrange templates until the layout feels balanced. Then hang the frames following the template marks.
- Fill frames with prints, photos, calendar art, wrapping paper, or simple painted pieces (ideas below).
Make it look pricey: Keep the top line roughly level or keep the centers aligned. Consistency = sophistication.
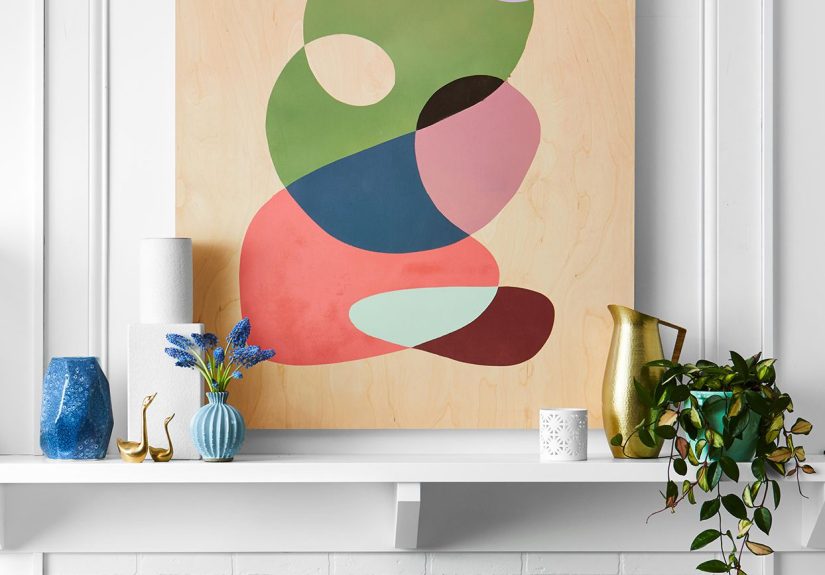
2) Watercolor “Wash” Abstract on Canvas (Zen, But Make It Decor)
Watercolor washes look airy and modernand they’re forgiving. If you “mess up,” it becomes “movement.”
That’s art, baby.
- Materials: Blank canvas, watercolor set (or diluted acrylic), wide brush, water cup.
- Style match: Great for coastal, minimalist, Scandinavian, and modern spaces.
- Wet the canvas lightly with clean water (just a mist or damp brush).
- Drop in 2–3 colors and let them blend naturally. Tilt the canvas for drips if you like.
- Leave white space. White space is the “designer pause” in your sentence.
- Let dry fully, then frame (floating frames make it look extra legit).
Make it look pricey: Repeat one color from the room (pillow, rug, vase) so it feels custom.
3) Textured Plaster-Style Art (Big “Boutique Hotel” Energy)
Texture is the cheat code for elevated wall art. This plaster look can be done with joint compound/spackle,
and it instantly reads modern and high-end.
- Materials: Canvas (or DIY wood frame + drop cloth), joint compound, putty knife, paint.
- Budget tip: Use leftover paint samples for the final color.
- If you want extra budget-friendly: stretch a drop cloth over a simple wood frame (staple tight).
- Spread joint compound with a putty knife in sweeping strokes, arcs, or simple raised patterns.
- Let it dry completely (this is where patience earns you a glow-up).
- Paint it monochrome (warm white, greige, pale clay) to highlight texture.
Make it look pricey: Keep the palette neutral and the shapes bold (simple curves > tiny details).
4) Minimalist Stripe Panel (Using an Old Door or Closet Panel)
Upcycling a flat panel into oversized art is wildly cost-effective. It’s basically a giant canvas that also
makes you feel resourceful and dramatic (the best combo).
- Materials: Old door/panel, primer, painter’s tape, paint, brush/roller.
- Style match: Modern farmhouse, minimal, contemporary.
- Sand lightly and wipe clean. Prime if the surface is glossy.
- Pick 2 colors (high contrast looks sharp: black + white, navy + cream).
- Tape off wide stripes. Paint, let dry, then peel tape slowly.
- Add a simple frame strip if you want it to look like a “real” art panel.
Make it look pricey: Matte paint finishes look more like “gallery” than glossy finishes.
5) Chevron Wood Shim Wall Art (Hardware Store, But Make Fashion)
Wood shims are cheap, lightweight, and weirdly elegant when arranged in a pattern. Chevron gives instant
structure and texture.
- Materials: Wood shims, spray paint or stain, backing board, wood glue.
- Safety note: Spray paint outdoors or with good ventilation.
- Paint or stain shims (one color for minimal, multiple for playful).
- Arrange on a backing board in a chevron pattern until it looks balanced.
- Glue down, let dry, then hang using picture hangers.
Make it look pricey: Choose one “hero” color and keep the rest neutral.
6) Rope-Stamped Two-Tone Prints (DIY Printmaking Without the Fancy Attitude)
This looks like boutique printmaking, but it’s just rope, glue, and paint doing the heavy lifting.
- Materials: Cotton rope, hot glue, scrap wood/cardboard, acrylic paint, cardstock.
- Budget tip: Make multiple prints from one stampinstant series.
- Hot-glue rope onto scrap wood in a simple shape (arches, waves, loops).
- Paint the rope lightly and press onto cardstock.
- Rotate the stamp and repeat with a second color for a layered look.
- Frame as a diptych or triptych.
Make it look pricey: Use muted colors (terracotta, sage, charcoal) and lots of negative space.
7) Lace + Embroidery Hoop Wall Set (Soft Texture, Big Charm)
Embroidery hoops are basically instant frames. Add lace and fabric and you’ve got romantic, vintage texture
without paying “antique store” prices.
- Materials: Embroidery hoops, fabric scraps, lace, scissors, glue.
- Style match: Cottagecore, boho, vintage, soft modern.
- Layer lace over a solid fabric background for contrast.
- Tighten in the hoop, then trim excess fabric on the back.
- Glue the fabric edges neatly to reduce bulk.
- Hang a cluster of 3–5 hoops in varied sizes.
Make it look pricey: Stick to one fabric family (all neutrals, all blues, etc.).
8) Color-Block an Existing Print (Because “Upcycled” Sounds Cooler Than “Bored”)
Got art that doesn’t match anymore? Give it a modern refresh with color blocking. It’s the decor version of
a haircut after a breakupsuddenly everything feels possible.
- Materials: Cheap print, poster board, acrylic paint, double-sided tape, frame.
- Remove the print from the frame.
- Paint strips or shapes on poster board (let dry).
- Tape the painted poster board onto part of the print to “crop” it artistically.
- Optional: paint a matching block on the frame itself for extra polish.
Make it look pricey: Match the color block to a throw pillow or rug accent color.
9) Pixel-Grid Painted Panel (Geometric, Custom, Surprisingly Meditative)
This is the “I like structure” project. A grid of painted squares can look modern and intentionallike you
bought it from a cool gallery in a neighborhood with great coffee.
- Materials: Plywood/MDF panel, pencil, ruler, painter’s tape, craft paint.
- Budget tip: Craft paints are often cheaper than wall paint for small sections.
- Mark a grid of equal squares with pencil.
- Pick one color family (blues, greens, warm neutrals) in 4–6 shades.
- Tape off sections and paint squares. Let dry between adjacent squares if needed.
- Vary opacity by mixing a little water into some paint for depth.
Make it look pricey: Keep transitions smooth (light to dark) for an ombré vibe.
10) Washi Tape Geometric Art (Renter-Friendly and Weirdly Addictive)
Washi tape is the commitment-phobe’s best friend: bold design, removable, no paint fumes, no regrets.
- Materials: Washi tape, cardstock/canvas board, scissors, ruler.
- Start with a simple pattern: triangles, diagonal lines, a half-sunburst.
- Lay tape in clean lines; press down firmly to prevent lifting.
- Trim edges neatly with scissors or a craft knife.
- Frame it for a finished look.
Make it look pricey: Use 2–3 tape colors max (neutral + one accent).
11) Paint-Swatch Ombré Collage (Yes, Those Free Chips Matter)
If you’ve ever taken paint chips “just in case,” congratulations: you were unknowingly preparing for art.
This project looks playful and modern, especially in a grid.
- Materials: Paint chips/swatches, scissors, glue stick, backing paper, frame.
- Pick one color family (like blues or blush tones) in multiple shades.
- Cut chips into equal rectangles or squares.
- Arrange from light to dark (ombré), then glue down.
- Frame with a wide mat for a “gallery” finish.
Make it look pricey: Use a large white matinstant breathing room and polish.
12) Framed Wrapping Paper or Wallpaper Samples (Designer Pattern, Dollar-Level Spending)
Pattern is expensive when it covers an entire roombut as framed panels? Suddenly you’re a genius with “an
eye for textiles.”
- Materials: Wrapping paper or wallpaper samples, foam board, frame, tape.
- Style match: Maximalist, traditional, eclectic, glam.
- Mount the paper onto foam board (prevents wrinkles and sagging).
- Trim to fit the frame size.
- Repeat with 2–3 coordinating patterns for a mini series.
Make it look pricey: Use identical frames and hang them in a tidy row.
13) Calendar Art Series (12 Coordinated Prints for the Price of One)
High-quality art calendars are an underrated wall art goldmine. They’re already themed and coordinated,
which makes your gallery wall look intentional with almost no effort.
- Materials: Art calendar, paper cutter/scissors, frames or clip-hangers.
- Budget tip: Buy last year’s calendar on clearance.
- Cut off the calendar dates and the binding edge.
- Trim prints to standard frame sizes if possible (8×10 and 11×14 are easy).
- Frame and hang as a grid or staggered gallery.
Make it look pricey: Add matching mats so the art looks “collected,” not “cut out.”
14) Pressed Flower Frames (Nature, But Make It Permanent)
Pressed flowers can look delicate and museum-like, especially in simple frames. Use blooms from a bouquet,
a memorable event, or just your yardyour wall can be sentimental and stylish.
- Materials: Flowers, parchment paper, heavy book (or quick-press method), frames.
- Style match: Cottagecore, modern vintage, soft minimal.
- Press flowers between parchment paper inside a heavy book for 1–2 weeks.
- Arrange on a white background paper (tweezers help).
- Seal inside a frame so the flowers stay protected.
- Group 3–6 small frames together for a botanical gallery wall.
Make it look pricey: Keep backgrounds clean (white/cream) and use thin frames for a modern herbarium look.
15) Yarn Line Art Canvas (Soft Texture, Kid-Friendly, Actually Cool)
This one is fun because it’s half drawing, half sculpting. You sketch a simple shape, then “trace” it with
yarn and glue for a raised, textured effect.
- Materials: Canvas board, yarn, craft glue, pencil, optional marker for accents.
- Style match: Boho, playful modern, kids’ rooms, bright accent walls.
- Lightly sketch a simple design: rainbow, abstract squiggle, big flower, initials.
- Add glue along the lines in small sections (so it doesn’t dry before the yarn arrives).
- Press yarn into the glue, trimming ends neatly.
- Let dry fully before hanging.
Make it look pricey: Use one bold yarn color on a neutral canvas for clean contrast.
Quick Styling Moves That Upgrade Any DIY Wall Art
If you do nothing else, do these:
- Mat everything. A simple mat makes even budget prints look “collected.”
- Repeat shapes. Three hoops, three frames, three panelsrepetition reads intentional.
- Mix textures, not chaos. Pair one textured piece (plaster or fabric) with smoother prints.
- Hang at eye level. Your art should meet your gaze, not your ceiling fan.
- Use a “hero piece.” One larger artwork anchors the wall; smaller pieces support it.
Also: don’t underestimate lighting. A cheap plug-in picture light or a well-aimed lamp can make your DIY art
look like it’s waiting for a fancy review in a magazine.
of Real-World DIY Wall Art Experience (What People Learn the Fun Way)
Here’s the funny thing about DIY wall art: the project isn’t usually the hard partdeciding is.
People spend two hours comparing paint swatches like they’re choosing a life partner, then finish the actual
painting in 20 minutes. That’s normal. The wall feels high-stakes because it’s visible every day, which makes
your brain treat a $9 canvas like it’s a permanent public record. The workaround is simple: pick a small color
palette and commit to it for one wall. You can always start a new “era” in another room later.
Another common experience: the first version often looks a little “crafty,” and the second version looks
polishedbecause you learn where to simplify. For example, the textured plaster piece tends to look better with
fewer, bolder strokes instead of lots of tiny patterns. Same with washi tape designs: two colors and big shapes
feel modern; seven colors and micro-triangles can drift into “middle school notebook margin” territory. (If
that’s your vibe, live your truth. If not, scale up.)
Gallery walls teach patience in a very specific way. People usually start by hanging one frame… then step back
and realize they’ve created a lonely rectangle floating in space. The reliable method is to lay everything out
firsteither on the floor or with paper templates on the wallso you can adjust without turning your drywall
into Swiss cheese. Once you do this once, you’ll never go back. You’ll become the friend who says, “Let’s
template it,” and everyone will both appreciate and fear you a little.
The most useful budget lesson is that framing is the glow-up. A wrapping paper panel looks like
wrapping paper until it’s mounted flat and framedthen it looks like a designer textile print. Calendar art
looks like a calendar until you add a matthen it looks curated. Even paint swatches look intentional when
they’re evenly cut and aligned. If you’re trying to stretch dollars, spend them on consistency: matching frames,
matching mats, or one unifying paint color.
Finally, DIY wall art tends to become more personal than store-bought pieces, even when it’s abstract. You end
up remembering the afternoon you made it, the playlist you had on, the tiny mistake you decided to keep, and
the moment you realized it actually looked good. That’s the quiet win: budget wall decor isn’t just cheaper.
It makes your home feel like it belongs to you. And if someone asks where you bought it, you get to
say, “Oh, I made it,” which is basically free serotonin.


