Table of Contents >> Show >> Hide
- Why Wooden Cutting Boards Look So Good (And Why That Matters)
- Before You Buy: The No-Regrets Wooden Cutting Board Checklist
- End Grain vs. Edge Grain (In Plain English)
- 10 Easy Pieces: Display-Worthy Wooden Cutting Boards
- 1) The Classic Maple Workhorse (Edge Grain)
- 2) The Moody Walnut Beauty (Serving + Prep)
- 3) Cherry: The “Ages Like a Good Story” Board
- 4) The End-Grain Checkerboard Showstopper
- 5) The Juice-Groove Carving Board (Because Gravity Is Real)
- 6) The Long “Baguette Board” (Slim, Chic, Always Useful)
- 7) The Paddle Board (The Charcuterie Crowd-Pleaser)
- 8) The Live-Edge Slab (Rustic, but Make It Polished)
- 9) The Round Board (The One That Makes Everything Look Fancy)
- 10) The “Two-Board System” (One Pretty, One Ruthless)
- How to Keep Wooden Cutting Boards Display-Worthy
- How to Display Wooden Cutting Boards Without Making Your Kitchen Feel Cluttered
- What to Avoid (So Your Gorgeous Board Stays Gorgeous)
- of Real-Life Cutting Board Experiences (So You Don’t Have to Learn the Hard Way)
- Conclusion
A wooden cutting board is the rare kitchen tool that can do three jobs at once: prep station, serving platter, and countertop “I totally have my life together” decor. It’s basically the throw pillow of the kitchenexcept you can chop onions on it and no one will call the police.
But not all wooden boards are created equal. Some are built like tanks (hello, end-grain butcher blocks). Others are the lightweight, pretty ones you lean against the backsplash so your kitchen instantly looks like a magazine spreaduntil you realize you still need to cook dinner in there.
This guide breaks down what makes a board display-worthy (not just “it exists”), what to look for when buying, and 10 easy pieces that cover the most useful, best-looking wooden board stylesplus how to keep them gorgeous without turning maintenance into a second job.
Why Wooden Cutting Boards Look So Good (And Why That Matters)
Wood brings warmth, texture, and that “real home” vibe to a kitchen. Even minimalist spaces soften up when a board is propped on the counter. And unlike decorative clutter, a cutting board earns its keep: it’s always one good tomato away from being useful.
Bonus: with proper care, a quality wooden cutting board can last for yearsoften decadeswhile aging into that rich, lived-in patina that makes it look even better over time.
Before You Buy: The No-Regrets Wooden Cutting Board Checklist
- Closed-grain hardwoods: Maple, walnut, and cherry are popular for a reasondurable, knife-friendly, and classic-looking.
- Construction: End grain is the showpiece (and usually gentler on knives); edge grain is the everyday workhorse.
- Thickness: Thin boards can warp; thicker boards feel stable and look more “heirloom.”
- Features that matter: Juice grooves (great for roasts), handles (great for serving), feet (great for airflow), and reversible sides (great for sanity).
- Size you’ll actually use: Bigger boards are easier to cook onmore surface = less mess, fewer runaway carrot coins.
End Grain vs. Edge Grain (In Plain English)
End-grain boards are made with the wood fibers facing up. Think of it like cutting between bristles of a brushknives tend to stay happier, and the board hides marks better. These boards are often thicker, heavier, and more expensive, but they’re also the ones that look like functional art.
Edge-grain boards use long strips of wood with fibers running horizontally. They’re still excellent, typically lighter, often more affordable, and perfect for everyday chopping. If end grain is a luxury SUV, edge grain is the reliable sedan that starts every morning without drama.
10 Easy Pieces: Display-Worthy Wooden Cutting Boards
These “pieces” are board styles and types you can mix and match depending on how you cook, how you serve, and how much you want your kitchen to look like a Nancy Meyers set without the Nancy Meyers budget.
1) The Classic Maple Workhorse (Edge Grain)
Best for: daily chopping, slicing, weekday meal prep.
Hard maple is the backbone of the wooden cutting board world. It’s durable, light enough to move around, and looks clean and bright on the counter. An edge-grain maple board is the one you’ll reach for constantlyand it photographs beautifully even when you’re only making a sad desk lunch.
Look for: a reversible design, slightly rounded edges, and enough surface area to chop without playing ingredient Tetris.
2) The Moody Walnut Beauty (Serving + Prep)
Best for: cheese boards, bread + butter moments, and “oops, guests are here” hosting.
Walnut brings drama in the best way. Its darker tone makes food pop (especially cheeses, fruit, and anything sprinkled with herbs like you’re starring in a cooking show). Walnut boards often read more “display piece” than “tool,” but they can absolutely do both.
Look for: a wide, flat surface and subtle handles or finger grips for easy carrying from kitchen to table.
3) Cherry: The “Ages Like a Good Story” Board
Best for: everyday use that gets prettier over time.
Cherry starts lighter and deepens with age and use, developing a warm reddish tone that looks incredible leaning against a backsplash. It’s also a sweet spot for people who want something elegant but not too precious to chop garlic on.
Look for: smooth finishing, a stable thickness, and a shape you’ll actually leave out because it’s that pretty.
4) The End-Grain Checkerboard Showstopper
Best for: heavy chopping, big prep days, and flexingquietly.
If you’ve ever seen a thick end-grain board with a checker pattern and thought, “That board definitely has a skincare routine,” you’re not wrong. End grain is often prized for durability and that iconic butcher-block look.
Look for: tight seams, balanced weight, and feet (optional but great for airflow and stability).
5) The Juice-Groove Carving Board (Because Gravity Is Real)
Best for: roasts, watermelon, juicy tomatoes, and anything that tries to turn your counter into a slip-n-slide.
A juice groove is like a tiny moat. It catches drips, contains chaos, and saves you from cleaning the floor because you carved a brisket like you were auditioning for a medieval feast.
Look for: a groove that’s deep enough to work, plus a flat reverse side for dry chopping.
6) The Long “Baguette Board” (Slim, Chic, Always Useful)
Best for: bread, citrus, garnish prep, and countertop styling.
Long, narrow boards are wildly underrated. They’re great for slicing bread or lining up ingredients during meal prepand they’re ridiculously easy to display because they don’t hog space.
Look for: a gently tapered shape or a handle for hanging (instant decor upgrade).
7) The Paddle Board (The Charcuterie Crowd-Pleaser)
Best for: snacks, appetizers, and making “just a few things” look intentional.
Paddle boards scream “I host.” They’re the easiest way to serve cheese and crackers without dragging out platters. Also: they lean beautifully against a wall, especially if you stack two or three of different sizes.
Look for: a comfortable handle and a surface that’s smooth enough for serving (no splinters, ever).
8) The Live-Edge Slab (Rustic, but Make It Polished)
Best for: statement decor and serving (especially for parties).
Live-edge boards bring that natural, organic looklike your kitchen briefly became a cabin, but with better lighting. They’re often used more for serving than chopping, but they can still be functional when finished correctly.
Look for: food-safe finishing, a stable base (no wobble), and a thickness that won’t warp from one enthusiastic rinse.
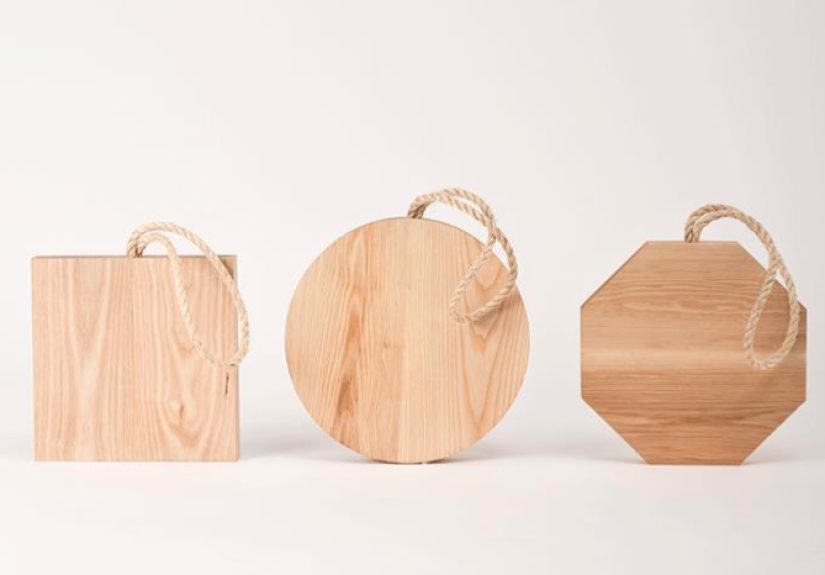
9) The Round Board (The One That Makes Everything Look Fancy)
Best for: pizza, pastries, cheese, and countertop styling.
Round boards are sneaky-good. They feel special even when you’re serving store-bought cookies. A round board with a short handle also hangs nicely on a hook, adding shape variety to your display.
Look for: a wide diameter and a finish that’s smooth enough to serve directly on.
10) The “Two-Board System” (One Pretty, One Ruthless)
Best for: real life.
If you want your kitchen to look gorgeous and function, this is the move: keep one board that stays mostly pretty (serving, bread, fruit), and one board that does the heavy lifting (onions, raw prep workflows, messy chopping).
Look for: complementary woods (like maple + walnut) or contrasting shapes (rectangle + paddle) so the display looks curated, not accidental.
How to Keep Wooden Cutting Boards Display-Worthy
Wood is durable, but it’s also a natural materialmeaning it reacts to water, heat, and neglect (same, honestly). The good news: maintenance is simple when you make it routine.
Daily Care: Clean Like You Mean It (But Don’t Overdo It)
- Hand-wash with mild soap and warm water when needed.
- Dry immediately with a towel.
- Stand it upright to finish drying so airflow hits both sides evenly (helps prevent warping).
- Never soak and never toss it in the dishwasher. Wood + prolonged water + heat = regret.
Monthly-ish Care: Oil It (Your Board Is Thirsty)
When a board looks dry, feels rough, or starts absorbing water like a sponge, it’s time to oil. Food-grade mineral oil is the classic option because it’s stable and won’t go rancid like many cooking oils. Apply generously, let it soak in (overnight is great), then wipe off any excess.
For extra shine and protection, finish with a board cream (often mineral oil + beeswax). That waxy top layer helps repel water and keeps the surface feeling silky.
Quick Fixes: Odors, Stains, and “Oops” Moments
- Odors: scrub with coarse salt and half a lemon, then rinse and dry.
- Stains: treat promptly; don’t let beet juice move in and start paying rent.
- Deep knife marks: light sanding can refresh the surface, followed by oiling.
How to Display Wooden Cutting Boards Without Making Your Kitchen Feel Cluttered
The goal is “styled,” not “I opened a cutting board museum.” Use one of these easy display tricks:
- Lean + layer: Prop a large board against the backsplash and layer a smaller board in front for depth.
- Use a stand: A simple board stand makes it look intentional and keeps boards upright and accessible.
- Open shelving: Mix boards with bowls, small vases, or cookbooks so the shelf looks curated.
- Hang a hero piece: A paddle or round board on a hook adds warmth and frees counter space.
What to Avoid (So Your Gorgeous Board Stays Gorgeous)
- Dishwashers (heat + water = warping/cracking).
- Soaking (wood will swell, then shrink, then cracklike a tiny drama cycle).
- Rancid-prone oils that can leave smells behind.
- Ignoring one side: drying unevenly is a common path to warping.
- Leaving it wet and flat: trapped moisture is not your board’s love language.
of Real-Life Cutting Board Experiences (So You Don’t Have to Learn the Hard Way)
I used to think wooden cutting board maintenance was for people who also iron their pillowcases. Then I bought a beautiful walnut board, set it on the counter, and immediately treated it like a decorative pet: admired it, took a picture, and then… used it to chop a lemon and forgot about it.
The next day, there was a faint citrus halo on the surface like my board had been visited by a very polite ghost. I panicked. I tried wiping it with water. I tried more soap. (Wrong direction.) The stain faded a bit, but the board still looked slightly “sad.” That’s when I learned the big lesson: wooden boards don’t want complicated solutionsthey want consistent ones. A gentle scrub, a full dry, and a good oiling fixed it. Not instantly, but enough that I stopped considering a tiny board funeral.
Another time, I hosted friends for what I claimed was a “casual” snack night. You know, the kind of casual where you buy fancy olives and suddenly care about arranging grapes. I used a paddle board as the base, and it instantly elevated everything. Cheese looked more expensive. Crackers looked artisanal. I looked like I had read a book called How to Be Effortless and actually took notes. After that, I became a big believer in having at least one board that’s primarily for serving and displaybecause it makes entertaining easier and makes your kitchen feel more welcoming even on normal days.
I also learned the magic of the “two-board system.” My light maple board handles daily chopping and gets washed constantly. My darker serving board gets used for bread, fruit, and charcuteriethings that don’t leave aggressive smells. That division keeps the display board looking clean and keeps the workhorse board from feeling like it has to be perfect. It’s allowed to look used, because it is used. That’s the point.
And yes, the salt-and-lemon scrub actually works. The first time my board picked up a garlic-onion funk that seemed determined to haunt my strawberries, I scrubbed it with coarse salt and half a lemon, let it sit briefly, then rinsed and dried. The smell calmed down dramaticallylike it realized it was being too much and decided to behave.
Finally: the biggest upgrade wasn’t buying a fancier board. It was changing how I dry it. Standing boards upright after washing (instead of leaving them flat and damp) made a noticeable difference in how they stayed flat and how “fresh” they smelled. Small habit, big payoff. Now my boards look better, last longer, and my kitchen always has at least one beautiful piece leaning on the counter whispering, “Yes, you are a capable adult.”
Conclusion
A display-worthy wooden cutting board isn’t just about looksit’s about choosing a board that matches how you cook, then caring for it in a way that’s easy enough to stick with. Pick a classic hardwood, choose the right construction (end grain for statement, edge grain for everyday), and keep it clean, dry, and lightly oiled. Do that, and your cutting board won’t just sit there looking prettyit’ll earn its place in your kitchen for the long haul.


