Table of Contents >> Show >> Hide
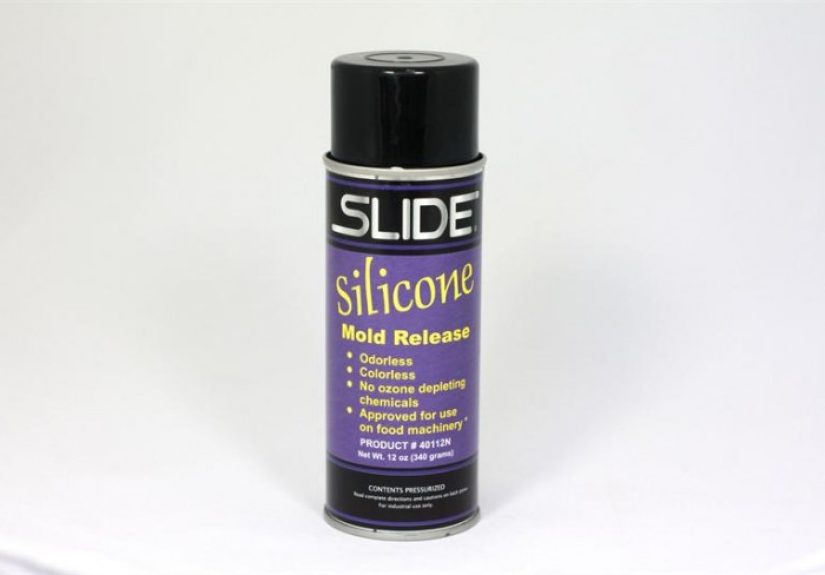
- What Is Silicone Spray Mold Release?
- How Silicone Release Works (The Non-Stick Jacket Theory)
- Where Silicone Spray Mold Release Shines (And Where It Doesn’t)
- Picking the Right Release Agent: A Practical Decision Guide
- How to Apply Silicone Spray Mold Release (Thin Coats Win)
- Troubleshooting: Common Problems and Real Fixes
- Cleanup and Post-Processing: Removing Silicone Residue
- Safety: Aerosols Are Convenient… and Sometimes Spicy
- Alternatives to Silicone Spray Mold Release
- Real-World Experiences & Shop Notes (The Stuff People Learn the Hard Way)
- Conclusion
If you’ve ever tried to pop a part out of a mold and accidentally invented a new sport called “bench-pressing disappointment”, you already understand the value of a good release agent. Silicone spray mold release is one of the most popular “get-out-of-jail-free” cards in molding and casting but it’s also the product most likely to haunt your paint job later like glitter in a craft room.
In this guide, we’ll break down what silicone spray mold release actually is, when it’s the hero, when it’s the villain, and how to apply it so your parts come out cleanwithout turning your shop into a slippery, fish-eye-generating chaos zone.
What Is Silicone Spray Mold Release?
Silicone spray mold release is typically an aerosol release agent that lays down a very thin film of silicone (often silicone oil) on a mold surface. That film lowers surface energy, which is a fancy way of saying: stuff doesn’t want to stick to it. In production molding, it helps parts eject faster, reduces tearing, and can improve surface appearance by preventing drag marks or “sticky spots.”
You’ll see silicone spray releases used across processes like injection molding, compression molding, vacuum forming, pour-casting, and even wax and rubber work. Some formulations are positioned as “food grade” for certain applications, and others are purpose-built for tricky combos like silicone-on-silicone.
Silicone Spray vs. “Regular” Silicone Lubricant Spray
Not all silicone sprays are created equal. A general silicone lubricant (the kind you’d use on weatherstripping or a squeaky hinge) can behave differently than a dedicated mold release. Mold releases are typically formulated to provide predictable film behavior on molds, minimize defects, and hold up under repeated cycles. Translation: your garage-lube spray might work in a pinch, but it’s not always the cleanest, most consistent choice.
How Silicone Release Works (The Non-Stick Jacket Theory)
Imagine your mold wearing a microscopic raincoat. Silicone’s low surface energy makes many plastics, rubbers, foams, and resins less eager to bond to the mold wall. That reduces mechanical grip and chemical attraction, so parts release with less force.
The trick is that “microscopic” part. A good release coat is thin and even. Too much silicone can pool, transfer to your part, soften detail, or cause surface issueslike haze, streaks, or that “why does my casting look oily?” vibe.
Where Silicone Spray Mold Release Shines (And Where It Doesn’t)
Great Use Cases
- Injection and compression molding: Helps ejection, reduces sticking, and can lower defect rates.
- Rubber and elastomer parts: Supports clean demolding when materials want to cling.
- Urethane casting (carefully): Useful when a mold is complex or a part is prone to tearingespecially on older molds.
- Vacuum forming and thermoforming: Can reduce drag and scuffing on some tooling setups.
- Wax, some plastics, and “sticky” materials: Helps parts pop without drama.
Use With Caution
- Anything you need to paint, glue, or coat afterward: Silicone residue is famous for causing adhesion problems and paint defects (hello, fisheyes).
- Workspaces that also do finishing: Silicone overspray can migrate. It doesn’t need your permission to travel.
- Some silicone rubber workflows: Silicone can bond to silicone without the right release. When you’re doing silicone-on-silicone, use a release specifically recommended for that scenario.
Picking the Right Release Agent: A Practical Decision Guide
“Best” depends on what you’re molding, what your mold is made of, and what you’ll do with the part afterward. Here’s a quick, real-world guide to avoid expensive trial-and-error.
| Scenario | What Usually Works | What to Watch For |
|---|---|---|
| Silicone rubber pouring on silicone rubber | Use a silicone-to-silicone release designed for it | Wrong release can cause bonding or cure issues |
| Urethane casting parts | Urethane-compatible release (often not water-based) | Water-based releases can cause bubbles/pits in urethanes |
| Polyester/epoxy composites in tooling | Wax + PVA film, or a semi-permanent system | Silicone may contaminate parts and complicate finishing |
| Porous molds (plaster, concrete patterns) | Seal first, then apply compatible release | Skipping sealer = sticking and surface damage |
| Parts that must be painted | Silicone-free or “paintable” release systems | Even trace silicone can trigger fisheyes |
Silicone-Based vs. Silicone-Free vs. “Paintable” Mold Releases
Silicone-based sprays are popular because they’re effective and convenient. The downside is the residue: silicone is notoriously stubborn, and even a tiny amount can cause coating and bonding headaches.
Silicone-free releases are often chosen when parts need secondary operations like painting, bonding, or plating. These releases aim to reduce surface-energy contamination so coatings can wet out properly.
“Paintable” releases are usually a category of silicone-free systems designed to wash off or leave minimal residue. The important part is: “paintable” doesn’t mean “invincible.” Always test your finishing process on a sample part.
Food-Grade Notes (Because Labels Matter)
Some silicone mold release sprays are marketed for food-grade or incidental food-contact applications, and some silicone lubricants are registered for specific food processing categories. That doesn’t mean every silicone spray in your shop is safe for the same use. If food contact is on the table, choose a product explicitly intended for that environment and follow the manufacturer guidance and your compliance requirements.
How to Apply Silicone Spray Mold Release (Thin Coats Win)
If you remember only one thing: mist, don’t marinate. Most release problems come from over-application. Here’s a dependable workflow used by many manufacturers and experienced casters.
Step-by-Step
- Clean the mold: Remove old residue, dust, and debris. Dirt plus release equals “texture” you didn’t ask for.
- Dry completely: Moisture can cause defects in certain materials (especially some urethanes).
- Shake the can: Seriously. Aerosols separate. Let chemistry do its job.
- Spray from the right distance: Often around 8–12 inches. You want a light, even mist.
- Cover evenly: Use smooth passes; overlap your passes so you don’t miss edges and corners.
- Brush into details (optional but powerful): For intricate molds, gently brushing can help the release wet out and break surface tension in fine features.
- Let it flash off: Give solvents time to evaporate before you pour or cycle the mold.
- Apply a second light coat if needed: Especially for challenging geometries. Two mists beat one flood.
The “Less Is More” Meter
A good release coat is almost invisible. If you can see wet patches or feel an oily layer, you’ve probably applied too much. Over-application can cause surface streaking, detail loss, and transfer to the partsetting you up for finishing trouble later.
Troubleshooting: Common Problems and Real Fixes
Problem: The Part Still Sticks
- Likely cause: Not enough coverage in corners, undercuts, or high-friction areas.
- Fix: Clean, reapply a light mist, and consider brushing release into fine details.
- Pro tip: Some processes benefit from a warm mold before applying release, depending on the product and operation.
Problem: Surface Looks Hazy, Oily, or “Smeared”
- Likely cause: Too much release, pooling, or spraying too close.
- Fix: Wipe excess (if the product allows), apply thinner coats, and let it dry properly.
Problem: Bubbles, Pits, or Weird Craters
- Likely cause: Compatibility issue (especially with certain urethanes), moisture, or incorrect release type.
- Fix: Use a release specifically recommended for your casting chemistry and avoid water-based releases where they’re known to cause defects.
Problem: Paint Fisheyes (Tiny Craters That Ruin Your Day)
- Likely cause: Silicone contaminationon the part, in the air, on your gloves, on your soul.
- Fix: Switch to silicone-free/paintable release, isolate spray areas, and use proper surface prep before painting.
- Reality check: Fisheyes can come from oils and waxes too, but silicone is a frequent repeat offender because it migrates easily and is hard to remove.
Cleanup and Post-Processing: Removing Silicone Residue
If you plan to paint or bond your part, assume silicone residue is present unless you used a silicone-free system. Typical cleanup approaches include thorough washing with detergent, repeated wipe-downs with appropriate cleaners, abrasion (light sanding) when the part allows it, and strict contamination control (fresh gloves, clean rags, clean air). Always match cleaners to your substrate so you don’t haze plastics or damage elastomers.
Also: clean the environment. Silicone overspray can land on benches, tools, and fixtures. If your “paint corner” shares air with your “silicone spray corner,” you might be training fisheyes like they’re Pokémon.
Safety: Aerosols Are Convenient… and Sometimes Spicy
Many silicone spray mold releases (and silicone sprays in general) involve pressurized containers and flammable solvents/propellants. Treat them like the tiny, handheld fire-risk tubes they can be:
- Ventilation matters: Use in a well-ventilated area and avoid breathing mist.
- Keep away from ignition sources: No sparks, open flames, or “I’ll just weld real quick” moments nearby.
- Storage: Avoid heat and direct sun; pressurized cans can rupture if overheated.
- PPE: Eye protection is a good idea; gloves help reduce contamination on parts.
- Slip hazard: Overspray on floors is basically an invitation to an unplanned ice-skating routine.
Alternatives to Silicone Spray Mold Release
Silicone spray is popular because it’s fast and effectivebut it’s not the only tool in the drawer. Depending on your process and finishing needs, consider:
- Mold release wax: Classic for composites and tooling; can build a durable release layer with proper buffing.
- PVA (polyvinyl alcohol) release film: Often used over wax as a sacrificial barrier; washes off with water in many cases.
- Semi-permanent release systems: Designed for multiple cycles; great for repeat production when applied correctly.
- Silicone-free “paintable” releases: Helpful when parts must be coated or bonded afterward.
- Process tweaks: Better mold polish, correct draft angles, and proper cure schedules can reduce reliance on heavy release.
Real-World Experiences & Shop Notes (The Stuff People Learn the Hard Way)
You can read instructions all day, but the real education often happens when you’re holding a mold in one hand, a stuck casting in the other, and bargaining with the universe like, “I will clean the shop every week if this part releases.” Here are field-tested patterns makers and casters commonly reportpackaged into lessons you can steal for free.
1) The “two quick mists” rule beats the “one heroic blast.” Beginners often spray until the mold looks glossy, because glossy feels reassuring. Then the part comes out with streaks, softened detail, or a slightly greasy feellike it’s been moisturized against its will. A lighter coat (or two) tends to release better because it’s more uniform and less likely to puddle in corners. If your mold looks like it just got out of a rainstorm, that’s not “extra protection.” That’s tomorrow’s cleanup project.
2) Keep silicone in a designated zone. Shops that paint (or want to paint “someday”) learn quickly that silicone is an excellent traveler. People will swear they never sprayed silicone near the paint area… while holding the same gloves they used to spray release. A simple habit helps: store silicone sprays in one place, use them in one area, and don’t carry overspray on rags, gloves, or parts into the finishing space. Some teams even label it like a hazard: “SILICONE ZONEENTER WITH CLEAN HANDS.” Dramatic? Yes. Effective? Also yes.
3) Intricate molds reward patience. Deep textures, fine undercuts, and high-detail cavities are where release application becomes an art form. Many makers find that a light mist followed by gentle brushing into details prevents trapped air and improves release. The brush step feels fussyuntil you demold a part with crisp detail and no torn edges, and suddenly you’re a believer.
4) “Food grade” isn’t a vibe; it’s a spec. People sometimes use whatever silicone spray is on the shelf for molds that might touch food or food packaging. In professional settings, that’s a no-go. Makers who work around food handling learn to pick products explicitly positioned for those environments and keep them separate from general-purpose shop aerosols. If your label doesn’t clearly support your use, don’t assume it does.
5) When release suddenly “stops working,” it’s often the mold, not the can. Over time, molds can accumulate residue, micro-scratches, or surface changes that increase sticking. Many experienced users treat “release problems” like a checklist: clean the mold thoroughly, inspect high-friction areas, confirm the casting material mix/cure, and then revisit release choice. Sometimes the fix is as boring as “wash and dry better,” which is annoying because it’s true.
6) The best release strategy is the one that matches your next step. If the part is purely functional and never gets painted, silicone spray might be the fastest path to clean demolding. If the part needs coating, bonding, or a showroom finish, experienced makers often shift toward silicone-free or paintable systems, or barrier approaches like wax and PVA depending on the process. The point isn’t that silicone is “bad” it’s that silicone is loyal to non-stick performance, not to your paint booth dreams.
Conclusion
Silicone spray mold release is a powerful, convenient way to prevent sticking and speed up productionwhen it matches your process. Apply it in thin, even coats, control overspray like it’s a mischievous cat, and choose alternatives when your parts need painting, bonding, or coating. The best results come from pairing the right release chemistry to the material you’re molding, the mold surface you’re using, and the finishing steps you plan afterward.


