Table of Contents >> Show >> Hide
- What Deck Waterproofing Actually Does (and What It Doesn’t)
- Pick Your Waterproofing “Level”
- Tools and Materials Checklist
- Step-by-Step: How to Waterproof Your Deck the Right Way
- Step 1: Check the forecast (and don’t negotiate with rain)
- Step 2: Do a brutally honest deck inspection
- Step 3: Clear and protect the area
- Step 4: Clean the deck like you mean it
- Step 5: Strip or brighten if the deck needs it
- Step 6: Let the deck dry completely
- Step 7: Sand for better bonding (especially on older decks)
- Step 8: Protect the “hidden” deck parts: framing and attachments
- Step 9: Choose your application method (and don’t over-apply)
- Step 10: Apply waterproofing to rails, edges, and end grain first
- Step 11: Coat the deck boards in a smart order
- Step 12: Respect curing time (your deck is not a drying rack)
- Special Situations: Composite Decking and Waterproofing Below
- Maintenance: How to Keep Your Deck Waterproof Longer
- Common Mistakes (So You Don’t Learn Them the Hard Way)
- Real-World Waterproofing Experiences (the “Wish I Knew That” Section)
A deck is basically a big, flat, outdoor sponge that you invited to live next to your house. It gets blasted by sun,
soaked by rain, sprinkled with pollen, and occasionally marinated in spilled soda and regret. If you want that deck to
stay strong (and not turn into a splinter museum), waterproofing isn’t optionalit’s maintenance with benefits.
“Waterproofing your deck” can mean a few different things: sealing the wood so water doesn’t soak in, adding a coating
that sheds water, protecting the framing with flashing/joist tape, or installing an under-deck drainage system so the
space below stays dry. The right approach depends on what your deck is made of, how beat up it is, and whether there’s
anything important underneath (like a patio, storage, or your sanity).
What Deck Waterproofing Actually Does (and What It Doesn’t)
Waterproofing helps reduce water absorption, which lowers the risk of swelling, cupping, cracking, rot, and mildew.
It also boosts UV resistance when you choose a stain/sealer combo, and it can make cleaning easier because dirt doesn’t
bond as aggressively to protected fibers.
What it doesn’t do: magically fix structural problems, reverse rot, or keep standing water from happening if your deck
has drainage issues. If your boards are spongy, fasteners are rusting out, or the ledger area is leaking into the house,
address those first. (Waterproofing is protective. It’s not a time machine.)
Pick Your Waterproofing “Level”
Think of deck waterproofing like jackets:
- Light layer (clear water repellent/sealer): Great when you love the natural look and the wood is in good shape.
- All-purpose layer (semi-transparent stain + sealer): Adds color and UV protection while still showing grain. A popular sweet spot.
- Heavy-duty layer (solid stain or deck coating/resurfacer): Best when the deck has cosmetic flaws, older boards, or stubborn weathering.
- Full system (framing protection + surface protection + under-deck drainage): For elevated decks where you want the substructure and the space below protected.
Quick decision examples
- New cedar/redwood deck: A penetrating clear sealer or semi-transparent stain keeps the look while fighting moisture and sun.
- Pressure-treated pine that’s weathered for a season: Semi-transparent stain/sealer is typically forgiving and durable.
- Old deck with lots of “character” (translation: rough boards): Solid stain or a deck coating can even out appearanceif prep is done correctly.
- Deck over a patio you want to keep dry: Consider an under-deck drainage system (often installed over the joists) plus surface protection above.
Tools and Materials Checklist
- Broom, leaf blower, and a stiff scrub brush
- Deck cleaner (and, if needed, stripper and wood brightener)
- Garden hose or pressure washer (used gently)
- Sander + sandpaper (common ranges: 60–80 grit for rough areas; 80–100 for general smoothing)
- Painter’s tape, drop cloths, and plastic sheeting for plants/siding protection
- Quality brush for edges/rails, roller or stain pad for floorboards
- Chosen waterproofing product (sealer, stain/sealer, solid stain, or coating)
- Optional: joist flashing tape, ledger flashing/approved flashing materials, exterior sealant for specific joints
- Safety: gloves, eye protection, and a mask when sanding
Step-by-Step: How to Waterproof Your Deck the Right Way
Step 1: Check the forecast (and don’t negotiate with rain)
Plan for at least 24–48 hours of dry weather. Moderate temperatures are best, and you want to avoid blazing direct sun
that dries product too fast. Wind is also annoying because it delivers free dust and leaf confetti directly into your finish.
Step 2: Do a brutally honest deck inspection
Walk the whole deck and look for:
- Rot or soft spots: Probe suspect boards with a screwdriver. If it sinks in easily, replace that board.
- Loose fasteners/pop-ups: Re-seat or replace corroded screws. Movement breaks finishes.
- Splinters and cracks: Small cracks can be sanded; deep splits may mean board replacement.
- Ledger area concerns: If the deck attaches to the house, waterproofing isn’t just “nice”it’s damage prevention.
If the deck is structurally questionable, pause and repair first. A perfect finish on an unsafe deck is like putting racing tires on a shopping cart.
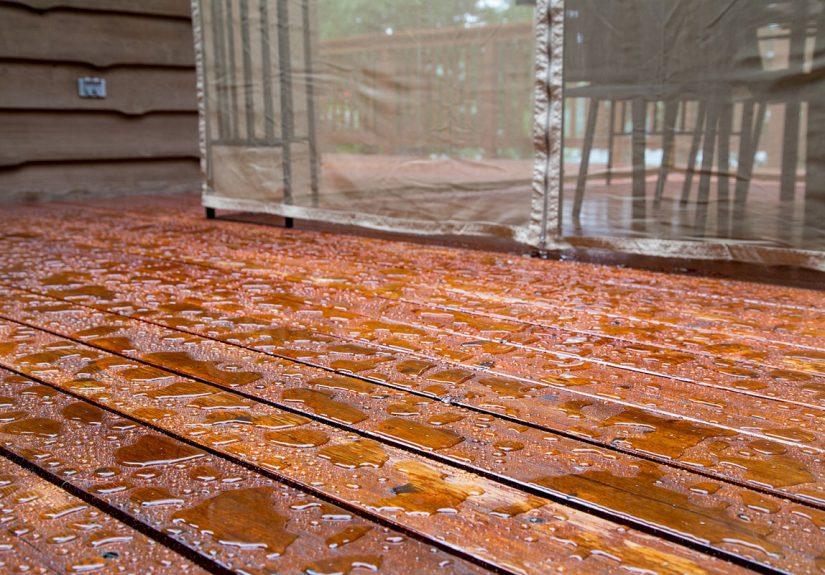
Step 3: Clear and protect the area
Remove furniture, planters, grills, rugseverything. Cover nearby plants with breathable fabric (plastic can “steam” plants in sun).
Mask off siding, doors, and anything you don’t want speckled with stain. You will move faster (and swear less) if prep is tidy.
Step 4: Clean the deck like you mean it
A waterproofing product can only bond to clean wood. That means removing grime, algae, sunscreen residue, and old flaking finish.
Use a deck cleaner and scrub along the grain. Rinse thoroughly.
About pressure washers: they’re helpful, but they can also fuzz up wood fibers if you blast too close or too hard. Use a wide fan tip,
keep moving, and don’t carve your initials into the boards. (Your future self will not be impressed.)
Step 5: Strip or brighten if the deck needs it
If water-based products have built up, if stain is peeling, or if the surface is patchy, you’ll often need a stripper. After stripping,
a wood brightener can help neutralize and restore a more even tone. This step is especially useful on older decks where the wood looks
tired or uneven after cleaning.
Step 6: Let the deck dry completely
This is where many DIY jobs go wrong: applying sealer to wood that’s still damp. Your finish can fail early, look blotchy, or peel.
Give the deck timeoften a full day after washing, longer in humid weather or shade.
A simple readiness check: sprinkle water in a few areas. If it soaks in quickly instead of sitting on the surface, the wood is generally
ready for a penetrating product. Always follow your product’s instructions for dry surface requirements.
Step 7: Sand for better bonding (especially on older decks)
Sanding isn’t just for perfectionists. It removes fuzzed fibers, smooths raised grain, and helps coatings bond evenlyespecially after
washing or stripping. Focus on:
- High-traffic zones (stairs, door exits)
- Any peeling edges or uneven areas
- Railings and hand-contact surfaces (for comfort and safety)
Vacuum or blow off dust after sanding. Don’t rinse it away with a hose unless you’re prepared to wait for drying again.
Step 8: Protect the “hidden” deck parts: framing and attachments
If you’re building newor upgrading during a big refreshthis is where you get the long-game wins:
- Joist flashing tape: Applied along the tops of joists and beams before installing deck boards, it helps keep water from sitting on framing and causing rot.
- Ledger flashing: Where the deck meets the house, proper flashing details matter. If water sneaks behind the ledger, it can damage the rim/band area of the homean expensive “surprise.”
- Corrosion-resistant hardware: Moisture + treated lumber can be tough on metal; use appropriate fasteners/connectors for exterior use.
If you suspect ledger flashing is missing or incorrect, consider having it evaluated by a proespecially if you see staining, dampness,
or peeling paint on the house near the deck connection.
Step 9: Choose your application method (and don’t over-apply)
Different products apply differently, but the big principle is consistent: thin, even coats are usually better than thick ones.
Over-application can cause sticky surfaces, shiny patches, or early peelingespecially with film-forming coatings.
- Brush: Best for edges, corners, rails, and detail work.
- Pad applicator: Fast and even on deck boards.
- Roller: Useful for rough surfaces or certain coatings; less ideal for thin penetrating sealers unless the product allows it.
- Sprayer: Speedy, but usually needs back-brushing/back-rolling to work product into wood and avoid lap marks.
Step 10: Apply waterproofing to rails, edges, and end grain first
Start with vertical surfaces and cut ends. End grain is especially thirstyit’s where water loves to enter. Coating these areas well
can reduce swelling and checking. Then move to the deck boards.
Step 11: Coat the deck boards in a smart order
Work from the far end toward your exit so you don’t paint yourself into a corner (a classic outdoor comedy). Apply along the grain,
keep a wet edge, and finish a few boards at a time so you don’t create lap marks.
If your product recommends two coats, follow the recoat window. Many systems prefer two thinner coats rather than one thick coat.
Step 12: Respect curing time (your deck is not a drying rack)
Dry-to-touch is not the same as “ready for a barbecue.” Many products need at least 24–48 hours before light foot traffic, and longer
for full cure depending on humidity and temperature. Keep furniture off until the finish is truly set, or you’ll get dents, stuck chair legs,
and a finish that looks like it fought with your patio set and lost.
Special Situations: Composite Decking and Waterproofing Below
Composite boards
Composite decking doesn’t get sealed the same way wood does. It generally doesn’t need a topical waterproofing product,
but the framing underneath still benefits from moisture management (joist tape, proper drainage, and good ventilation).
Clean composite regularly and follow the manufacturer’s care recommendations.
Under-deck drainage systems
If your deck is elevated and you want the space beneath to stay dry, look into under-deck drainage systems. Many are designed to sit
over the joists (beneath the deck boards) and channel water to a gutter or downspout area. These systems can protect the substructure
and turn the area below into usable storage or a sheltered hangout spot.
Note: installing these systems is much easier during a new build or when you’re replacing deck boards. Retrofitting is possible, but it’s
a more complex project.
Maintenance: How to Keep Your Deck Waterproof Longer
- Clean seasonally: Dirt holds moisture against the surface.
- Do the “water bead” check: If water no longer beads and soaks in quickly, it may be time for a maintenance coat.
- Watch shady areas: They stay damp longer and invite mildew.
- Recoat on a schedule: Many wood decks need refreshing every 1–3 years, depending on sun exposure, product type, and foot traffic.
- Keep gaps clear: Leaves and debris clog drainage between boards.
Common Mistakes (So You Don’t Learn Them the Hard Way)
- Sealing damp wood: Traps moisture and can cause failure.
- Skipping prep: The finish is only as strong as what it sticks to.
- Over-applying product: Thick coats can stay tacky or peel.
- Ignoring the ledger area: Water intrusion there can affect the house, not just the deck.
- Choosing the wrong product type: A coating over a poorly prepped, previously sealed surface is a recipe for peeling.
Real-World Waterproofing Experiences (the “Wish I Knew That” Section)
The internet loves a clean, heroic “Saturday deck makeover” story. Real life is messierand that’s useful, because the most practical deck
waterproofing lessons come from the stuff people do wrong once and never want to repeat.
One of the biggest patterns is underestimating dry time. Homeowners often wash the deck in the morning, feel optimistic by lunch,
and start sealing in the afternoon. The surface can look dry while moisture is still hanging out inside the boardsespecially in shaded areas or
where air doesn’t move much. The result is usually blotchy absorption (some boards go dark, others stay light) or a finish that doesn’t bond well.
The fix is boring but effective: give it the extra day, and check multiple spots, not just the sunny middle where everything dries first.
Another common “oops” is pressure washing like you’re cleaning a driveway. Deck boards are softer than concrete, and aggressive washing
can raise fuzzy fibers and carve trenches along the grain. That fuzz doesn’t just look roughit drinks up stain unevenly and can turn a smooth finish
into a scratchy one. When people dial back the pressure, keep the nozzle moving, and follow with light sanding, the final look is noticeably more even.
Then there’s the classic: too much product. Many deck sealers and stain/sealer combos are designed to penetrate. If you flood the surface,
the wood can’t absorb it all, and you end up with glossy patches that stay tacky longer than expected. Furniture sticks, footprints get recorded like
dinosaur tracks, and suddenly your deck is hosting an art exhibit titled “Impressions of a Weekend.” Thin coats, applied consistently, almost always
win. So does working a few boards at a time and maintaining a wet edge.
People also tend to forget that waterproofing isn’t only about what you can see. The deck’s “bones” matter. When DIYers add joist flashing tape
during a board replacement, it’s one of those upgrades that feels minor until a few seasons later when the framing is still crisp instead of turning punky
and dark. Similarly, paying attention to the ledger areawhere the deck meets the housecan prevent the kind of moisture problem that shows up
indoors as peeling paint, musty smells, or worse. That’s not a fun discovery. It’s an expensive one.
Finally, there’s the “expectation reset” lesson: waterproofing is not a one-and-done, forever spell. High sun exposure, freeze-thaw cycles, and heavy
foot traffic can wear finishes down faster than people expect. Homeowners who build a simple habitquick clean in spring, clear debris in fall, and a
water-bead checktend to spend less time redoing the whole project. They’re doing maintenance coats before failure, which is cheaper, faster, and dramatically
less annoying than stripping a peeling deck back to bare wood.
In other words: the best deck waterproofing “experience” isn’t a dramatic rescue. It’s a boring pattern of small, smart choices that keep the deck from
needing rescuing at all. Which is exactly the kind of boring you want for anything made of wood that lives outdoors.


