Table of Contents >> Show >> Hide
- What a BIOS Update Actually Does
- When You Should Update Your ASUS BIOS
- Before You Update: A Short Prep Checklist That Saves a Lot of Regret
- Method 1: Update the BIOS Through MyASUS or Windows Update
- Method 2: Use the ASUS BIOS Update for Windows Installer
- Method 3: Update the BIOS Using ASUS EZ Flash or ASUS Firmware Update in BIOS
- Which BIOS Update Method Should You Use?
- Common Mistakes to Avoid
- What to Do After the BIOS Update
- Troubleshooting If Something Feels Off
- Experience-Based Lessons: What ASUS Owners Usually Learn the Hard Way
- Conclusion
Updating the BIOS on an ASUS PC sounds like one of those jobs that should require a flashlight, a wizard, and a backup plan written on parchment. In reality, it is much simpler than its reputation suggests. You just need the right file, the right method, and enough patience to avoid touching anything while your computer is doing its dramatic “please do not interrupt me” reboot routine.
If you have an ASUS laptop, desktop, Mini PC, or an ASUS motherboard-based system, a BIOS update can help fix stability issues, improve hardware compatibility, patch firmware-level bugs, and sometimes solve weird little mysteries such as random boot trouble, memory instability, fan behavior that has become creatively loud, or support for newer components. The catch is simple: not every ASUS model supports every update path. That is why the smartest guide is not “here is one way,” but “here are the three easiest methods, and when each one makes sense.”
In this guide, you will learn how to update the BIOS on an ASUS PC using MyASUS or Windows Update, a Windows-based ASUS BIOS installer, or the built-in BIOS utility known as ASUS EZ Flash or ASUS Firmware Update. You will also learn what to do before you update, what not to do during the process, and how to avoid turning a simple maintenance task into an unexpected bonding experience with your recovery screen.
What a BIOS Update Actually Does
Your BIOS, or more accurately on modern PCs, UEFI firmware, is the low-level software that starts the computer, checks basic hardware, and hands control over to Windows. When ASUS releases a BIOS update, it usually is not trying to impress you with fireworks. It is typically fixing something practical: better memory compatibility, improved CPU support, security updates, battery or thermal behavior adjustments, improved stability, or fixes for specific bugs that only reveal themselves after you install new hardware or a major Windows update.
That said, updating the BIOS is not the same as updating Chrome or your audio driver. If the process is interrupted by a forced shutdown, dead battery, wrong firmware file, or random mid-update panic, the PC may fail to boot properly. That is why the golden rule is this: update the BIOS when you have a good reason, follow ASUS instructions for your exact model, and use the least complicated method your system supports.
When You Should Update Your ASUS BIOS
A BIOS update is worth considering when:
- Your ASUS PC has a known bug, freezing issue, or boot problem that ASUS mentions in BIOS release notes.
- You installed or plan to install new RAM, a new CPU, or another component that may need newer firmware support.
- Your system has stability problems after a major Windows update or hardware change.
- ASUS lists a security, compatibility, or reliability fix in the BIOS changelog.
- Your PC repeatedly acts like it is auditioning for a troubleshooting forum.
You may not need a BIOS update if your ASUS computer is working perfectly and the newer BIOS does not address anything relevant to your system. “Because there is a newer version” is not always a great reason. “Because my laptop crashes when waking from sleep and ASUS says the new BIOS fixes that” is a much better one.
Before You Update: A Short Prep Checklist That Saves a Lot of Regret
1. Confirm your exact ASUS model
Do not guess. “It is a Zenbook-ish laptop I bought last year” is not a model number. Use the label on the device, the ASUS support page, MyASUS, or Windows System Information. ASUS support pages are model-specific, and downloading the wrong BIOS file is how innocent afternoons become educational.
2. Check your current BIOS version
In Windows, press Windows + R, type msinfo32, and look for BIOS Version/Date. You can also check inside BIOS itself on many ASUS systems. This helps you confirm whether the update is actually newer and whether the update completed successfully later.
3. Plug the PC into power
For laptops, keep the charger connected. Do not start a BIOS update on 17 percent battery while whispering “it will probably be fine.” ASUS update routines often require AC power, and some models want the battery above a certain level before continuing.
4. Back up important files
A BIOS update normally does not erase your files, but that is not the same thing as “nothing could ever go wrong.” Back up anything important before you begin.
5. Save your BitLocker or device encryption recovery key
If your PC uses BitLocker or device encryption, make sure you know where the recovery key is stored before a firmware update. On some systems, it is smart to suspend BitLocker temporarily before updating firmware.
6. Use a properly formatted USB drive for EZ Flash
If you plan to use the BIOS-based method, prepare a USB drive formatted as FAT32 and copy the extracted BIOS file to it. Keeping the file easy to find, ideally in the root of the drive, makes the process smoother.
Method 1: Update the BIOS Through MyASUS or Windows Update
This is the easiest method for many ASUS laptops and some newer systems. If your model supports it, MyASUS can download the package and guide the restart process. On some supported PCs, firmware may also appear through Windows Update or optional updates.
Best for
Everyday users who want the simplest path and have a working Windows installation.
Why this method is easy
You stay inside Windows for most of the process, and the app or operating system handles much of the heavy lifting. It is less “firmware surgery” and more “guided reboot with paperwork.”
How to do it
- Open MyASUS on your ASUS PC.
- Look for System Update, Live Update, or a similar update section, depending on your model and app version.
- Scan for updates and review what is offered.
- If a BIOS or firmware package appears, read the description and confirm it matches your system.
- Plug in your charger and close open work.
- Start the update and allow the system to restart when prompted.
- During reboot, the PC may enter a firmware update screen. Do not interrupt it.
- Wait for Windows to load again, then verify the new BIOS version in msinfo32.
If you prefer checking Windows directly, go to Settings > Windows Update and then review available updates, including optional or driver-related items when available. Some PCs receive firmware this way, though not every ASUS model exposes BIOS updates through Windows Update.
Pros
- Very beginner-friendly
- No manual hunting through BIOS menus if the update is surfaced automatically
- Useful for supported ASUS laptops and office PCs
Cons
- Not all ASUS models support this path
- The BIOS update may not show up even when a newer version exists on the support page
- Still requires a reboot into the firmware update stage
Example
If you own a recent ASUS Vivobook or Zenbook and MyASUS shows a BIOS item under critical or recommended updates, this is usually the easiest route. It feels less intimidating because ASUS is essentially holding the flashlight for you.
Method 2: Use the ASUS BIOS Update for Windows Installer
Some ASUS models offer a Windows-based BIOS package on the support page, often labeled something like BIOS Update for Windows or BIOS Installer for Windows. Older guides may also refer to a similar idea as WinFlash. If your model provides this file, it can be a convenient way to start the update without manually selecting the firmware file from within BIOS.
Best for
Users whose ASUS support page explicitly offers a Windows BIOS installer and who want a more direct update process than the USB method.
How to do it
- Go to the official ASUS support page for your exact model.
- Open the Driver & Utility or support downloads section.
- Look under categories such as BIOS or BIOS Update (Windows).
- Download the BIOS installer for Windows if your model offers it.
- If the file is zipped, extract it first.
- Close open apps, save all work, and keep the charger connected.
- Run the installer and follow the on-screen wizard.
- Allow the system to restart when prompted.
- Let the BIOS update finish without pressing keys, forcing shutdown, or making emotionally charged decisions.
- Once back in Windows, verify the new BIOS version.
Important note
If your ASUS support page does not offer a Windows BIOS installer, do not go looking for one on random third-party sites. That is not resourceful. That is how tech support legends begin. In that case, use Method 3 instead.
Pros
- Simple guided process
- Good for users who want official ASUS instructions without manually browsing firmware menus
- No USB prep needed on supported models
Cons
- Only available for certain ASUS systems
- Still depends on a healthy Windows environment to launch the process cleanly
- More sensitive to a messy Windows session than the BIOS-based method
Method 3: Update the BIOS Using ASUS EZ Flash or ASUS Firmware Update in BIOS
This is the most universal and most reliable method for ASUS systems because it runs from the BIOS environment itself rather than from within Windows. If your PC does not support the first two methods, this is usually the one you want. It is also the method many experienced users prefer because it avoids background Windows activity during the actual firmware flash.
Best for
Anyone who wants the most dependable method, especially if Windows is unstable or the ASUS support page does not offer a Windows installer.
What you need
- Your exact ASUS model number
- The correct BIOS file downloaded from the official ASUS support page
- A USB flash drive formatted as FAT32
- A calm personality for about ten minutes
How to do it
- Download the correct BIOS file from the ASUS support page for your exact model.
- Extract the downloaded file if it comes in a ZIP archive.
- Copy the BIOS file to your FAT32 USB drive.
- Insert the USB drive into the ASUS PC.
- Restart the computer and enter BIOS. On many ASUS laptops this is F2; on many ASUS desktops or motherboards it is Delete. If you miss the timing, you can also reboot through Windows advanced startup and choose UEFI Firmware Settings when available.
- Inside BIOS, switch to Advanced Mode if needed, often by pressing F7.
- Open ASUS EZ Flash 3 Utility or ASUS Firmware Update, depending on what your model calls it.
- Select the USB drive and choose the BIOS file.
- Confirm the update and let the system complete the flash.
- Wait for the automatic reboot. Then check the BIOS version afterward.
Why this method is often the safest bet
Because the actual flash runs from the firmware environment, it avoids a lot of the chaos that can happen inside Windows: background apps, driver conflicts, unexpected prompts, or that one program that always decides it needs attention at exactly the worst possible moment.
Common ASUS naming differences
On some ASUS systems, the tool appears as ASUS EZ Flash 3 Utility. On others, you may see ASUS Firmware Update. The purpose is the same: select the correct BIOS file and apply the update from inside the BIOS environment.
Which BIOS Update Method Should You Use?
Here is the simple version:
- Use Method 1 if MyASUS or Windows Update already shows a BIOS or firmware package for your PC.
- Use Method 2 if ASUS offers a BIOS Update for Windows installer for your exact model.
- Use Method 3 if you want the most universal method, if Windows is unstable, or if the first two methods are not available.
If you are unsure, Method 3 is usually the most dependable fallback because it is closest to ASUS’s classic supported workflow. It takes a little more setup, but it is straightforward once the BIOS file is on the USB drive.
Common Mistakes to Avoid
- Downloading a BIOS file for a similar but different ASUS model
- Starting the update on low battery power
- Forcing a shutdown because the screen stayed black longer than expected
- Using a USB drive that is not formatted properly for EZ Flash
- Interrupting the reboot sequence because it “seemed finished”
- Changing random BIOS settings after the update without knowing what they do
The longest two minutes of many BIOS updates happen after the user thinks the update should be done. This is normal. The screen may go dark. The fans may spin differently. The system may reboot more than once. None of that automatically means something is wrong. The correct move is usually the hardest one: wait.
What to Do After the BIOS Update
Once the PC returns to Windows, do a few quick checks:
- Open msinfo32 and verify the BIOS version changed.
- Let Windows finish settling down after the restart.
- Check system time and date if anything looks odd.
- Test sleep, boot speed, Wi-Fi, keyboard, and other everyday functions.
- If you had custom BIOS settings before, review whether they were reset to defaults.
- If BitLocker was suspended, resume it after you confirm the system is healthy.
Some BIOS updates reset settings such as boot behavior, virtualization, fan profiles, or memory options. If you had changed anything in BIOS previously, recheck those settings carefully instead of assuming they survived the trip.
Troubleshooting If Something Feels Off
The BIOS update does not appear in MyASUS
Your model may not support that method, or your system may already be up to date. Check the ASUS support page directly.
The support page has no Windows BIOS installer
That is normal for some models. Use EZ Flash instead of hunting down unofficial utilities.
You cannot enter BIOS with F2 or Delete
Use Windows advanced startup, then choose Troubleshoot > Advanced options > UEFI Firmware Settings if your PC provides that path.
The system boots oddly after the update
Enter BIOS, load optimized defaults if needed, save, and reboot. Then confirm boot order and storage settings. If your drive is not detected or a specific feature changed, check ASUS release notes and your BIOS configuration before panicking.
You are updating an ASUS motherboard rather than a prebuilt ASUS PC
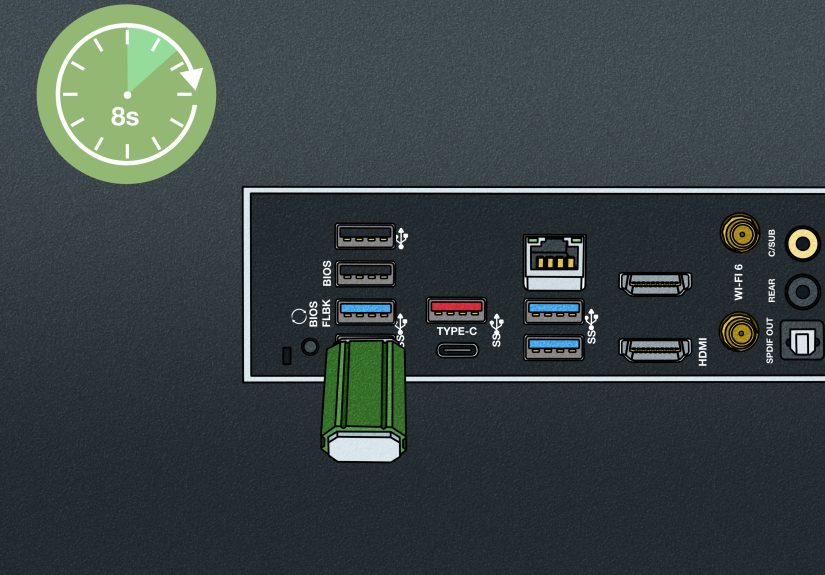
The process is similar, but motherboard-focused ASUS tools such as EZ Flash 3 and, on some boards, BIOS FlashBack may appear. Always use the support page for the exact board model.
Experience-Based Lessons: What ASUS Owners Usually Learn the Hard Way
One of the most common real-world experiences with an ASUS BIOS update is not “the update failed.” It is “the update looked scary, but it actually worked fine.” That sounds silly until you sit in front of a black screen for what feels like an entire fiscal quarter. People expect flashy progress bars and cheerful messages. Firmware updates are more mysterious. The system restarts, the screen goes dark, maybe a status screen appears, maybe it does not, and suddenly the user is negotiating with the power button like it owes them rent. The lesson here is simple: BIOS updates often look more dramatic than they are.
Another very common experience is that people wait too long to check the model number. They search for “ASUS BIOS update,” download the first thing that looks plausible, and only afterward realize ASUS has fourteen devices with names that differ by two characters and one hidden regional suffix. That is why careful users always start by confirming the exact model and current BIOS version. Five minutes of checking saves hours of repair-mode sadness later.
There is also the classic “I thought Windows was the problem” story. A lot of ASUS users go hunting through drivers, reinstall apps, blame updates, blame Wi-Fi, blame Mercury being in retrograde, and only then discover that the BIOS release notes mention improved stability, memory compatibility, resume-from-sleep fixes, or behavior changes tied to newer hardware. In other words, the BIOS is sometimes the missing step in a fix that seemed like a Windows problem. Not always, of course, but often enough that it deserves a place on the troubleshooting list.
Then there is the USB experience. People assume any random flash drive will work, stuffed with a decade of screenshots, installers, vacation photos, and one mysterious folder called “new new final.” In practice, BIOS updates go more smoothly when the USB drive is clean, properly formatted, and holding only the extracted firmware file. Simple setup beats clever improvisation almost every time.
Users also tend to underestimate how often BIOS settings return to defaults after an update. That matters if you had changed boot order, virtualization settings, Secure Boot behavior, memory profiles, or fan preferences. The update itself may succeed perfectly, but the PC can still feel “different” afterward because the old custom settings are gone. Many people interpret that as something breaking, when really the firmware just went back to a clean baseline.
My favorite practical lesson is this: the best BIOS update is the one you do on a calm day, not when you are already late, annoyed, and one email away from launching your laptop into low orbit. Updating the BIOS on an ASUS PC is not especially hard, but it rewards patience, good prep, and a little respect for the process. If you give it those things, it is usually one of the more satisfying maintenance jobs you can do. No glitter, no applause, just a more stable PC that quietly gets back to work.
Conclusion
If you want the easiest summary possible, here it is: update the BIOS on your ASUS PC using the simplest official method your model supports. Start with MyASUS or Windows Update if the firmware appears there. Use the ASUS Windows installer if your support page provides one. And if you want the most universal, dependable method, use ASUS EZ Flash in BIOS with a properly prepared FAT32 USB drive.
The real secret is not technical genius. It is good preparation. Confirm the model, download the correct file, keep the computer plugged in, do not interrupt the process, and check your settings after the reboot. Follow those rules and BIOS updating goes from “terrifying firmware ritual” to “pretty manageable maintenance task with slightly dramatic lighting.”


