Table of Contents >> Show >> Hide
- Before You Start: Pick the Right Stain (So Step 2 Doesn’t Become Step 27)
- Tools & Materials Checklist
- Step 1: Prep the Wood (The Part Everyone Wants to Skip…and Then Regrets)
- Step 2: Apply the Stain (Controlled Chaos, With a Timer)
- Step 3: Seal and Protect (Because Stain Alone Is Not Armor)
- Mini Cheat Sheet: Three Steps, One Page
- Conclusion: A Pro Finish Is Mostly Patience (With a Rag)
- Real-World Experiences: What Usually Happens (And How to Win Anyway)
Staining wood is one of those DIY skills that looks like magic when it’s done rightand looks like a crime scene when it’s not. The good news: you don’t need a secret handshake or a garage full of tools. You need three basic steps: prep, stain, and seal.
This guide walks you through the process in a simple, repeatable waywhether you’re staining a new pine bookshelf, refreshing a tired table, or trying to make “mystery wood” trim match the rest of your house. Along the way, you’ll get practical tips to avoid blotches, nail the color, and end up with a finish that won’t panic the moment a cold drink sweats nearby.
Before You Start: Pick the Right Stain (So Step 2 Doesn’t Become Step 27)
“Wood stain” isn’t one product. It’s a categorykind of like “sandwich.” Some are neat and tidy; some are dripping chaos. Choosing the right one makes everything easier.
Common stain types (and when they make sense)
- Oil-based penetrating stain: Longer working time (more forgiving), classic look, but stronger odor and longer dry time. Great for furniture and trim when you want time to wipe evenly.
- Water-based stain: Lower odor and faster dry time, but it can dry quickly and sometimes raises the grain (more on that in Step 1). Great for indoor projects when ventilation is limited.
- Gel stain: Thicker, more controlled, and often less blotchy on tricky woods or vertical surfaces. Great for pine, birch, cherry, or anything that loves to absorb stain like it’s trying to win a contest.
Quick reality check: stain changes with the wood
The same “Walnut” stain can look dramatically different on oak vs. pine vs. maple. That’s not you failingit’s just how wood works. Plan to test on a scrap or hidden spot before you commit to the whole project.
Tools & Materials Checklist
- Sandpaper (typical range: 120, 150/180, 220 grit) or sanding pads
- Vacuum, tack cloth, or clean lint-free rags
- Pre-stain wood conditioner (especially for softwoods and blotch-prone species)
- Stain (oil-based, water-based, or gel stain)
- Applicators: lint-free cloths, foam brush, quality brush, or staining pad
- Disposable gloves
- Drop cloths / painter’s tape
- Topcoat (polyurethane, water-based poly, wiping varnish, etc.)
- Safety: eye protection, ventilation, and a plan for stain-soaked rags (seriouslymore in Step 3)
Step 1: Prep the Wood (The Part Everyone Wants to Skip…and Then Regrets)
Prep is where good staining happens. The goal is simple: clean, evenly sanded, open wood pores so stain absorbs consistently. If the surface is uneven, dirty, or still sealed under an old finish, stain won’t “even out” later. It will just become uneven… but darker.
1) Remove old finish if needed
If your wood has a clear coat (polyurethane, varnish, lacquer), stain can’t penetrate it. You’ll need to strip or sand back to bare wood for a true color change. If you only want to refresh the tone slightly, some projects can be scuff-sanded and recoatedbut that’s a different goal than classic “stain the wood darker/lighter.”
2) Sand in stages (don’t jump to super fine grit first)
For most raw wood, sanding progressively gets you smooth and consistent absorption. A practical approach:
- Start: 120 grit to level and remove milling marks
- Middle: 150–180 grit to refine scratches
- Finish: 220 grit for a smooth, stain-ready surface
Always sand with the grain on the final passes. Cross-grain scratches can show up like little lightning bolts once stain hits them.
3) Clean like you mean it
Dust is the enemy of even stain. Vacuum thoroughly, then wipe with a tack cloth or a clean rag. For oil-based systems, many pros use a rag lightly dampened with mineral spirits to pick up fine dust (let it fully evaporate before staining).
4) Optional but powerful: pre-stain conditioner (especially for pine, birch, maple, cherry)
Some woods absorb stain unevenly, causing blotches and dark patches. A pre-stain wood conditioner helps even out absorption. Typical use: apply, let it soak briefly, wipe off excess, and stain within the product’s working window.
5) If using water-based stain: consider “raising the grain” on purpose
Water-based products can raise tiny wood fibers, making the surface feel rough after staining. One way to reduce surprises is to wipe the sanded wood with a damp cloth, let it dry, then lightly sand again (often with a fine grit). It’s like telling the wood, “Go ahead, get your drama out now,” before the stain is on.
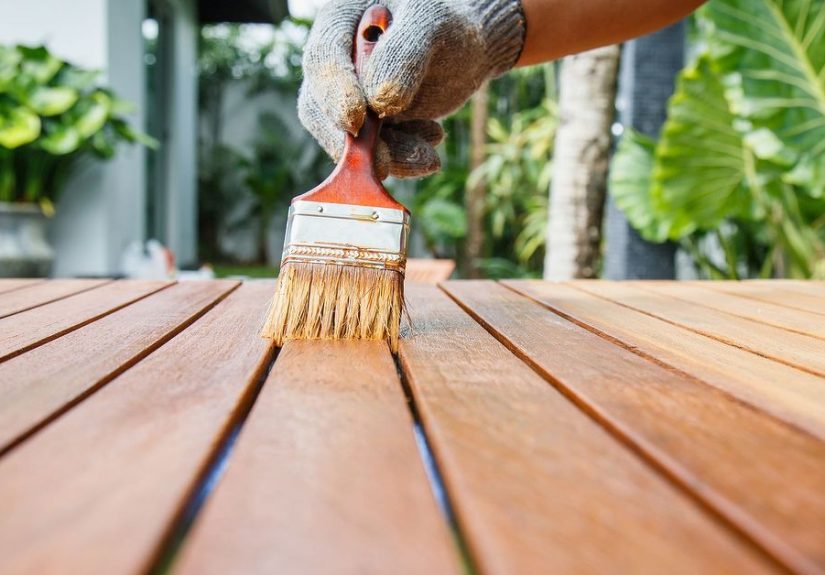
Step 2: Apply the Stain (Controlled Chaos, With a Timer)
Stain application is not “paint it on and walk away.” Think of stain as a color bath: you apply it wet, let it sit briefly, then remove the extra so the color stays in the woodnot as a sticky layer on top.
1) Stir welldon’t shake
Pigments settle. Stir thoroughly and occasionally while you work. Shaking can introduce bubbles and can lead to uneven results.
2) Test the color first (your future self will thank you)
Test on a scrap of the same wood (prepped the same way), or an inconspicuous area. Try two variables: application method (rag vs. brush) and dwell time (wipe sooner vs. later). That’s how you dial in “warm walnut” instead of “why is this orange?”
3) Work in sections and keep a wet edge
Pick a manageable arealike one table leg, a drawer front, or a 2–3 foot section of tabletop. Apply stain generously, keeping it wet as you go. Then wipe off the excess before it starts to get tacky.
4) Wipe off excess the right way
- Use clean, lint-free rags (change them often)
- Wipe with the grain for a consistent look
- Control color with time: shorter dwell = lighter, longer dwell = darker (but don’t let stain dry on the surface)
5) Want it darker? Use strategy, not panic
If the first coat is too light, you typically have two options:
- Apply a second coat (if the product allows it and the first coat is properly dry). This deepens toneespecially with many oil-based stains.
- Switch to a gel stain or a different stain system if the wood is blotching or refusing to cooperate. More coats of a blotchy stain usually just create blotchy, but moodier.
Example: Pine vs. Oak (why your friend’s stain looked better)
Oak has open grain and tends to take stain more predictably. Pine is softer and can absorb unevenly, leading to dark patches. On pine, a conditioner or gel stain often produces a more even result.
Troubleshooting quick fixes
- Blotches: conditioner next time; consider gel stain; avoid over-sanding with ultra-fine grit that can burnish the wood
- Lap marks: work faster in smaller sections; keep a wet edge; wipe consistently
- Sticky/tacky spots: too much stain left on surfacewipe more aggressively with clean rags; follow label guidance
Step 3: Seal and Protect (Because Stain Alone Is Not Armor)
Stain adds color. It does not add much protection. If your project will be touched, cleaned, spilled on, or admired up close, you want a topcoat.
1) Let the stain dryreally dry
Dry time depends on stain type, temperature, humidity, and how much stain you wiped off. Follow the label, but also use your senses: it should not feel cool, oily, or smell strongly of solvent. Rushing this step is how you get finish problems like poor adhesion, cloudiness, or “why is it still tacky a week later?”
2) Choose the right topcoat for the job
- Polyurethane (oil-based): durable, warm tone, great for tabletops and high-wear furniture; longer dry time and stronger odor.
- Water-based polyurethane: clearer (less amber), faster drying, lower odorgreat for light woods or indoor projects.
- Wiping varnish / wipe-on poly: easy application and fewer brush marks; usually requires more coats.
3) Apply topcoat in thin, even layers
Thin coats beat thick coats. Thick coats sag, run, and trap dust like it’s their hobby. Use a quality brush, foam brush, or wiping method depending on the product.
- Stir the finish gently (again: no shaking contest)
- Apply a thin coat
- Let it dry per label
- Lightly sand between coats (often with a very fine grit) to remove dust nibs
- Apply 2–3 coats for most furniture projects (more for heavy wear)
4) Safety corner: stain-soaked rags are not harmless trash
Oil-based stain and finish rags can generate heat as they dry. If wadded up, that heat can build and potentially ignite. The safe move: lay rags flat to dry outdoors (non-combustible surface) or store them in a proper, sealed metal container, then dispose according to local guidance. Do not toss a stain-soaked rag in a heap and assume it will “figure it out.” It might. But the solution could involve your smoke alarm.
Mini Cheat Sheet: Three Steps, One Page
| Step | Goal | Key Moves | Common Mistake |
|---|---|---|---|
| 1) Prep | Even absorption | Sand progressively, clean thoroughly, conditioner on blotch-prone woods | Skipping dust removal (dust = speckles and streaks) |
| 2) Stain | Consistent color | Test first, work in sections, keep wet edge, wipe off excess | Letting stain dry on the surface (hello tackiness) |
| 3) Seal | Durability | Let stain dry, apply thin topcoats, sand lightly between coats | Topcoating too soon (adhesion issues) |
Conclusion: A Pro Finish Is Mostly Patience (With a Rag)
If you remember nothing else, remember this: prep determines the outcome. Stain doesn’t hide problemsit highlights them in high-definition. Sand evenly, clean thoroughly, test your color, wipe off excess stain, and protect your work with a proper topcoat.
Do those three steps well and your project will look intentionallike you meant to do that all along. Which is the ultimate DIY flex.
Real-World Experiences: What Usually Happens (And How to Win Anyway)
Let’s talk about the part no one puts on the can: what staining wood feels like in real life, when your garage is 62°F, your “lint-free” rag is shedding like a golden retriever, and you suddenly realize your tabletop is bigger than your attention span. Here are a few common scenarios DIYers run intoplus how to handle them without spiraling into “maybe I should just paint it.”
Experience #1: The Blotch Surprise on Pine. You sand, you stain, you wipe… and the wood looks like it has freckles in all the wrong places. This usually happens on softwoods (pine, fir) and some hardwoods (cherry, birch, maple) that absorb stain unevenly. The win is in Step 1: conditioner or gel stain. If you’re already mid-project, don’t keep adding stain hoping it evens out. It won’t. Instead, wipe thoroughly, let it dry, then consider a gel stain to even the tone, or embrace a slightly lighter color that looks consistent.
Experience #2: “I’ll Just Do One More Coat”… and Now It’s Sticky. Sticky stain is usually not “too much pigment,” it’s too much stain left on the surface. Stain is meant to color the wood fibers, not form a thick film. The fix is painfully simple: wipe off more. Use fresh rags and real pressure. If it’s already tacky, a small amount of the appropriate solvent (per product guidance) can help loosen residue, followed by more wiping. The prevention: smaller sections, consistent dwell time, and removing excess like you’re trying to win a “cleanest wipe” trophy.
Experience #3: The “Why Is This So Orange?” Moment. Many stains run warm, and some woods (like pine and red oak) already lean warm. Add indoor lighting and suddenly your “classic walnut” looks like “pumpkin spice furniture.” This is where testing saves money and dignity. Try test swatches with different stain colors, and consider balance: cooler browns or a layered approach (a washcoat/conditioner plus stain) can reduce that orange pull. Also remember: topcoats can shift the look. Oil-based polyurethane often adds warmth (amber), while many water-based polys stay clearer.
Experience #4: The Water-Based Grain-Raise Plot Twist. You stain, it dries fast, and now the surface feels a little fuzzylike your project grew peach fuzz overnight. That’s grain raise. A practical approach is to “pre-raise” the grain during prep: wipe the sanded wood with water, let it dry, lightly sand smooth, then stain. It’s an extra step, but it makes the final finish feel smootherespecially on tabletops and handrails where you’ll notice every texture detail.
Experience #5: Dust Nibs, Cat Hair, and the Laws of the Universe. The moment you apply a topcoat, the air will magically contain more dust than it did five minutes ago. Control what you can: vacuum the area, wipe surfaces, and avoid fans blowing directly at your wet finish. Apply thinner coats, sand lightly between coats, and know that a few nibs are normalfinishing is often a game of “apply, dry, lightly sand, repeat” until the surface feels right.
Experience #6: The Rag Safety Wake-Up Call. Most people learn about oily rag risks after someone mentions it in a tone usually reserved for “don’t put metal in the microwave.” Build a habit: set up a safe drying spot for rags before you open the stain. Lay them flat to dry, or store them in a proper container. Staining is fun. Accidental fires are famously less fun.
If staining wood had a slogan, it would be: slow is smooth, smooth is fast. When you give yourself time to prep, test, and wipe carefully, you don’t just get better resultsyou get a calmer project. And a calmer project is the difference between “I made this!” and “I will never speak of this again.”


