Table of Contents >> Show >> Hide
- What “pea gravel concrete” usually means
- First: decide if resurfacing is the right fix
- Pick your finish: keep the pea gravel look or go smooth
- Safety and supplies (don’t skip this part)
- Step-by-step: resurface pea gravel concrete and keep the exposed-aggregate look
- Step 1: Check the weather and set your “no chaos” zone
- Step 2: Clean like you’re trying to impress a very picky inspector
- Step 3: Mechanically prep so the overlay can grip
- Step 4: Repair cracks, pits, and spalls (but keep your joints)
- Step 5: Prime/bond the surface
- Step 6: Mix the resurfacer in small batches (your arms will thank you)
- Step 7: Apply the overlay and work in sections
- Step 8: Seed/broadcast the pea gravel
- Step 9: Re-expose the aggregate (the make-or-break moment)
- Step 10: Cure and protect the surface
- Step 11: Seal for durability and easier cleaning
- Step-by-step: resurface and go smooth (simpler alternative)
- Example: planning materials for a real patio
- Common problems (and how to avoid them)
- DIY or hire a pro?
- of real-world resurfacing experience (what people don’t tell you)
- Conclusion
If your pea gravel concrete used to look like a classy “fancy driveway/patio” moment and now looks like a tired oatmeal cookie, you’re not alone. Exposed-aggregate (pea gravel) concrete is tough, but it’s not immune to time, weather, pool chemicals, de-icing salts, or that one heavy planter you “temporarily” dragged across it in 2019.
The good news: if the slab itself is still solid, you can resurface it and bring back a clean, refreshed finisheither by keeping the pea gravel look (the goal for most people) or by switching to a smoother overlay. The not-so-fun news: the result is 90% prep, 10% technique, and 100% refusing to cut corners.
What “pea gravel concrete” usually means
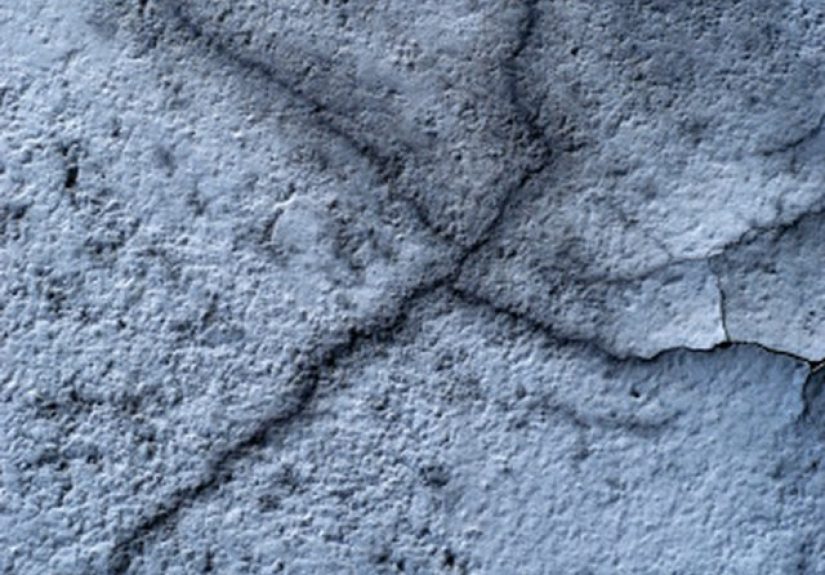
Most of the time, “pea gravel concrete” refers to exposed aggregate concrete: a normal concrete slab whose top paste layer has been removed or worn away so the rounded stones (often pea gravel) are visible. It’s popular because it’s slip-resistant, hides minor dirt better than smooth concrete, and looks more decorative than plain gray.
Over time, the surface can develop:
- Scaling (flaking top layer), often from freeze-thaw cycles or de-icers
- Spalling/pitting (craters and rough patches)
- Loose stones (aggregate popping out)
- Discoloration (UV, algae, rust stains, or old sealer failure)
- Worn-down texture (looks “overexposed” and feels harsh)
First: decide if resurfacing is the right fix
Resurfacing works best when the slab is structurally sound and your problems are mostly on the surface. You’re a good candidate if:
- Cracks are hairline to small (not wide, moving, or offset)
- No major settling, heaving, or “one side is auditioning to become a ramp”
- Spalls and pits are shallow enough to patch
- The concrete isn’t crumbling when you scrape it with a screwdriver
Resurfacing is usually not the best answer if you have big structural cracks, repeated heaving/settlement, deep deterioration, or drainage problems that keep water sitting on the slab. In those cases, an overlay can fail because the slab underneath keeps moving or breaking down.
Pick your finish: keep the pea gravel look or go smooth
Option A: Keep the pea gravel look (most common)
This is the “make it look like exposed aggregate again” approach. Typically you apply a thin cement-based overlay, then seed/broadcast pea gravel into it and re-expose the stones by washing/brushing at the right moment (timing matters) or by using a more advanced process. This is the closest to a true “pea gravel concrete resurfacing” makeover.
Option B: Overlay but change the look (simpler)
If you’re tired of the pebbly texture or you want a new style, you can apply a polymer-modified resurfacer to create a broom finish, skip-trowel texture, or smooth surface. It’s often easier than trying to perfectly match exposed aggregate.
Option C: Clean + re-seal (best for mild wear)
If your surface is basically fine but looks dull, stained, or patchy from old sealer, you may only need deep cleaning and a new sealer. It’s not “resurfacing,” but it can be a huge visual upgrade with less risk.
Safety and supplies (don’t skip this part)
Concrete work is not complicated, but it can be messy and unforgiving. Protect yourself and your project.
Safety basics
- Wear eye protection and gloves (cement is irritating to skin)
- Use a dust mask/respirator for grinding or mixing dry products
- Hearing protection for grinders and pressure washers
- Non-slip shoeswet concrete + slurry = surprise skating rink
Tools you’ll likely want
- Pressure washer (or rental)
- Stiff push broom and scrub brush
- Degreaser/concrete cleaner (as needed)
- Angle grinder with a concrete grinding wheel (often worth it)
- Mixing bucket(s) and a drill with a mixing paddle
- Concrete trowel, finishing trowel, and/or squeegee
- Edger (hand edger helps keep borders neat)
- Painter’s tape/plastic for masking and protection
Materials
- Concrete patch/repair material for chips and spalls
- Concrete bonding agent/primer (match it to your overlay system)
- Polymer-modified concrete resurfacer or overlay mix
- Clean pea gravel (washed, consistent size) if you’re recreating exposed aggregate
- Concrete sealer (penetrating or film-forming, depending on your look and location)
Step-by-step: resurface pea gravel concrete and keep the exposed-aggregate look
This is the method people usually mean when they ask about “resurfacing pea gravel concrete.” Plan a weekend, pick a good weather window, and aim for a small test area first.
Step 1: Check the weather and set your “no chaos” zone
Most cement-based resurfacers prefer mild temperatures and no rain while the surface sets. Avoid blazing-hot afternoons and windy days if you canthose conditions can make overlays dry too fast and crack or debond.
Mask off nearby walls, doors, and landscaping. Put up barriers so nobody walks across your fresh work. (Yes, this includes pets. They are innocent. They are also chaos.)
Step 2: Clean like you’re trying to impress a very picky inspector
Bond failure almost always starts with a dirty surface. Remove:
- Dirt, algae, and loose debris
- Oil/grease stains (use a degreaser and rinse well)
- Flaking paint or old coatings
- Failing sealer (you may need mechanical removal)
Pressure washing helps, but it doesn’t replace mechanical prep if the surface is sealed, glossy, or contaminated. If water beads up like it’s on a freshly waxed car, you need more prep.
Step 3: Mechanically prep so the overlay can grip
For many overlays, especially outdoors, a light grind is the difference between “lasting repair” and “peels off like a sunburn.” The goal is a clean, sound surface with enough texture for the new material to bite into.
Focus on:
- Removing weak/crumbly areas
- Knocking down sharp high spots
- Opening up the surface so primer and overlay can bond
Step 4: Repair cracks, pits, and spalls (but keep your joints)
Patch chips and spalled spots with a compatible repair mortar. For larger defects, rebuild the area first and allow it to cure appropriately before resurfacing.
Important: Don’t fill expansion or control joints with resurfacer. Joints exist to manage movement; if you lock them up, the concrete may crack somewhere else to “express itself.” If old joints are crumbling, clean them out and re-seal them after resurfacing.
Step 5: Prime/bond the surface
Many systems call for a bonding primer or bonding agent to improve adhesion and reduce pinholes. Apply it evenly per the manufacturer’s instructions. Some primers want the overlay placed while the primer is tacky; others want it to dry. Follow the directions for the exact products you’re using.
Step 6: Mix the resurfacer in small batches (your arms will thank you)
Resurfacers set faster than you thinkespecially in warm weather. Mix smaller batches so you can place them while they’re workable.
Target a smooth, lump-free consistency. The “right” thickness depends on the product and your plan:
- Thicker for filling deeper texture and embedding pea gravel
- Thinner for a skim coat or broomable topping
Step 7: Apply the overlay and work in sections
Start at the far corner and work backward so you don’t paint yourself into a literal corner. Spread the overlay with a squeegee or trowel to a consistent thickness. Keep a wet edgestopping too long creates lap lines (the concrete version of “you can see my foundation.”)
Step 8: Seed/broadcast the pea gravel
While the overlay is still fresh, evenly sprinkle clean pea gravel across the surface. Your goal is uniform coverage without big piles. Then gently embed the stones using a float or trowel so they sit securely in the overlay.
Timing tip: If you broadcast too early, the stones can sink. Too late, they won’t bond well. Do a small test section first to learn the “sweet spot” for your mix, temperature, and working speed.
Step 9: Re-expose the aggregate (the make-or-break moment)
To recreate exposed aggregate, you need to remove a thin layer of surface paste so the tops of the stones show. There are a few approaches, and which one is best depends on your product system and comfort level:
- Brush-and-wash method: Once the overlay firms up (often within hours), lightly scrub the surface with a stiff broom and rinse with water to reveal the stones. This requires careful timing and is best tested on a small area first.
- Gentle pressure wash later: Some DIYers wait until the next day and use a light pressure wash to expose the tops without blasting out stones. (Go easy. The goal is “reveal,” not “excavate.”)
- Advanced methods: Specialty products and processes can make exposure more consistent on larger jobs, but they’re better suited to experienced installers.
Stop exposing when you like the look. You don’t need to uncover half the stonetoo deep exposure can weaken the surface and feel harsh underfoot.
Step 10: Cure and protect the surface
Fresh cement-based overlays need time to gain strength. Protect the area from rain, sprinklers, and traffic. In hot, dry, or windy conditions, some systems recommend light misting to prevent rapid drying. Always follow the specific curing guidance for your resurfacer.
Step 11: Seal for durability and easier cleaning
Sealer isn’t just for looksit helps resist water intrusion, stains, and surface wear. For exposed aggregate, many people prefer a sealer that enhances color (“wet look”) without turning the surface into a slippery mess.
Practical tips:
- Make sure the overlay is cured enough before sealing (check your product instructions)
- Apply thin, even coats rather than one thick coat
- Consider a slip-resistant additive if the area gets wet (pool decks, shaded patios)
Step-by-step: resurface and go smooth (simpler alternative)
If you don’t care about keeping the pea gravel look, a standard resurfacer overlay can be easier and more consistent for DIY.
- Clean and mechanically prep (same as above)
- Patch defects and keep joints clear
- Prime/bond if required
- Apply resurfacer with a squeegee/trowel
- Finish texture (broom for grip, trowel for smoother)
- Cure and seal
This option is great for walkways and patios where you want a clean, uniform look and less “timing drama.”
Example: planning materials for a real patio
Let’s say you have a 12 ft × 16 ft patio:
- Area: 192 square feet
- Overlay thickness: roughly 1/8 inch (common when you need enough body to hold aggregate)
Most resurfacers list coverage by thickness. If your product covers about 65 sq ft at 1/16 inch, that’s roughly 32.5 sq ft at 1/8 inch. For 192 sq ft, you’d estimate around 6 bags (and it’s smart to round up for waste, texture, and test sections).
Pea gravel amount: This varies widely by stone size, how dense you want the exposure, and whether you’re aiming for a lightly exposed “salt-and-pepper” look or a more heavily seeded finish. Buy extra so you can test a small section and still have enough to keep the final look consistent.
Common problems (and how to avoid them)
“My overlay is peeling.”
Most often: poor surface prep, contaminants, or skipping a required primer. Fix requires removing loose overlay, re-prepping, and reapplying.
“I can see lines where sections overlap.”
Work in smaller sections, keep a wet edge, and maintain consistent mix and thickness. Hot or windy weather makes lap lines worse because the material skins over fast.
“The stones sank.”
Broadcasted too early or overlay was too wet. Next time, wait until the overlay starts to tighten up, or adjust your mix consistency within manufacturer limits.
“The stones popped out.”
Broadcasted too late, not embedded enough, or exposure was too aggressive. Be gentler when washing/pressure washing and don’t over-expose.
“It’s slippery after sealing.”
Some film-forming sealers can reduce traction. Use a sealer appropriate for exterior flatwork and consider slip-resistant additives, especially around pools and shaded areas.
DIY or hire a pro?
DIY resurfacing can be very doable on small-to-medium areas if you’re careful and patient. Consider hiring a pro if:
- You have a large driveway and want uniform exposed aggregate (timing is tough on big pours)
- You need major grinding/repair or suspect structural problems
- You want specialty finishes, color, or high-end overlay systems
Either way, the rules don’t change: prep thoroughly, follow product instructions, and don’t rush curing.
of real-world resurfacing experience (what people don’t tell you)
Here’s the part nobody puts on the front of the bucket: resurfacing pea gravel concrete is a “small decisions add up” project. The difference between a finish that lasts years and one that flakes off by next season often comes down to a few moments that feel minor while you’re working.
Experience #1: The surface can look clean and still be dirty. I’ve seen slabs that were pressure-washed until they looked brand newyet the overlay still debonded in sheets. Why? Invisible contaminants: old sealer residues, sunscreen and pool chemicals on decks, or oil that soaked into the surface months ago. The fix is rarely “wash harder.” It’s usually “prep smarter”: degrease, rinse thoroughly, and mechanically roughen the surface so you’re bonding to solid concrete, not to mystery residue.
Experience #2: Working time shrinks when you’re not looking. A resurfacer that feels perfectly workable in the bucket can go from smooth to stubborn in minutes once it hits warm concrete. People panic, add extra water, and the mix gets weaker and harder to control. A better strategy is boring-but-effective: mix smaller batches, stage your tools, and have everything prepped before you start. The job becomes calmer immediatelylike swapping a fire drill for a checklist.
Experience #3: “Even coverage” is a skill, not a vibe. When you seed pea gravel, it’s easy to unintentionally make “heavy zones” (gravel piles) and “bald zones” (not enough stone). Your eyes get used to whatever you’re doing, which is how you end up with a patio that looks like a constellation map. The trick is to seed with a repeatable motion and constantly step back to check uniformity. If you’re doing a bigger area, pre-measure gravel into buckets so each section gets a consistent amount.
Experience #4: Exposing aggregate is the moment you earn your snack. If you wash too soon, you’ll smear paste and pull stones loose. Too late, and you’ll fight a surface that doesn’t want to reveal anything without brute force. The “sweet spot” depends on the mix, the weather, and the slab temperature. That’s why a test patch is so powerful. Do a 2×2-foot section first, time the set, and learn how it behaves. It feels slow in the moment, but it saves you from redoing 200 square feet.
Experience #5: Sealer choices change everything. Some sealers make exposed aggregate look rich and glossy. Others keep it natural. Some add protection but also reduce traction. The best results come from matching the sealer to the space: pool deck? prioritize slip resistance. Driveway? prioritize durability and stain resistance. Shady patio with algae? prioritize breathability and easy cleaning. The “perfect” sealer is the one that fits the way you actually live on the surfacenot the one that looks best in a single photo right after application.
If you take one lesson from all this: prep thoroughly and test small. Pea gravel concrete can absolutely be resurfaced beautifully, but it rewards patience like it’s handing out trophies for good behavior.
Conclusion
Resurfacing pea gravel (exposed aggregate) concrete is one of those projects that looks intimidating until you break it into phases: evaluate the slab, clean and prep properly, repair defects, bond/prime as needed, apply a compatible overlay, and finish by re-exposing and sealing. If you want the exposed-aggregate look, the two key skills are even seeding and good timing during exposure. Do a small test patch, follow product directions, and treat surface prep like it’s the main eventbecause it is.


