Table of Contents >> Show >> Hide
- Why Make a Custom L-shaped Shower Curtain Rod?
- Best Materials for a DIY L-shaped Shower Curtain Rod
- Tools You Will Need
- How to Measure for an L-shaped Shower Curtain Rod
- Step-by-Step: How to Make an L-shaped Shower Curtain Rod
- Step 1: Choose Your Rod Design
- Step 2: Buy or Cut the Pipe
- Step 3: Dry-Fit the Assembly
- Step 4: Mark the Mounting Points
- Step 5: Locate Studs if Possible
- Step 6: Drill Carefully
- Step 7: Install the Wall Mounts
- Step 8: Add the Ceiling Support
- Step 9: Assemble the Rod in Place
- Step 10: Hang the Curtain and Test It
- How to Choose the Right Curtain for an L-shaped Rod
- Common Mistakes to Avoid
- Design Upgrades That Make It Look Custom
- Real-World Experiences and Lessons from Making an L-shaped Shower Curtain Rod
- Final Thoughts
If your shower lives in a corner, has a weird footprint, or seems determined to splash water onto the bathroom floor like it is auditioning for a water park, an L-shaped shower curtain rod can be a smart fix. The good news is that you do not need a machine shop, a welding torch, or the patience of a saint to make one. In many cases, you can build a sturdy custom rod with standard pipe or tubing, a 90-degree connector, solid mounting hardware, and a little measuring discipline. That last part matters, because in DIY, “close enough” is often how you end up buying a second curtain and muttering at the wall.
This guide walks you through how to make an L-shaped shower curtain rod that looks good, works hard, and does not sag like a tired noodle two weeks after installation. We will cover materials, measuring, mounting, tile-drilling tips, curtain sizing, and the small design upgrades that make the finished setup look intentional instead of improvised.
Why Make a Custom L-shaped Shower Curtain Rod?
A custom L-shaped shower curtain rod makes sense when a standard straight rod just cannot do the job. Corner showers, walk-in showers with two open sides, and tub-shower combos with an awkward return wall often need a rod that turns a corner. Store-bought corner rods exist, but making your own lets you control the size, finish, strength, and support points.
It can also be a budget-friendly move. If you build the rod from galvanized pipe or corrosion-resistant tubing, you get a tough, bathroom-friendly setup without paying premium pricing for a specialty piece. Better yet, you can size it to your exact shower opening instead of forcing your shower to cooperate with whatever the box store thinks is “standard.” Your shower did not ask to be average, and frankly, neither did you.
Best Materials for a DIY L-shaped Shower Curtain Rod
You have a few solid options, but for most DIYers, the easiest material is galvanized steel pipe. It is widely available, strong, threaded on many stock pieces, and easy to connect with standard elbows and flanges. A galvanized finish also holds up well in humid bathrooms.
Another option is EMT conduit, which is lightweight, coated for corrosion resistance, and nicely streamlined. It can look cleaner and lighter than plumbing pipe, but it is usually a little trickier for beginners because the fittings and mounting details are less plug-and-play for decorative bathroom use.
For a simple, durable build, these are the most practical materials:
- Two straight lengths of galvanized pipe or corrosion-resistant metal tubing
- One 90-degree elbow or corner connector
- Two wall flanges or mounting brackets
- One ceiling support drop for the corner or longest span
- Wall anchors and screws rated for your wall type
- Shower curtain rings or hooks
- Primer and metal spray paint if you want a custom finish
If you want the easiest path, buy galvanized pipe pieces that are already threaded, then join them with a threaded elbow. If you want a more polished look, spray-paint the assembled rod matte black, brushed gold, or oil-rubbed bronze after lightly sanding and cleaning it.
Tools You Will Need
- Tape measure
- Pencil
- Level
- Stud finder
- Drill
- Glass-and-tile or masonry bit if drilling through tile
- Hammer
- Screwdriver
- Pipe wrench or adjustable wrench
- Painter’s tape
- Safety glasses
If the pipe is not pre-cut, you may also need a pipe cutter or a trip to the hardware store, where the cutting and threading can often be done for you. Let the store do the hard part if possible. There is no prize for wrestling steel pipe in your driveway.
How to Measure for an L-shaped Shower Curtain Rod
Good measurements are the whole game here. Before buying parts, measure the two sides your rod will cover. For a corner shower, that usually means measuring from wall to wall on one side, then wall to wall on the adjoining side. Write both numbers down clearly. Not “about 34-ish.” Real numbers. Your future self will be grateful.
1. Measure Each Leg of the L
Measure the first wall span, then the second wall span. If your shower opening is slightly out of square, measure at the height where the rod will actually be installed. Bathrooms are sneaky that way.
2. Decide on the Mounting Height
A standard shower curtain is often 72 inches long, so the rod is commonly mounted at least 72 inches from the floor. You can also mount it higher for a taller, more custom look, especially if you plan to use an extra-long curtain. Just make sure the curtain hangs inside the shower area and does not drag on the floor, because wet fabric on the floor is basically a mildew internship.
3. Account for Fittings
If you are using threaded pipe, remember that elbows and flanges add length. The smartest move is to dry-fit everything on the floor before drilling a single hole. That lets you confirm your finished dimensions and adjust if needed.
4. Plan for Support
An L-shaped rod usually benefits from a ceiling support near the corner, especially if the spans are long or the curtain is heavy. Without it, even strong metal can flex over time, and that graceful custom rod starts looking like it needs coffee and a day off.
Step-by-Step: How to Make an L-shaped Shower Curtain Rod
Step 1: Choose Your Rod Design
The most beginner-friendly design is a two-piece galvanized pipe rod connected by a 90-degree elbow, anchored to both walls, and supported from the ceiling at the corner. This style is strong, customizable, and easy to assemble with standard parts.
Step 2: Buy or Cut the Pipe
Purchase two pipe sections sized to your measurements, minus the added depth of the elbow and flanges. If you are using galvanized pipe, ask the store to cut and thread the pieces to length. If you are using tubing instead, you will need a compatible corner connector and end brackets.
Step 3: Dry-Fit the Assembly
Assemble the two pipe pieces, elbow, and flanges on the floor. Confirm the finished shape and dimensions. This is the point where you discover problems while standing comfortably, not while perched on a ladder with a drill in one hand and regret in the other.
Step 4: Mark the Mounting Points
Use a tape measure and level to mark the height on both walls. Make sure the rod will sit level and parallel to the floor. Hold the flanges or brackets in place and mark the screw holes with a pencil.
Step 5: Locate Studs if Possible
Mounting into studs is always ideal. If that is not possible, use strong anchors rated for your wall material. On tile walls, drill carefully and use anchors made for tile or masonry where appropriate.
Step 6: Drill Carefully
If you are drilling into tile, place painter’s tape over the mark first so the bit does not wander. Start slowly and do not force the drill. If you can mount into drywall just outside the tiled area, that is often easier. When tile drilling is unavoidable, use the proper bit and keep your pressure controlled.
Step 7: Install the Wall Mounts
Drill the holes, insert anchors if needed, and screw the flanges or mounting brackets securely to the wall. They should feel firm and flush, not wobbly or dramatic.
Step 8: Add the Ceiling Support
Install a short support drop from the ceiling to the corner of the L or just beside it. This can be made from a short matching pipe section plus a ceiling flange and connector. The support keeps the rod from sagging and makes the whole setup feel much more permanent and professional.
Step 9: Assemble the Rod in Place
Thread or connect the rod pieces together and secure them into the wall mounts. If your system uses set screws, tighten them evenly. Double-check that the rod is level and stable before hanging anything on it.
Step 10: Hang the Curtain and Test It
Slide the curtain rings onto the rod before final assembly if your design requires it. Then hang your curtain or liner and test the glide. Open and close it a few times. Tug gently. If anything shifts, fix it now rather than after the first hot shower.
How to Choose the Right Curtain for an L-shaped Rod
This is where many DIY projects go slightly sideways. You build a beautiful rod, then hang a curtain that is too short, too narrow, or determined to puddle like a Victorian gown. For the cleanest look, measure the total rod length and the distance from the rod to the floor. A liner should be wide enough to cover the opening and short enough to stay off the floor.
In many L-shaped shower setups, you will either use one extra-wide curtain or two coordinated curtains that meet at the corner. If you want a fuller, less skimpy look, choose a curtain that gives you enough width rather than stretching it flat like a bed sheet caught in a storm. If you want the bathroom to look taller, use an extra-long curtain and mount the rod higher, close to the ceiling.
Common Mistakes to Avoid
Skipping the Ceiling Support
This is the classic mistake. A corner rod without support may look fine on day one and noticeably droopy by day thirty. Add the support.
Using Weak Anchors
A wet curtain weighs more than you think, and daily tugging adds stress. Use sturdy anchors or mount into studs whenever possible.
Forgetting Curtain Rings During Assembly
If your rod is a closed loop or permanently assembled, remember to add the rings first. Otherwise, you will get the special joy of taking it all back apart.
Mounting the Rod Too Low
A low rod can make the room feel cramped. It can also leave the curtain brushing the tub edge awkwardly. Standard height works, but a slightly higher mount often looks more intentional.
Ignoring the Bathroom Finish
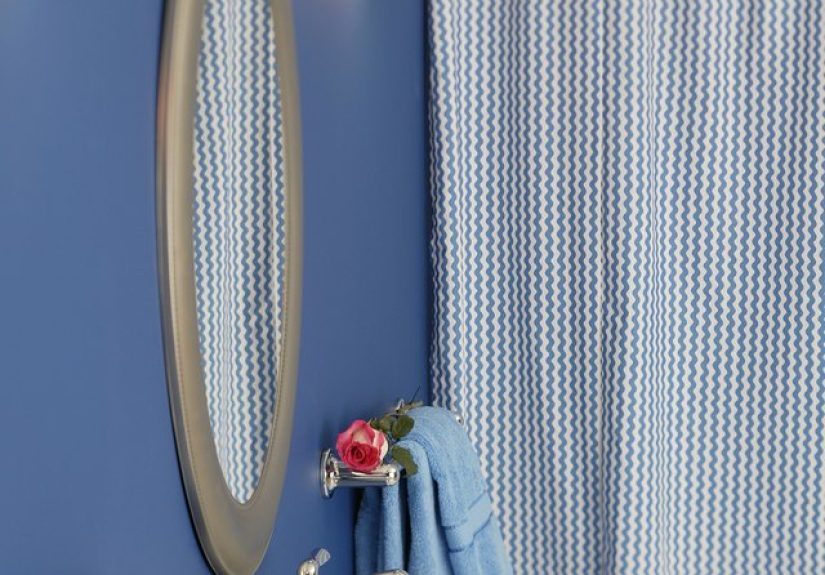
Even a DIY rod should look like it belongs in the room. Match the finish to your faucet, showerhead, cabinet pulls, or mirror frame for a cleaner design story.
Design Upgrades That Make It Look Custom
If you want your DIY L-shaped shower curtain rod to look less “weekend experiment” and more “nice bathroom choice,” a few upgrades help a lot:
- Paint the rod in a finish that matches your bathroom hardware
- Use metal curtain rings with a smoother glide
- Choose a curtain with reinforced grommets
- Raise the rod and use a longer curtain for a taller look
- Use a weighted liner to keep water where it belongs
These are small details, but together they make the project look finished instead of improvised. A bathroom notices everything.
Real-World Experiences and Lessons from Making an L-shaped Shower Curtain Rod
One of the most common experiences people have with this project is realizing that the rod itself is actually the easy part. The part that separates a solid result from a slightly cursed one is planning. Plenty of DIYers start with confidence, buy two pieces of pipe and an elbow, and assume the rest will sort itself out. Then they get home, hold the parts up to the shower, and discover that one wall is not square, the tile line is slightly off, and the curtain they already bought is about six inches too short. The lesson is simple: measure first, shop second, brag later.
Another common experience is the great tile-drilling anxiety. If you have never drilled tile before, the idea sounds like a quick route to cracking something expensive. In practice, it is manageable when you slow down, tape the spot, use the right bit, and let the drill do the work. People who rush usually have the rougher experience. People who take five extra minutes usually end up wondering why they were so nervous in the first place. Bathroom projects love patience. They do not reward bravado.
Support placement is another area where experience teaches fast. Many first-time builders assume heavy metal pipe will stay perfectly straight on its own. Then the curtain goes up, everyone starts yanking it open and closed twice a day, and gravity begins its quiet little campaign. A ceiling support changes everything. It makes the rod feel intentional, stronger, and more stable. It also gives the project that built-in look people want when they say they are “just doing a quick bathroom update.”
There is also the aesthetic side of the experience, which surprises people in a good way. A custom L-shaped rod can genuinely improve the room. If you raise it a bit and hang a longer curtain, the bathroom often feels taller and cleaner. If you match the finish to your faucet or shower trim, the rod stops looking like hardware and starts reading as part of the design. That is a pretty satisfying outcome for a project that starts with pipe fittings and a drill.
And then there is the final real-world truth: you will probably make one tiny mistake, fix it, and then tell everyone the project was easy. That is how DIY works. Maybe you forget to slide on the rings before tightening the last connection. Maybe one anchor hole needs to be widened. Maybe you repaint the rod because the first color looked more “haunted bronze” than “matte black.” None of that means the project failed. It means you made a custom shower curtain rod the normal way, which is to say with one or two corrections and a growing sense that you could probably do this again in half the time. By the end, you get a practical upgrade, a more functional shower, and the deeply underrated pleasure of solving a weird bathroom problem with your own hands.
Final Thoughts
If you need a custom corner shower solution, learning how to make an L-shaped shower curtain rod is absolutely doable. The smartest approach is to keep the build simple: use sturdy metal, measure both spans carefully, mount it securely, and add a ceiling support so the rod stays straight and useful for the long haul. Once the curtain goes up and the water stays where it belongs, the project starts feeling less like a DIY task and more like a quiet daily victory.
And honestly, that is the beauty of a good bathroom upgrade. It does not need to be flashy. It just needs to work every morning without drama.


