Table of Contents >> Show >> Hide
- Before You Start: Know What You’re Repairing
- What You’ll Need
- How to Fix Cigarette Burns in a Car Seat: 14 Steps
- Step 1: Check the size, depth, and seat material
- Step 2: Make sure the burn is not in a side-airbag area
- Step 3: Vacuum and clean the area first
- Step 4: Trim away the charred edges
- Step 5: Decide whether you need a simple surface fix or a backed repair
- Step 6: Rebuild missing padding only if needed
- Step 7: Insert the backing patch for deeper holes
- Step 8: Match the texture and color before you glue anything permanent
- Step 9: Apply adhesive or filler in thin layers
- Step 10: Add fibers, patch material, or repair compound to blend the surface
- Step 11: Shape the repair to match the original surface
- Step 12: Recolor leather or vinyl if needed
- Step 13: Let the repair cure completely
- Step 14: Protect the seat and monitor the repair
- Material-Specific Tips That Actually Matter
- Common Mistakes That Make a Burn Repair Look Worse
- When You Should Hire a Professional
- Common Repair Experiences and Real-World Lessons
- Final Thoughts
- SEO Tags
A cigarette burn in a car seat is one of those tiny disasters that somehow feels bigger than it is. It is small, yes. It is also right there, staring at you every time you open the door like your upholstery is judging your life choices. The good news is that many minor burns can be repaired at home if you match the method to the seat material and avoid turning a pinhole into a full-blown upholstery tragedy.
This guide walks you through how to fix cigarette burns in a car seat in 14 practical steps. It covers cloth, leather, and vinyl seats, explains when a DIY fix works, and tells you when to stop being brave and call an upholstery pro. By the end, you should know how to make that burn far less visible without making your seat look like a craft project gone rogue.
Before You Start: Know What You’re Repairing
Not every cigarette burn is the same. A tiny surface singe on a cloth seat is usually much easier to repair than a deep burn that has chewed through the upholstery and into the padding. Likewise, leather car seat burn repair requires a different approach than fixing a cloth or velour seat.
One more thing matters even more than the material: location. If the damage is on the outside edge of a front seat, near a seam, or anywhere a side airbag may deploy, do not treat this like a casual arts-and-crafts moment. Repairs in airbag-related seat areas can affect safety systems. In that case, get advice from a dealer or qualified upholstery specialist.
What You’ll Need
Your exact supplies depend on the seat material, but most repairs use some version of the following:
- Vacuum or soft brush
- Mild upholstery or leather cleaner
- Microfiber cloths
- Small scissors, precision snips, or a scalpel
- Tweezers
- Backing fabric or sub-patch for deeper holes
- Fabric adhesive, leather/vinyl adhesive, or kit adhesive
- Matching fibers or repair compound
- Fine sandpaper for leather or vinyl
- Colorant or dye for leather and vinyl
- Gloves and patience
That last one is not sold separately, unfortunately.
How to Fix Cigarette Burns in a Car Seat: 14 Steps
-
Step 1: Check the size, depth, and seat material
Start by figuring out whether the burn is a shallow singe, a true hole, or a crater with missing padding. Also identify the surface: cloth, velour, leather, or vinyl. Small cloth burns are usually the most DIY-friendly. Leather and vinyl repairs are also possible, but they require more careful filling, texturing, and color matching.
-
Step 2: Make sure the burn is not in a side-airbag area
If the burn sits on a front seat-back seam, outer bolster, or another area that may be tied to a side airbag, stop here and seek professional help. A clean-looking repair is nice. A functioning safety system is nicer.
-
Step 3: Vacuum and clean the area first
Remove loose ash, dust, and crumbly material with a vacuum or soft brush. Then clean the surrounding upholstery so adhesive or filler can bond properly. For cloth, use a light upholstery cleaner and a damp microfiber cloth. For leather or vinyl, use a cleaner intended for those materials. Let the area dry completely before moving on.
-
Step 4: Trim away the charred edges
This is where the repair starts to become a repair instead of a cover-up. Carefully snip or shave off blackened, hardened, or melted fibers around the burn. Remove only the damaged material. If you keep cutting like you are pruning a hedge, the hole will grow and your mood will shrink. Work slowly.
-
Step 5: Decide whether you need a simple surface fix or a backed repair
If the burn is tiny and the seat structure underneath is intact, you may be able to use adhesive and matching fibers alone on cloth seats, or a small amount of filler on leather or vinyl. If the hole is larger, sunken, or goes through the surface layer, add a backing patch underneath before filling. Think of backing as giving the repair something solid to sit on instead of hoping glue will perform miracles.
-
Step 6: Rebuild missing padding only if needed
If the burn has eaten into the foam or padding and left a dip, lightly rebuild that depression before finishing the surface. Do not overstuff it. A raised repair is just a burn with extra confidence. Use only a small amount of compatible fill material or the padding method recommended by your repair kit.
-
Step 7: Insert the backing patch for deeper holes
For larger holes, cut a rounded piece of backing fabric or sub-patch slightly bigger than the damaged area. Use tweezers to slide it underneath the surface so it overlaps the edges. This gives the adhesive and repair material support from below. On leather and vinyl, this step is especially helpful when the hole has fully penetrated the surface.
-
Step 8: Match the texture and color before you glue anything permanent
This step saves regret. On cloth seats, collect matching fibers from a hidden spot if you can do so without creating a second problem. Under-seat fabric, hidden trim allowances, or spare matching material can help. On leather and vinyl, compare your repair compound and colorant before application. Test discreetly if the kit allows it.
-
Step 9: Apply adhesive or filler in thin layers
For cloth seats, apply a small amount of fabric adhesive to the damaged area or onto the backing. For leather and vinyl, use flexible filler or the kit’s repair compound. Thin layers work better than one heavy blob. A giant glob might feel efficient, but it usually dries unevenly, shrinks badly, and looks like the seat caught a second, more artistic fire.
-
Step 10: Add fibers, patch material, or repair compound to blend the surface
For cloth car seat repair, sprinkle or place matching fibers onto the adhesive until the burn hole disappears into the surrounding weave. Press gently so the fibers seat into the glue. For leather or vinyl, continue building the filler in thin coats until it sits just below flush with the surrounding material.
-
Step 11: Shape the repair to match the original surface
Once the material begins to set, refine the shape. On cloth, this means evening out the fibers and mimicking the original nap or direction of the upholstery. On leather and vinyl, it means smoothing the filler and lightly sanding when fully dry. Your goal is not perfection under a microscope. Your goal is invisibility from normal human distance, which is how most car seats are judged unless you give rides to upholstery inspectors.
-
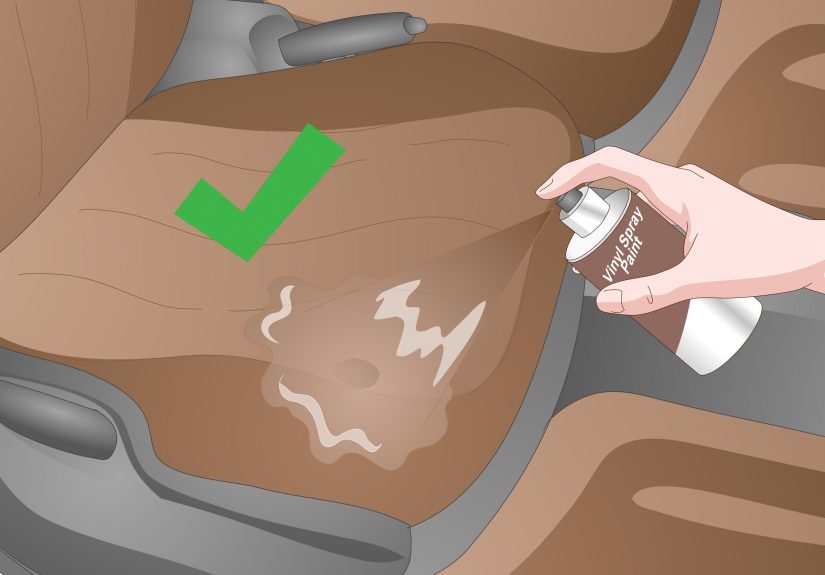
Step 12: Recolor leather or vinyl if needed
Leather and vinyl repairs almost always look better with a color-matched finish. Apply light coats of colorant rather than one thick coat. Let each layer flash or dry according to the kit directions. Build up color gradually. This helps the repaired area blend with the rest of the seat and reduces the odds of peeling, cracking, or a “freshly painted pumpkin” effect.
-
Step 13: Let the repair cure completely
Do not sit on it early just because it looks dry. Some repairs need several hours, and many kits recommend a full day before regular use. Premature sitting can flatten fibers, distort the surface, or pull uncured filler out of place. The repair should be fully set before you test it with weight, friction, or your car keys.
-
Step 14: Protect the seat and monitor the repair
After the fix cures, keep the area clean and avoid harsh scrubbing. A quality seat cover can help prevent future burns, especially if this is a work truck, older commuter car, or a vehicle with upholstery that has already seen too much of life. Check the repair over the next few weeks. If edges lift, the color shifts, or the padding sinks, it may be time for a professional spot repair.
Material-Specific Tips That Actually Matter
Cloth and Velour Seats
These repairs are usually about replacing lost texture. The biggest challenge is matching the weave, nap, and color. Tiny repairs often look surprisingly good when the surrounding area is clean and the fiber match is close. If the seat has a pattern, you may need to fake that pattern gently with the repair tool before the adhesive cures.
Leather Seats
Leather burns tend to harden, shrink, and wrinkle the damaged area. That means trimming and backing are often more important than they are on cloth. A flexible filler is essential because car seats move, compress, and flex every time you get in and out. Stiff filler may crack later.
Vinyl Seats
Vinyl repair is similar to leather repair in overall sequence, but the finish and texture matter a lot. A kit with grain paper and color-matching compound usually gives a better result than a random glue-and-hope strategy.
Common Mistakes That Make a Burn Repair Look Worse
- Cutting away too much material
- Skipping the cleaning step
- Using too much glue or filler at once
- Not supporting deeper holes with a backing patch
- Ignoring color and texture match
- Using the seat before full cure time
- Attempting a DIY repair near airbag-related seams
When You Should Hire a Professional
DIY is great when the burn is small, the seat material is straightforward, and the damage is nowhere near safety components. But a pro is the better move when:
- The burn is larger than a small coin
- The foam is badly damaged
- The seat has perforated leather or a complex pattern
- The repair is on a visible bolster or premium interior panel
- The damage is near a seat seam tied to airbags
- You want the closest thing to an invisible repair
In many cases, a professional car seat burn repair costs much less than replacing the entire seat cover. A small cloth repair might be manageable on a budget, while deep leather damage, specialty color matching, or full reupholstery naturally costs more.
Common Repair Experiences and Real-World Lessons
One of the most common experiences people have with fixing cigarette burns in a car seat is underestimating how small the actual repair area should be. A person sees a black dot, starts trimming aggressively, and suddenly turns a tiny burn into a repair the size of a quarter. The best outcomes usually come from slow, precise work. The people who are happiest with their results are often the ones who treat the project like detail work rather than demolition.
Another pattern shows up with cloth seats: many first-time DIYers assume color is the hard part, but texture is usually the real challenge. Even when the shade is close, a repair can still stand out if the fibers sit flat while the surrounding seat has a raised nap, or if the original fabric has a directional look. People who take a few extra minutes to mimic the seat’s texture usually get much better-looking results. In other words, a nearly perfect beige still looks wrong if it is a completely different kind of beige.
Leather seat repairs tend to teach a different lesson. Most people do fine with the cleaning and trimming, but then get impatient during the filler stage. They apply too much, do not let layers dry fully, and wind up with a repair that looks smooth at first and lumpy later. The better experiences usually come from building the surface gradually, sanding carefully, and then using light, controlled coats of colorant. The repair may not vanish completely, but it can become hard to notice unless someone is actively searching for it.
A lot of drivers also discover that the location of the burn matters almost as much as the burn itself. A tiny damage spot in the center of a seat cushion is often a reasonable DIY project. The same burn on an outer seat bolster or seam can become a no-go zone because of movement, friction, or safety-system concerns. This is where people often say they wish they had known sooner that “small” does not always mean “simple.” That is especially true in newer vehicles, where seats do a lot more than just provide a place to sit.
There is also the emotional side of the repair, which is oddly consistent. People start annoyed, move into cautious optimism, then hit a dramatic midpoint where they are convinced they have ruined the seat forever. After that, if they have used the right materials and let the repair cure properly, the seat often looks much better than expected. Not factory-new, maybe, but very respectable. The biggest win is often psychological: instead of noticing the burn every single day, they stop thinking about it at all. That is a pretty solid definition of success for a small interior repair.
Finally, many car owners come away from the process with the same conclusion: prevention is far easier than restoration. After doing one burn repair, people suddenly become extremely interested in ashtrays, seat covers, window-down smoking habits, and keeping hot objects away from upholstery. Funny how one tiny crater can turn somebody into the world’s most devoted interior-care enthusiast.
Final Thoughts
Learning how to fix cigarette burns in a car seat is mostly about choosing the right level of repair. Tiny cloth burns can often be blended with adhesive and matching fibers. Leather and vinyl usually need backing, flexible filler, and color matching. The golden rule is simple: repair only the damage, not half the seat around it.
Take your time, respect airbag-related areas, and do not rush the cure. A careful repair can make a nasty little burn look dramatically better and save you from the cost of replacing the whole seat cover. That is a pretty good return for one afternoon of focused work and a temporary ban on sitting where the glue is drying.


