Table of Contents >> Show >> Hide
- First: What Do You Mean by “Bright Red Under Black Hair”?
- The Non-Negotiable Science: Why Bright Red Usually Needs a Lighter Base
- Before You Start: A Quick Safety & Reality Checklist
- Choosing Your Method: Three Ways to Get Red Under Black
- Step-by-Step: How to Get Bright Red Underlayer Hair (Peekaboo Red)
- What you’ll need
- Step 1: Map your underlayer (where the red will live)
- Step 2: Decide your brightness target (this controls how much you lighten)
- Step 3: Pre-lighten the underlayer (only if you want truly vivid red)
- Step 4: (Optional) Tone for a cleaner red
- Step 5: Apply the bright red dye
- Step 6: Rinse, condition, and keep the black hair black
- How to Keep Bright Red From Fading (Because Red Loves to Disappear)
- Common Problems (and How to Fix Them Without Panic-Texting Your Group Chat)
- When You Should Absolutely Consider a Professional
- Conclusion: Bright Red Under Black Hair Is a VibeIf You Respect the Process
- Experiences & Lessons People Commonly Share After Going Bright Red Under Black Hair (Extra )
Black hair is dramatic. Bright red hair is dramatic. Put them together and you’ve basically created a superhero cape… for your head.
Whether you want a hidden “peekaboo” red underlayer (so you can look professional until you flip your hair like a movie villain),
or you’re trying to get truly vivid red to show up on very dark hair, the game is the same:
you need a plan, a realistic target shade, and a strong commitment to not rushing chemistry.
This guide breaks down the safest, most reliable ways to get bright red underneath black hair, including
what “bright” actually requires, when you can skip bleach (rarely), and how to keep red from fading faster than your motivation to meal prep.
First: What Do You Mean by “Bright Red Under Black Hair”?
The title can mean two slightly different (but equally cool) goals. Pick yours before you buy anything:
Goal A: A bright red underlayer with black hair on top (peekaboo/hidden color)
- Look: Hair appears black when down; bright red flashes when you move, curl, braid, or tie it up.
- Best for: Anyone who wants drama with “I can still show up to work Monday” energy.
- Big advantage: You only lighten/dye the underlayer, so the overall damage risk is lower than a full-head transformation.
Goal B: Making very dark hair look bright red (overall or major sections)
- Look: Red is visible even when the hair is downthink cherry, ruby, or fire-engine red.
- Reality check: Truly bright red almost always requires pre-lightening on black hair. Without lift, you’ll likely get burgundy,
deep cherry, or a red sheen in sunlight (still pretty; just not “neon stoplight”).
The rest of this article focuses on the most common request: black on top, bright red underneathand it includes tips
for “my hair is so dark it eats color for breakfast” situations.
The Non-Negotiable Science: Why Bright Red Usually Needs a Lighter Base
Hair color works on levels. Black hair sits at the darkest end of the level system (often level 1–2).
Vivid fashion reds (the kind that look bright indoors, not just in direct sun) typically need a much lighter baseoften
around a level 7+ blonde for maximum pop.
Here’s the simplest way to think about it:
Hair dye is not paint. It’s more like stained glass. If the “glass” (your base color) is very dark,
light can’t bounce back through it with a bright red glow. Lighten the base and suddenly the red has room to scream (politely).
So… can you go bright red without bleach?
Sometimesif your “black hair” is actually dark brown, or if you’re using a high-lift permanent red formulated for dark hair,
or if you’re okay with a deep red instead of a bright one. But if your goal is genuinely vivid,
pre-lightening the section you want red is the most reliable route.
Before You Start: A Quick Safety & Reality Checklist
- Patch test: Always test for allergic reactions (especially with oxidative/permanent dyes).
- Strand test: Test on a small hidden section to confirm lift speed and final red result.
- History matters: “Virgin” hair (never dyed) lifts more predictably than hair colored with box black dye.
- Condition matters: If your hair is already brittle, stretching, or snapping, pause and repair first.
- When in doubt, go pro: Especially if you’ve used black box dye, henna, relaxers, or keratin treatments.
Choosing Your Method: Three Ways to Get Red Under Black
Method 1 (Most Popular): Lighten the underlayer, then apply a vivid red (semi-permanent/direct dye)
This is the go-to “peekaboo red” method. You lighten only the hair underneath, then apply a highly pigmented red.
Semi-permanent reds often feel like a tinted conditioning mask: no developer, less structural damage, and easy to refresh.
The tradeoff is that red fades faster than many shadesso maintenance is part of the deal.
Method 2: Use a high-lift permanent red designed for dark hair (developer-based)
Some permanent reds are marketed specifically for dark hair and can lift and deposit in one stepoften paired with higher-volume developer.
This can create visible red on dark hair, but “bright” is still limited without pre-lightening.
This method is more chemical commitment and can be harsher on hair/scalp if misused.
Method 3: Minimal lift + deep red (if you want subtle but noticeable)
If your goal is “red glow” rather than “comic-book crimson,” you can skip heavy lightening and aim for a deep cherry/burgundy underlayer.
It’s lower maintenance, more forgiving, and still looks amazing in curls, braids, and sunlight.
Step-by-Step: How to Get Bright Red Underlayer Hair (Peekaboo Red)
What you’ll need
- Gloves (multiple pairs if you’re messy, and you areno shame)
- Non-metal mixing bowl & tint brush
- Sectioning clips
- Petroleum jelly or barrier cream (for hairline/ears)
- Lightener (bleach) + developer (if going truly bright)
- Vivid red dye (semi-permanent/direct dye works great)
- Old towel + dark t-shirt you don’t love
- Gentle, sulfate-free color-safe shampoo & conditioner
Step 1: Map your underlayer (where the red will live)
Decide how “hidden” you want the red:
- Classic peekaboo: A horizontal section around the occipital area (the back “bump” of your head).
- Underneath everywhere: All hair below the parietal ridge (ear-to-ear line).
- Nape-only: The lowest section at the necklinesubtle until you put your hair up.
Clip all top hair away securely. You want the black layer completely isolated so it doesn’t get bleached, stained, or emotionally traumatized.
Step 2: Decide your brightness target (this controls how much you lighten)
Use this as a practical guide:
- Level 4–5 base (medium brown): You can often get a noticeable bright red with modest lift.
- Level 2–3 base (very dark brown): Expect to lift to orange/gold before bright red looks truly vivid.
- Level 1–2 base (black): For “bright bright” red, you usually need to lift the underlayer to a blonde level (often around 7+).
Translation: if your underlayer lifts only to orange, you’ll still get a gorgeous red, but it may read as deeper cherry rather than neon ruby.
Still cute. Just different.
Step 3: Pre-lighten the underlayer (only if you want truly vivid red)
Important: Bleaching is the step with the most risk. Follow product directions exactly. Don’t freestyle chemistry.
If your hair is already fragile, consider a salonor choose a deep red tint instead of bright.
General developer logic (varies by product/hair type):
- 20 volume: slower, gentler lift; often preferred for finer hair or more controlled lightening
- 30 volume: stronger lift for darker bases with healthy hair (higher irritation/damage risk)
- 40 volume: fastest/highest riskbest left to experienced users or professionals
Application tips for more even lift:
- Work in thin sections: Thick sections = patchy lift = patchy red.
- Saturate like you mean it: Dry spots lift unevenly and turn into “leopard print,” which is fun on pants, not hair.
- Mid-lengths first, roots later: Roots process faster because scalp heat speeds things up. Doing roots last helps avoid “hot roots.”
- Rinse as soon as your target level is reached: Leaving lightener on longer doesn’t “earn extra credit.”
If you can’t reach your target level in one session without pushing time limits, stop. Condition and reassess later.
Two careful sessions (spaced out) beat one reckless session followed by a dramatic haircut you didn’t schedule.
Step 4: (Optional) Tone for a cleaner red
Reds can look different depending on what your lift reveals underneath (gold, orange, etc.).
For most vivid reds, a warm base is finered and warmth are friends. But if the hair is extremely brassy or uneven,
a gentle toning/gloss step can help your final red look more intentional and less “I fought a traffic cone and lost.”
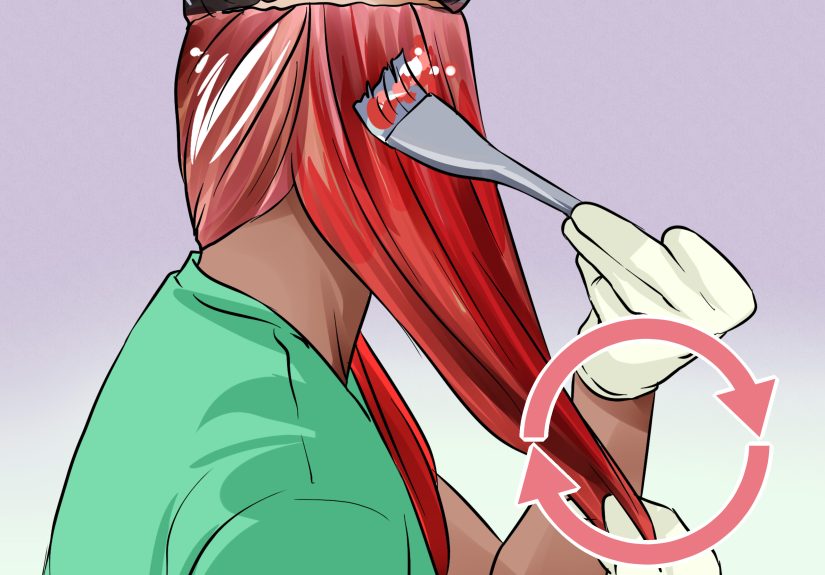
Step 5: Apply the bright red dye
For the brightest underlayer, a highly pigmented semi-permanent/direct dye is a common choice. The technique is simple:
apply on clean, dry or towel-dried hair (follow your dye’s directions), fully saturate, and let it process.
- Use enough product: Red needs full saturation. If you think you used enough, use 15% more.
- Comb through gently: Helps distribute color evenly without shredding freshly-lightened hair.
- Process time matters: Follow the instructions; many vivid dyes look better with longer processing (within safe guidance).
- Keep it contained: Foil or plastic wrap can prevent the red from transferring onto the black top layer.
Step 6: Rinse, condition, and keep the black hair black
Rinse the underlayer until the water runs mostly clear. Use cool-to-lukewarm water to reduce bleeding.
Condition well. Avoid aggressively shampooing right away unless the instructions specifically say to shampoo.
Pro tip for peekaboo styles: for the first few washes, you can wash the underlayer separately (clip the black hair up)
to reduce red bleeding onto the top layer.
How to Keep Bright Red From Fading (Because Red Loves to Disappear)
Red is famously high-maintenancenot because it’s “difficult,” but because it tends to fade faster than many shades.
Treat your red underlayer like a fancy sweater: fewer washes, gentler handling, and definitely no boiling hot water.
Your red-preservation routine
- Wait before washing: Many colorists recommend avoiding shampoo for about 48 hours after coloring to let color settle.
- Wash less often: Aim for 2–3 shampoos per week; use dry shampoo or rinse-only days in between.
- Use cool water: Hot water opens the cuticle more and encourages fade; cool water helps keep dye from escaping so fast.
- Go sulfate-free and color-safe: A gentle cleanser is less likely to strip your red.
- Add a color-depositing conditioner/gloss: This is like a top-up for your red between full dye sessions.
- Heat protection is not optional: Heat styling can accelerate fading and dryness. Protect first, style second.
- UV protection helps: Sun can dull color; hats and UV sprays are your red’s bodyguards.
Common Problems (and How to Fix Them Without Panic-Texting Your Group Chat)
“My red is more burgundy than bright.”
That usually means your base wasn’t light enough for the shade you chose. Solutions:
- Embrace it (deep cherry under black hair is stunning).
- Refresh with a brighter red direct dye regularly.
- If you truly want “bright,” you’ll likely need to lift the underlayer lighter next time (carefully, possibly in a separate session).
“It’s patchy.”
Patchiness usually comes from uneven lightening or uneven saturation. Fixes:
- Use a strand test next time to gauge lift and timing.
- Apply color in thinner sections and use more product than you think you need.
- If the underlayer is severely uneven, a professional color correction is the safest route.
“The red is bleeding onto my black hair.”
Red pigment loves to travel. Contain it:
- Wash the underlayer separately for the first few shampoos.
- Rinse with cooler water and shorten wash time.
- Use a good conditioner on the black hair; more sealed cuticle = less pigment grabbing on.
“My hair feels dry after lightening.”
Lightening can raise the cuticle and reduce strength. Recovery moves:
- Deep conditioning mask weekly.
- Limit heat styling and always use heat protectant.
- Trim ends if they’re splitting or crunchy (the haircut is not a moral failure; it’s maintenance).
When You Should Absolutely Consider a Professional
- You’ve used box black dye and want bright red (box black can be stubborn and unpredictable).
- You’ve used henna or metallic dyes in the past (chemical reactions can happen).
- Your hair is relaxed, permed, or heavily bleached.
- You want a very specific red (like true fire-engine red) with zero patchiness.
- You’ve had scalp sensitivity or allergic reactions before.
Conclusion: Bright Red Under Black Hair Is a VibeIf You Respect the Process
If you want bright red under black hair, your success comes down to three things:
isolation (protect the black top layer),
base brightness (lighten enough for your target red),
and maintenance (because red fades like it has places to be).
Do it patiently, test first, and you’ll get that hidden-flame effect that looks expensive even if you did it in pajama pants.
Experiences & Lessons People Commonly Share After Going Bright Red Under Black Hair (Extra )
If you’re about to do this for the first time, congratulations: you are entering a club where the membership card is a slightly pink-stained towel.
Here are the most common “real life” experiences people report after trying bright red under black hairso you can skip the heartbreak and go straight to the flex.
1) The “Wait… Why Is It So Dark?” Moment
A lot of first-timers apply a gorgeous cherry red dye on a dark underlayer and expect it to look like the photo on the boxonly to discover it reads
more like deep burgundy. The usual takeaway? Brightness comes from the base, not just the dye label. People who love the result anyway
often describe it as “mysterious,” “wine-toned,” or “expensive velvet.” People who want it brighter almost always end up doing a second, gentler lift later,
after they’ve given their hair time to recover.
2) The “My Shower Looks Like a Crime Scene” Week
Red pigment bleeding is so common it should come with a tiny therapist. Many people say the first few rinses look dramatic, but it calms down fast if you
switch to cool water, reduce shampoo frequency, and use color-safe products. A popular trick: clip the black hair up and rinse the underlayer
separately for the first few washes. It sounds annoyinguntil you realize it’s less annoying than accidentally turning your black layer slightly auburn at the ends.
3) The “I Didn’t Realize How Much I’d Love the Peekaboo Effect” Surprise
One of the best parts of underlayer red is how dynamic it is. People often say they didn’t expect how different it looks depending on styling:
straight hair gives a sleek “secret color” peek, curls make the red flash like confetti, and braids look like you intentionally hired a stylist named
something cool like “Raven.” It’s also common to hear: “I can look normal at work, then go full spicy after hours.” Which is basically the dream.
4) The “Maintenance Is Real, But It’s Not Miserable” Learning Curve
Yes, red fades. But the happiest red-under-black people tend to do small, consistent things instead of dramatic, exhausting routines:
fewer wash days, cooler rinses, a color-depositing conditioner once a week, and heat protection. The vibe is less “I am chained to my bathroom” and more
“I’m just a little smarter than I used to be.” Many also say they now keep one “hair color shirt” and one “hair color towel” permanently assigned to the cause.
It’s not sad; it’s organization. (And possibly character development.)
5) The Biggest Regret: Skipping the Strand Test
If there’s one universal lesson, it’s this: people who skip strand tests tend to learn everything the hard waytiming, lift speed, porosity, and how quickly
“just a little longer” becomes “why is my hair gummy?” Meanwhile, people who do strand tests sound like calm wizards: they know exactly what developer strength
their hair tolerates, how long it takes to lift, and what red looks best on their base. The difference is not talent. It’s patience.
Bottom line: the experience of getting bright red under black hair is usually a mix of excitement, a tiny bit of cleanup, and a lot of compliments.
Respect the process, and you’ll get the kind of underlayer color that makes you want to flip your hair in slow motioneven if you’re just walking to the fridge.


