Table of Contents >> Show >> Hide
- Why draw on Google Slides in the first place?
- Method 1: Use the Scribble tool for quick freehand drawing
- Method 2: Draw with lines, arrows, curves, and shapes for a cleaner look
- Method 3: Create a custom drawing in Google Drawings and insert it into Slides
- Which drawing method should you use?
- Common mistakes to avoid when drawing on Google Slides
- Simple examples of how drawing improves presentations
- What the real experience of drawing on Google Slides is like
- Final thoughts
Google Slides is not exactly Photoshop’s dramatic cousin, and that is honestly part of its charm. It is fast, collaborative, easy to share, and built for people who need a presentation finished before lunch. But here is the good news: if you have ever opened a deck and thought, “This slide needs an arrow, a doodle, a sketch, or at least one aggressively helpful circle,” you absolutely can draw on Google Slides.
Whether you want to annotate a screenshot, build a quick diagram, or add a hand-drawn touch so your presentation feels more human and less “template from the land of generic rectangles,” Google Slides gives you a few surprisingly useful options. The trick is knowing which method to use for which kind of drawing.
In this guide, you will learn how to draw on Google Slides using three easy methods: the Scribble tool for freehand drawing, built-in lines and shapes for cleaner visuals, and Google Drawings for custom artwork with more control. Along the way, I will also show you when each option works best, where it gets clunky, and how to make your drawings look polished instead of like they were created during a very bumpy bus ride.
Why draw on Google Slides in the first place?
Drawing inside a slide deck is useful for more than artsy flair. Sometimes you need to point out a tiny detail in a product screenshot. Sometimes you want to build a process diagram without opening a separate design app. Sometimes you just want to circle a number so boldly that nobody in the meeting can miss it. Drawing helps you explain ideas faster and makes your slides feel more custom, visual, and engaging.
It is especially helpful for teachers, marketers, students, trainers, sales teams, and anyone who has ever muttered, “This would be easier if I could just sketch it.” If that sounds familiar, welcome. You are among friends.
Method 1: Use the Scribble tool for quick freehand drawing
If you want to draw on Google Slides the fastest possible way, the Scribble tool is your best friend. This is the freehand option built right into Google Slides, and it is perfect for rough sketches, underlines, arrows, circles, signatures, and casual annotations.
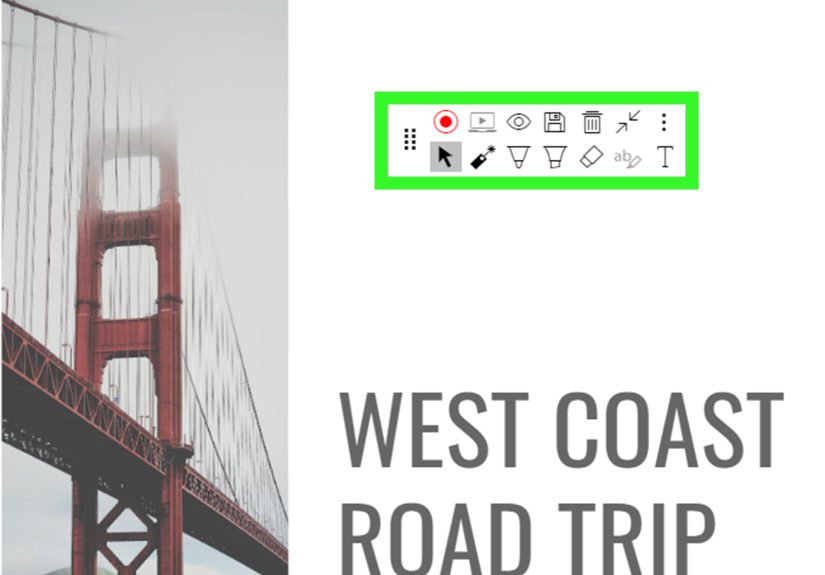
How to use Scribble in Google Slides
- Open your presentation and go to the slide you want to edit.
- Click Insert in the top menu.
- Hover over Line.
- Select Scribble.
- Click and drag your mouse or trackpad to draw.
- Release your cursor to finish the drawing.
Once your drawing is on the slide, you can click it and format it like other objects. Change the line color, adjust the thickness, move it around, resize it, or layer it above images and text. That means your messy-but-useful circle around a chart can become a neat red highlight instead of a mysterious black noodle.
When Scribble works best
Scribble is ideal when speed matters more than precision. It works well for:
- Circling key numbers in a chart
- Underlining a phrase in a screenshot
- Adding quick arrows during lesson prep
- Creating hand-drawn emphasis on an otherwise formal slide
- Mocking up an idea before you build a cleaner version
The pros and cons of Scribble
Pros: It is built in, easy to access, and very fast. You do not need another tool, app, or extension.
Cons: It can look a little rough, especially if you are using a touchpad instead of a stylus or mouse. If you are aiming for geometric perfection, Scribble is not your soulmate.
Tips for better Scribble drawings
Keep your strokes short instead of trying to draw one giant masterpiece in a single motion. Zoom in if you need tighter control. And if your first attempt looks like a sleepy earthworm, do not panic. Delete it and try again. The second try is usually much better, and the third one often looks like you knew what you were doing all along.
Method 2: Draw with lines, arrows, curves, and shapes for a cleaner look
If Scribble is the quick doodle option, built-in lines and shapes are the “I would like this slide to look organized and employed” option. This method is excellent for people who want diagrams, flowcharts, labels, callouts, or custom visual structures that still feel polished.
What you can use
Inside Google Slides, you can insert shapes, lines, arrows, and other objects from the top menu. These tools help you create graphics that look more deliberate than freehand scribbles. For example, instead of drawing a wobbly rectangle around a screenshot, you can insert a real rectangle and format it in a few clicks.
How to draw with shapes and lines
- Go to Insert.
- Choose Shape or Line.
- Select the object you want, such as a line, arrow, rectangle, circle, or callout.
- Click and drag on the slide to place it.
- Use the toolbar to change fill color, border color, line weight, and style.
This method is fantastic for creating:
- Flowcharts and simple diagrams
- Labeled screenshots
- Step-by-step instructional slides
- Timelines and directional arrows
- Boxes, highlights, and visual frames
Use Arrange tools to make your drawings look smarter
Here is where many people stop too early: after drawing the objects, they leave everything slightly crooked and call it “creative energy.” Resist that urge. Google Slides includes Arrange options that let you align objects, change their order, and distribute spacing evenly. In plain English, this means your arrows can line up, your callout boxes can stop drifting, and your diagram can look intentional instead of accidental.
If you are creating a process slide, for example, you can combine circles, arrows, and text boxes, then align and distribute them for a much cleaner result. It takes about thirty extra seconds and saves your presentation from looking like it got dressed in the dark.
Best uses for shapes and lines
This is the best option when you need precision. If you are designing a sales funnel slide, illustrating a workflow, or showing before-and-after comparisons, shapes and lines usually beat freehand drawing. They are also easier to edit later, which matters when your boss, client, or professor says, “Can we make that arrow a little more optimistic?”
Method 3: Create a custom drawing in Google Drawings and insert it into Slides
Sometimes Google Slides is good enough for the job, and sometimes you need a little more elbow room. That is where Google Drawings comes in. If you want to create a more detailed custom illustration, diagram, logo mockup, or annotation graphic, Google Drawings can give you more flexibility before you bring the finished result into Slides.
Why use Google Drawings?
Google Drawings is handy when your visual is more complicated than a quick slide annotation. It gives you a blank canvas designed for drawing and object layout, which can feel more comfortable than building everything directly on top of a slide. You can use lines, shapes, arrows, and freehand scribbles there as well, then export the result and place it into your presentation.
How to do it
- Open Google Drawings and create your artwork.
- Use shapes, lines, arrows, or Scribble to build the graphic.
- Download the finished drawing as an image file.
- Return to Google Slides.
- Insert the image onto your slide.
This workflow works especially well for:
- Custom diagrams used across multiple slides
- Branded callouts or visual labels
- More detailed illustrations that need extra editing space
- Reusable assets for training decks and classroom materials
Why this method is worth the extra step
Yes, it takes a little longer than drawing directly in Google Slides. But it can save time later, especially if you want a graphic you can reuse in more than one presentation. Think of it as meal prep, but for arrows and boxes.
Which drawing method should you use?
The best option depends on what you are trying to create.
Choose Scribble if:
- You want quick freehand drawing
- You need to annotate a slide fast
- You are adding emphasis, circles, or rough arrows
Choose shapes and lines if:
- You want clean, polished visuals
- You are making diagrams, labels, or structured layouts
- You need objects that are easy to align and edit
Choose Google Drawings if:
- You want more room to build a custom graphic
- Your drawing is too detailed for one slide canvas
- You plan to reuse the artwork later
Common mistakes to avoid when drawing on Google Slides
1. Using Scribble for everything
Scribble is great for quick marks, but it is not always the right choice for diagrams or structured designs. If you need precision, switch to shapes and lines.
2. Ignoring alignment
A slightly crooked arrow may not sound like a big deal until your whole slide starts looking off-balance. Use alignment and distribution tools whenever you create multi-part visuals.
3. Overdrawing the slide
Just because you can draw on Google Slides does not mean every slide should become a digital whiteboard. Keep drawings purposeful. They should clarify the message, not wrestle it to the ground.
4. Forgetting contrast
If your line color blends into the background, your beautiful annotation becomes invisible performance art. Use contrasting colors and appropriate line weight so viewers can actually see what matters.
Simple examples of how drawing improves presentations
Imagine you are presenting website analytics. Instead of showing a raw screenshot of a dashboard, you can draw a circle around conversion rate, add an arrow to a traffic spike, and insert a callout box that says, “This campaign launched here.” Suddenly the audience knows exactly where to look.
Or picture a classroom slide about the water cycle. A few arrows between clouds, rain, and runoff can make the process easier for students to follow than a block of text ever could. Same slide deck, much better teaching.
Even in a business presentation, a hand-drawn underline under one sentence can create emphasis that feels more natural than bolding half the slide like you are yelling through typography.
What the real experience of drawing on Google Slides is like
Here is the honest experience: drawing on Google Slides is surprisingly useful once you stop expecting it to behave like a full illustration app. The first time most people try it, they usually head straight for Scribble, draw one shaky line, and immediately decide the tool is either magical or mildly offensive. The truth sits somewhere in the middle. It is not a professional art studio, but for presentation work, it does a lot more than people expect.
In practical use, Scribble feels best when you are in explaining mode rather than design mode. If you are a teacher marking up a reading passage, a manager pointing at a sales chart, or a student highlighting the important part of a diagram, it feels quick and natural. You are not trying to create museum-grade artwork. You are trying to make your point clear. And for that, Google Slides does the job beautifully.
The experience gets even better when you shift from “drawing pictures” to “drawing communication.” That is really the sweet spot. Arrows, circles, underlines, connectors, borders, and labels are where Google Slides shines. These are the kinds of marks that improve understanding in seconds. A rough arrow aimed at the right screenshot detail can save two whole paragraphs of explanation. That is a trade most presenters should take every single time.
People who enjoy polished visuals often have the best experience when they combine methods. They may use Scribble for emphasis, shapes for structure, and Google Drawings for anything more custom. That hybrid approach feels efficient because you are not forcing one tool to do every job. You are using the fast method when speed matters and the cleaner method when appearance matters.
There is also a collaboration advantage that people do not talk about enough. In shared decks, drawings can make feedback clearer. Instead of leaving a vague comment like “fix this section,” a teammate can circle the exact item, add an arrow, or drop in a quick shape-based callout. That reduces confusion and keeps revisions moving. Fewer mystery comments. Fewer “Which part did you mean?” messages. Better moods all around.
Of course, the experience can get messy when slides become overloaded. Too many arrows, too many boxes, and too many doodles can make a presentation feel chaotic. The best results come when drawings support the message instead of competing with it. In other words, draw like an editor, not like a toddler with unlimited markers.
Over time, most users figure out a rhythm. Scribble for fast emphasis. Shapes and lines for diagrams. Google Drawings for anything reusable or detailed. Once that clicks, drawing on Google Slides stops feeling like a hidden trick and starts feeling like a normal, useful part of building better presentations. And honestly, that is when the tool becomes fun.
Final thoughts
If you have been wondering how to draw on Google Slides, the answer is refreshingly simple. Use Scribble when you need quick freehand marks, use shapes and lines when you want cleaner visuals, and use Google Drawings when you need a more custom graphic. Each method solves a different problem, and together they cover most presentation needs without forcing you to leave the Google ecosystem.
The best part is that you do not need advanced design skills to make these tools useful. A well-placed arrow, a neat callout, or a quick annotation can make a slide easier to understand, more visually engaging, and much more memorable. So go ahead and draw on that deck. Just maybe do not turn every quarterly report into abstract art.


