Table of Contents >> Show >> Hide
- What a Fish Tail Plait Is (and Why It Looks So Fancy)
- Before You Start: What You’ll Need
- The Core Technique: How to Do a Basic Fish Tail Plait (Step-by-Step)
- Quick Fixes: Common Fish Tail Plait Problems (and How to Save Them)
- 3 Cute & Easy Fish Tail Plait Styles
- Style #1: The Classic Side Fish Tail Plait (Beginner-Friendly and Pretty)
- Style #2: The Fishtail Ponytail (Sporty, Polished, and Perfect for Busy Days)
- Style #3: The Fishtail Crown (Halo Braid That Looks Fancy but Is Secretly Just Two Braids)
- How to Make Your Fish Tail Plait Last Longer (and Look Better All Day)
- Mini Style Ideas: Make It Yours
- Real-World Fish Tail Plait Experiences (and What They Teach You)
- Conclusion
The fish tail plait (also called a fishtail braid) is one of those hairstyles that looks like it requires a fairy godmother, a personal glam squad, and at least one degree in engineering.
Plot twist: it’s basically just two sections of hair and a repeatable swap. That’s it. No sorceryjust a steady rhythm, a tiny bit of patience, and the willingness to redo the first inch once (okay, twice) while you mutter,
“I swear I know what I’m doing.”
In this guide, you’ll learn the core technique (so you can fishtail braid your hair without panic-Googling mid-braid), plus three cute, easy fishtail styles you can wear to school, brunch, work, date night, or anywhere you want your hair to look “effortless”
(even if it took effort… and a mirror pep talk).
What a Fish Tail Plait Is (and Why It Looks So Fancy)
A classic braid uses three sections. A fish tail plait uses two. You repeatedly take a small piece from the outside of one section and cross it over to the other section, alternating sides.
Those tiny crossovers create the signature “woven” pattern that looks intricatelike you had helpwhen you absolutely did not.
Before You Start: What You’ll Need
- A brush or wide-tooth comb (detangling is non-negotiable)
- Hair elastic (clear elastics are great for ends; thicker ties for ponytails)
- Texturizing spray or dry shampoo (especially if your hair is silky/clean)
- Bobby pins (for the crown/halo style and flyaways)
- Optional: light hair oil/serum for frizz, hairspray for hold, a small clip to park hair while you section
Pro Prep Tips for Better (and Less Slippery) Braids
- Texture is your best friend. Fishtails grip better on second-day hair. If your hair is freshly washed, add dry shampoo or texturizing spray at the roots and through the lengths.
- Detangle first. A fishtail braid is a lot of small sections. Snags will steal your joy.
- Want “boho” volume? Lightly wave your hair first or keep it slightly undone. Sleek is cute toojust pick your vibe.
The Core Technique: How to Do a Basic Fish Tail Plait (Step-by-Step)
Once you learn this, you can turn it into a side braid, ponytail braid, crown braid, half-up braidbasically a whole wardrobe of braided hairstyles.
Step 1: Choose Your Starting Point
Beginners usually find it easiest to start with a low ponytail (especially off to one side). It keeps the braid controlled and visible in the mirror. If you’re more confident, you can start from loose hair at the back of your head.
Step 2: Split Hair Into Two Equal Sections
Hold the left section in your left hand and the right section in your right hand. These two sections stay separate the entire timethink of them as “Team A” and “Team B.”
Step 3: Take a Small Outer Piece and Cross It Over
From the outside edge of the left section, take a small piece (start with a piece about the width of a pencil for an easier learning curve). Cross it over and add it to the inside of the right section.
Step 4: Repeat on the Other Side
Now take a small piece from the outside edge of the right section, cross it over, and add it to the inside of the left section.
Repeat, alternating sides, until you reach the ends.
Step 5: Secure the End
Tie off the braid with an elastic. If you want a softer look, use a clear elastic and wrap a small strand of hair around it (pin the end underneath with a bobby pin).
Step 6: “Pancake” for Volume (Optional, but Cute)
For a fuller, lived-in braid, gently tug the outer loops of the braid outwardlittle by littleworking from top to bottom. This is often called pancaking. Go slowly so you don’t pull the braid apart.
Quick Fixes: Common Fish Tail Plait Problems (and How to Save Them)
“My braid looks weird on one side.”
You might be taking pieces from random places instead of consistently from the outer edge. Slow down and keep your “pickup” sections the same size on both sides.
“It’s slipping out / my hair is too smooth.”
Add texture: dry shampoo, texturizing spray, or a tiny bit of styling powder. If you started from loose hair, switch to starting in a ponytail until the motion feels automatic.
“The braid is too tight and tiny.”
Use slightly bigger sections as you cross over, and pancake the braid afterward. You can also loosen your grip while braiding to avoid a super-tight rope effect.
“My arms are tired.”
Welcome to the club. Start lower (side ponytail), take breaks, and remember: even messy fishtails are cute. “Undone” is basically a hairstyle category now.
3 Cute & Easy Fish Tail Plait Styles
Each style uses the same core fishtail braid technique. The difference is where you start, how you finish, and whether you’re going for sleek, messy, or “I woke up like this (and then braided for seven minutes).”
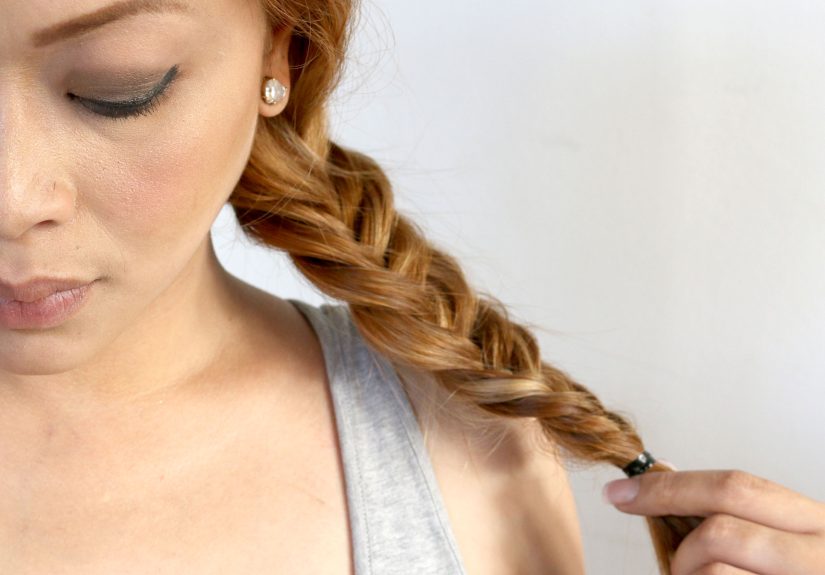
Style #1: The Classic Side Fish Tail Plait (Beginner-Friendly and Pretty)
This is the fishtail braid you’ve seen on everyone from festival-goers to bridesmaids. It’s flattering, easy to monitor in the mirror, and forgiving if your sections aren’t perfect.
How to Do It
- Part your hair slightly off-center or deep to one side for a romantic look.
- Sweep hair over one shoulder and gather into a low side ponytail. Secure with an elastic.
- Split the ponytail into two sections.
- Fishtail braid down the length: take a small piece from the outer edge of one section, cross it over, and add it to the inside of the other sectionalternate sides.
- Secure the end with a clear elastic.
- Pancake gently for a fuller, boho finish.
- Face-framing pieces: pull out a couple of soft strands near your temples if you want a relaxed vibe.
Make It Look Extra (Without Extra Work)
- Boho volume: pancake the braid and mist lightly with hairspray.
- Sleek version: smooth flyaways with a small amount of serum and keep the braid tight.
- Accessory moment: tie a ribbon or scarf at the end (instant “I tried” energy).
Style #2: The Fishtail Ponytail (Sporty, Polished, and Perfect for Busy Days)
This style gives you the best of both worlds: a ponytail’s practicality and a fishtail braid’s “wow” factor. It’s also great for hiding roots on day-two or day-three hair (no judgment; we’re all just doing our best).
How to Do It
- Prep with texture. Add dry shampoo at the roots and a little texturizing spray through the ponytail for grip.
- Create a ponytail at your preferred height: high for sporty, mid for everyday, low for chic.
- (Optional) Hide the elastic: take a small strand of hair, wrap it around the base, and pin it underneath.
- Split ponytail into two sections and fishtail braid down.
- Secure the end with a clear elastic.
- Finish: pancake the braid for fullness, or keep it sleek for a clean, editorial look.
Best Tweaks by Hair Type
- Fine hair: pancake more aggressively (gently!) and consider a light volumizing powder.
- Thick hair: take slightly larger crossing pieces to speed up the process and reduce arm fatigue.
- Curly hair: keep tension looser and let texture shineflyaways can look intentional here.
Style #3: The Fishtail Crown (Halo Braid That Looks Fancy but Is Secretly Just Two Braids)
If you want maximum compliments for minimum chaos, this is the one. A fishtail crown braid (also called a halo braid) is essentially two fishtail braids wrapped around your head and pinned.
The final result looks like you own a sundress collection and have your life together.
How to Do It
- Part your hair down the middle into two equal sections.
- Create two low pigtails (one on each side) and secure with elastics.
- Fishtail braid each pigtail down to the ends and secure.
- Pancake each braid slightly so it looks fuller and softer.
- Wrap the first braid across the top/back of your head like a headband and pin it in place with bobby pins.
- Wrap the second braid in the opposite direction, overlapping where needed, and pin securely.
- Hide pins and smooth flyaways with a light mist of hairspray. If you want extra hold, spray your bobby pins before inserting them.
Shortcut for Shorter Hair: The Half-Up Fishtail Crown
If your hair isn’t long enough to wrap all the way around, take two small sections from near your temples, fishtail braid them back, and pin them together at the back of your head. It gives the crown vibe without requiring Rapunzel-level length.
How to Make Your Fish Tail Plait Last Longer (and Look Better All Day)
Use the “Grip + Set” Combo
- Grip: dry shampoo, texturizing spray, or volumizing powder (especially on clean hair)
- Set: a light mist of flexible-hold hairspray so it stays touchable
Protect Your Hair While You Style
- Avoid over-tight braiding around the hairline to reduce tension.
- Remove elastics gently (snapping them out is a betrayal to your ends).
- If you sleep in a braid, keep it loose and use a soft scrunchie to prevent breakage.
Mini Style Ideas: Make It Yours
- Messy fishtail: pancake + pull a few face-framing pieces loose
- Sleek fishtail: smooth with serum and keep the sections tight and even
- Fishtail with accessories: ribbon woven through, pearl pins, a claw clip at the base
- Double fishtails: two side fishtails pinned back for a half-up moment
Real-World Fish Tail Plait Experiences (and What They Teach You)
Let’s talk about the part tutorials don’t always mention: the experience of doing a fish tail plait as a real human with real arms, real hair, and real life happening around you.
The fishtail braid has a reputation for being “easy,” and it isonce your hands memorize the pattern. But the first few tries can feel like you’re assembling IKEA furniture without the little Allen wrench.
One of the most common beginner experiences is the “Why does it look like a lumpy rope?” moment. That usually happens when your section sizes change without you noticing.
In real life, you’re braiding while thinking about your day, listening to music, or trying to keep a toddler from using your brush as a microphone. So your hands start grabbing random-sized pieces.
The fix isn’t perfectionit’s rhythm. Many people find it helps to repeat a simple mantra: “Outside, cross, switch hands.” Once you keep that cadence, your braid magically starts looking intentional.
Another classic experience: super-slippery hair. If your hair is freshly washed, it can feel like you’re trying to braid silk ribbon.
This is why so many stylists recommend working with second- or third-day hair, or adding texture first. In the real world, texture products aren’t just “extra”they’re the difference between a fishtail that holds and a fishtail that slowly slides into a sad ponytail.
If you’ve ever watched your braid loosen itself like it’s quitting the job, you already understand the value of dry shampoo.
Then there’s the “arm workout” experience. A fishtail braid uses lots of small motions, so if you start too high on your head, your shoulders may file a formal complaint.
That’s why starting in a side ponytail is such a game-changeryour hands are in front of you, you can see what you’re doing, and you can pause without everything unraveling.
People who braid often (or who learned on friends, siblings, or willing captives) tend to develop a personal strategy: start low when you’re rushed, start high when you’re feeling ambitious, and always keep an elastic nearby like it’s your emergency exit.
Real-world fishtails also teach you that “messy” is a feature, not a flaw. If a few strands pop out, it can actually make the braid look more modern and relaxed.
Many popular fishtail looks intentionally pull the braid apart (pancaking) to create that full, boho shape. So if you’re worried your braid isn’t crisp enough, congratulationsyou may be accidentally on trend.
The key is control: pancake gently, set with light hairspray, and pin anything that’s escaping too enthusiastically.
Finally, the most satisfying experience: the first time someone says, “Wait… you did that yourself?” That’s the fishtail braid’s whole personality.
It’s a hairstyle that rewards practice fast. After a few tries, you’ll go from “How do people do this?” to “I can do this in five minutes while talking,” which is basically the hair equivalent of leveling up.
And once you own the technique, you’ll start seeing fishtail opportunities everywhereponytails, crowns, half-up styleslike you’ve unlocked a secret menu for your hair.
Conclusion
A fish tail plait looks intricate, but it’s built on one simple repeat: take a small piece from the outside, cross it over, and switch sides.
Master that, and you can create a classic side fishtail braid, a fishtail ponytail for busy days, or a fishtail crown braid that looks special-event ready.
Keep texture on your side, don’t fear a little messiness, and remember: the braid doesn’t have to be perfectit just has to be yours.


