Table of Contents >> Show >> Hide
- What the Lock Screen Actually Does
- Before You Disable the Lock Screen
- Method 1: Disable the Lock Screen with Group Policy
- Method 2: Disable the Lock Screen with Registry Editor
- What If You Also Want to Skip the Sign-In Screen?
- Common Problems and Fixes
- Should You Disable the Lock Screen?
- Best Practices If You Disable It
- Real-World Experiences with Disabling the Lock Screen on Windows 10
- Final Thoughts
- SEO Tags
If Windows 10’s lock screen feels like a bouncer guarding a party you already hosted, you are not alone. Plenty of users still rely on Windows 10 for work, home offices, garage PCs, media boxes, and that one laptop everyone swears they will replace “soon.” Even though Windows 10 officially reached end of support in October 2025, a lot of machines are still humming along just fine. The problem is that the lock screen adds an extra click, an extra keypress, and an extra tiny dose of annoyance every time you start your computer or wake it from sleep.
The good news is that disabling the lock screen on Windows 10 is still possible. The better news is that you do not need a computer science degree, a wizard hat, or a sacrificial keyboard. In most cases, you can remove it with either Local Group Policy Editor or Registry Editor, depending on your edition of Windows 10.
This guide explains exactly how to disable the Windows 10 lock screen, what to do if the change does not stick, and how to handle the separate sign-in screen if your real goal is to get to the desktop faster. Because yes, Windows made those two things separate. Because of course it did.
What the Lock Screen Actually Does
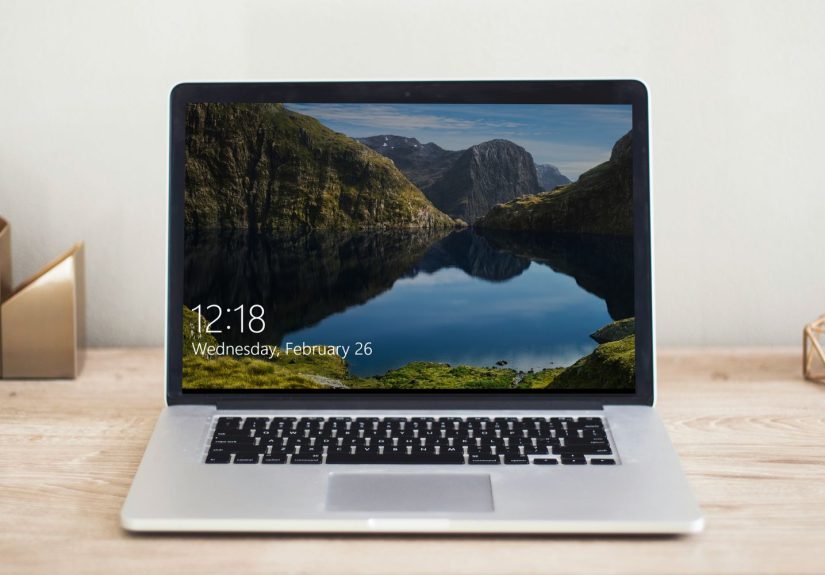
Before you start flipping switches, it helps to know what you are changing. The lock screen is the full-screen image or slideshow you see before the password, PIN, or sign-in prompt appears. It may show the time, date, notifications, and the occasional scenic photo that makes your PC look far more adventurous than your actual day.
The sign-in screen comes after that. This is where Windows asks for your PIN, password, fingerprint, or face scan. So if you disable the lock screen, Windows usually skips the pretty wallpaper gatekeeper and takes you directly to the sign-in screen. Faster? Yes. Completely friction-free? Not always.
Before You Disable the Lock Screen
A little prep work can save you from a dramatic “Why did my PC stop behaving?” moment later.
1. Check your Windows 10 edition
If you are using Windows 10 Pro, Enterprise, or Education, you can usually use Local Group Policy Editor. If you are on Windows 10 Home, Group Policy Editor is typically not available, so the Registry method is the practical route.
2. Use an administrator account
You need administrative privileges to change these settings. If Windows treats your account like a houseguest, it may refuse to save the change.
3. Back up the registry if you plan to edit it
Registry edits are powerful, but they are also the digital version of “measure twice, cut once.” A simple backup or restore point is a smart move before you start.
4. Do not try this on a managed work or school PC without permission
If your device belongs to a company, school, or IT department, a domain policy or device management policy may reverse your change. That is not Windows being haunted. That is IT doing its job.
Method 1: Disable the Lock Screen with Group Policy
This is the cleanest method for Windows 10 Pro, Enterprise, and Education users.
Step-by-Step Instructions
- Press Windows + R to open the Run dialog.
- Type gpedit.msc and press Enter.
- Go to Computer Configuration > Administrative Templates > Control Panel > Personalization.
- Double-click Do not display the lock screen.
- Select Enabled.
- Click Apply, then OK.
- Restart your PC or sign out and sign back in.
After that, Windows should skip the lock screen and go directly to the sign-in screen. It is a simple change, but it feels surprisingly satisfying, like removing a pointless pop-up from real life.
Why This Method Works
This policy tells Windows not to show the lock screen layer before sign-in. It is the most straightforward option because it uses a built-in administrative setting rather than a manual tweak.
How to Re-Enable It
Go back to the same policy and set it to Not Configured or Disabled. Restart the computer, and the lock screen should return.
Method 2: Disable the Lock Screen with Registry Editor
If you are on Windows 10 Home, this is usually the best method. It is also useful when Group Policy is unavailable.
Step-by-Step Instructions
- Press Windows + R, type regedit, and press Enter.
- If User Account Control appears, click Yes.
- Navigate to:
HKEY_LOCAL_MACHINESOFTWAREPoliciesMicrosoftWindows - Right-click the Windows key, choose New > Key, and name it Personalization if it does not already exist.
- Select the Personalization key.
- In the right pane, right-click an empty area and choose New > DWORD (32-bit) Value.
- Name the value NoLockScreen.
- Double-click NoLockScreen and set its value to 1.
- Click OK and restart your computer.
If the change works, the lock screen disappears and Windows moves straight to the sign-in prompt. If nothing changes, double-check the spelling of the key and value. Windows is very strict about names, which is rich coming from an operating system that once named a browser “Edge” and expected that to settle the competition.
How to Undo the Registry Change
Go back to the same location and either delete the NoLockScreen value or set it to 0. Restart your PC, and the lock screen should come back.
What If You Also Want to Skip the Sign-In Screen?
This is where many users get tripped up. Disabling the lock screen does not disable password or PIN sign-in. If you want Windows 10 to stop asking you to sign in after waking from sleep, or even log in automatically at startup, you need separate settings.
Turn Off Sign-In After Sleep
- Open Settings.
- Go to Accounts > Sign-in options.
- Find Require sign-in.
- Select Never if that option is available.
This helps if your PC wakes up and immediately demands a PIN like it is guarding national secrets instead of a half-written grocery list.
Enable Automatic Sign-In at Startup
If you want Windows to boot straight to the desktop, that is a different configuration again. Many users do this with netplwiz or control userpasswords2. It can work well on a personal desktop in a secure environment, but it comes with a trade-off: it reduces security and may store credentials in a way that is not ideal on shared or portable devices.
In plain English: convenient for a home office tower, not a brilliant idea for a laptop you carry around town.
Common Problems and Fixes
Group Policy Editor Is Missing
You are probably using Windows 10 Home. That is normal. Use the Registry method instead.
The Lock Screen Still Appears After the Change
Try a full restart, not just a sign-out. Also confirm that the registry path is correct and that NoLockScreen is a DWORD (32-bit) value set to 1.
The Sign-In Screen Still Appears
That is expected. Remember, the lock screen and sign-in screen are two different stages. If your goal is fewer interruptions after sleep or startup, review the sign-in settings separately.
Your Change Keeps Reverting
This often happens on managed devices. A work policy, school policy, domain controller, or MDM system can reapply company settings after a reboot or policy refresh.
Windows Hello or Other Sign-In Options Complicate Things
On some systems, especially those using Microsoft accounts, Windows Hello settings can affect how sign-in behaves. If you are trying to enable automatic sign-in, you may need to review Windows Hello-related options first. That is separate from disabling the lock screen itself, but it often shows up in the same troubleshooting session.
Should You Disable the Lock Screen?
For many people, yes. If this is your personal computer in a safe environment, removing the lock screen can make everyday use feel faster and less cluttered. It is a quality-of-life tweak, not a dramatic performance upgrade, but small annoyances add up. One fewer unnecessary screen means one fewer chance to mutter at your monitor before coffee.
That said, the lock screen does provide a layer of friction before someone reaches your sign-in options. On a shared household PC, office device, or travel laptop, leaving it enabled can make sense. Convenience is great, but convenience and security are always negotiating with each other like tired roommates splitting rent.
Best Practices If You Disable It
- Keep a strong password or PIN if you still use the sign-in screen.
- Use automatic sign-in only on devices you physically control.
- Avoid disabling security features on company-managed machines.
- Create a restore point before changing deeper system settings.
- Review your sleep and wake sign-in settings so the experience matches what you actually want.
Real-World Experiences with Disabling the Lock Screen on Windows 10
In real-world use, disabling the Windows 10 lock screen tends to be one of those tiny changes that feels bigger than it sounds. On paper, you are removing one screen. In practice, you are removing one pause from the routine you repeat every day. That matters more than people think.
For example, on a desktop PC in a home office, the difference is immediate. You press the power button, sit down with your coffee, and instead of clicking through a scenic mountain photo you did not ask for, you land directly on the sign-in prompt. It is not life-changing in the dramatic movie-trailer sense, but it does make the computer feel more direct and less ceremonial. There is less fluff between you and your work.
The same goes for family PCs that get used in short bursts. Maybe someone wants to print a recipe, check homework, pay a bill, or open Spotify while cleaning the kitchen. The lock screen adds just enough friction to be mildly irritating every single time. Once it is gone, the machine feels quicker, even though the actual hardware speed has not changed. That is the funny thing about usability: sometimes shaving off one unnecessary step makes the whole system feel smarter.
On workshop, garage, or media-center computers, the benefit can be even more noticeable. Those machines are often used for a narrow purpose. You are not admiring the wallpaper. You are trying to launch a playlist, open a browser, or check a reference file while your hands are dusty, busy, or already holding something awkward. In those moments, the lock screen feels less like security and more like a speed bump in roller skates.
Of course, experience also teaches an important lesson: many people think they want to disable the lock screen, but what they really want is to avoid typing a password after sleep. Those are different settings, and that distinction causes a lot of confusion. A user disables the lock screen, restarts, and then says, “Why am I still getting asked for my PIN?” The answer is simple but annoying: because Windows considers the sign-in prompt a separate feature. Once people understand that, setup becomes much less frustrating.
There is also a clear divide between personal and managed devices. On personal PCs, the change usually feels clean and helpful. On company laptops, it can turn into a wrestling match with group policies, security baselines, and admin restrictions. In that situation, disabling the lock screen can be less of a tweak and more of a temporary illusion before IT policies put everything back the next time the machine checks in.
Overall, most users who disable the lock screen on a personal Windows 10 machine do not rave about it like they discovered a hidden superpower. Instead, they quietly enjoy a smoother routine. And honestly, that is the best kind of tweak: no fireworks, no drama, just one less pointless click between you and the desktop.
Final Thoughts
If you want to disable the lock screen on Windows 10, the process is still straightforward. Use Group Policy if you have Windows 10 Pro, Enterprise, or Education. Use the Registry Editor if you are on Windows 10 Home. In both cases, the goal is the same: skip the decorative gate and get to the actual sign-in prompt faster.
Just remember that the lock screen is not the same thing as the sign-in screen. If you want a truly faster startup or wake experience, you may also need to adjust Sign-in options or configure automatic logon carefully. Done right, this tweak makes Windows 10 feel less padded and more efficient. Done recklessly, it can make your PC less secure than a screen door on a submarine.
Choose the method that fits your edition, back up before making changes, and enjoy a version of Windows 10 with one less unnecessary detour.


