Table of Contents >> Show >> Hide
- Jump to a Method
- Before You Start: 60-Second Burnt-Pot Triage
- Method 1: Dish-Soap Simmer (The “Let Heat Do the Work” Move)
- Method 2: Baking Soda Simmer (Classic + Reliable)
- Method 3: Baking Soda Paste (Overnight, Low Drama)
- Method 4: Vinegar + Steam Boil (When Burnt Bits Need a Spa Day)
- Method 5: Vinegar Then Baking Soda (Smart Fizz, Not a Volcano)
- Method 6: Lemon + Baking Soda Scrub (Fresh-Smelling Victory)
- Method 7: Coarse Salt Scrub (Cast Iron’s Best Friend)
- Method 8: Cream of Tartar Paste (For Stains + Scorch Marks)
- Method 9: Bar Keepers Friend (The “Pro Kitchen” Option)
- Method 10: Dishwasher Detergent (Soak or Tablet Scrub)
- How to Choose the Best Method by Pot Type
- FAQs
- Bonus: Burnt-Pot Stories & Lessons ( of “Yep, Been There”)
- Conclusion + SEO Tags
Burnt pot? First: you’re not alone. Second: you didn’t “ruin dinner,” you just invented a new cookware trend called Charcoal Chic. Third: yes, you can usually fix itwithout scrubbing like you’re training for a dishwasher Olympics.
This guide walks you through 10 easy, practical ways to clean burnt food from a pot using pantry staples and a few trusted helpers. You’ll also learn how to pick the right method for stainless steel, nonstick, cast iron, enameled cookware, and aluminumbecause the wrong scrubber can turn “cleaning” into “lightly sanding a brand-new car.”
Before You Start: 60-Second Burnt-Pot Triage
Step 1: Let it cool. Sudden temperature changes can warp pans or crack enamel, and grabbing a hot pot in a panic is how people learn new swear words. (Safety first.)
Step 2: Scrape gently. Use a wooden spoon or a plastic scraper to lift loose bits. Avoid metal tools on nonstick and enamel.
Step 3: Pick your method. Light burn? Go mild (soap simmer). Heavy black crust? Bring out baking soda, vinegar, or a cookware-safe cleanser.
Method 1: Dish-Soap Simmer (The “Let Heat Do the Work” Move)
Best for: Mild-to-moderate burnt food on stainless steel, ceramic, and enamel (and as a first step for almost everything).
What you’ll need
- Dish soap
- Water
- Wooden spoon or silicone spatula
Steps
- Fill the pot with hot water to cover the burnt area.
- Add a few squirts of dish soap.
- Bring to a gentle simmer for 5–10 minutes.
- While it simmers, nudge burnt bits up with a wooden spoon.
- Pour out, rinse, then wash normally.
Why it works: Heat + surfactants loosen stuck-on proteins and starches so you do less scrubbing and more smiling.
Pro tip: If the water turns “mystery stew brown,” congratulationsyou’re making progress. Dump and repeat once if needed.
Method 2: Baking Soda Simmer (Classic + Reliable)
Best for: Burnt-on food, greasy scorch marks, and that stubborn “I live here now” crust.
What you’ll need
- Baking soda
- Water
- Non-scratch sponge or brush
Steps
- Add 2–4 cups of water (enough to cover the burnt zone).
- Stir in 1–2 tablespoons of baking soda.
- Bring to a boil, then simmer 10–15 minutes.
- Turn off heat and let it cool a bit.
- Scrub gently and rinse.
Why it works: Baking soda is a mild abrasive and an alkaline helper that breaks up greasy, cooked-on residue.
Watch out: On nonstick, keep it gentleno aggressive scouring pads.
Method 3: Baking Soda Paste (Overnight, Low Drama)
Best for: Nonstick, ceramic, enamel, and stainlessespecially when you want a hands-off approach.
What you’ll need
- Baking soda
- A little water
- Soft sponge
Steps
- Mix baking soda with just enough water to make a thick paste (think frosting, not soup).
- Spread over the burnt area.
- Let sit at least 15–30 minutes (or overnight for heavy burns).
- Wipe and scrub gently, then rinse and wash with dish soap.
Why it works: Time lets the paste soften burnt residue so you can remove it without brute force.
Pro tip: For delicate coatings, use a soft sponge and repeat rather than “rage-scrub.” Rage-scrubbing is how nonstick becomes “stick.”
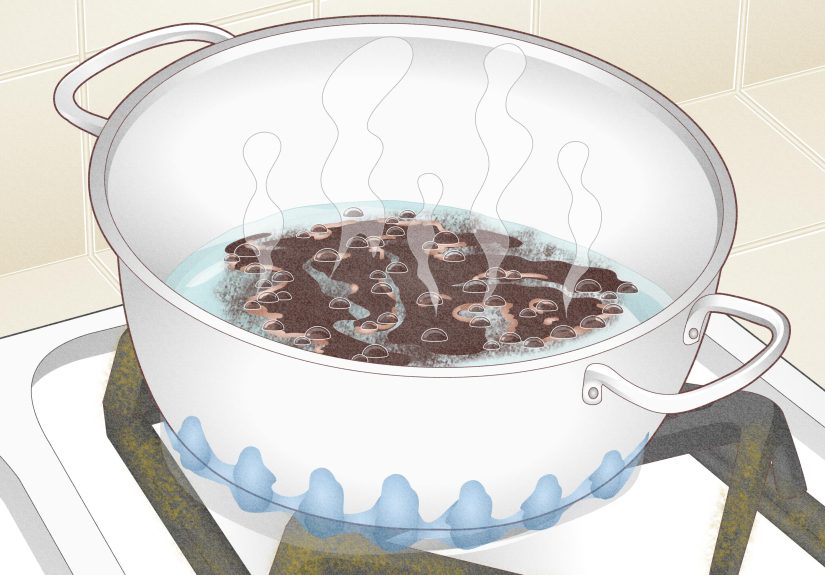
Method 4: Vinegar + Steam Boil (When Burnt Bits Need a Spa Day)
Best for: Stainless steel and many enamel/ceramic pots (not ideal for long contact on cast iron or reactive metals).
What you’ll need
- White vinegar
- Water
- Non-scratch scrubber
Steps
- Add equal parts water and white vinegar to cover the burnt area (or 1 part vinegar to 3 parts water if you want gentler).
- Bring to a boil for a few minutes.
- Turn off heat and let cool slightly.
- Scrub, rinse, then wash normally.
Why it works: Vinegar helps loosen cooked-on residue and can lift some discoloration while the steam softens the crust.
Caution: Don’t use vinegar soaks on cast iron (it can damage seasoning) and avoid prolonged contact with some metals.
Method 5: Vinegar Then Baking Soda (Smart Fizz, Not a Volcano)
Best for: Heavy burnt residue on stainless steel and sturdy surfaceswhen you want extra “lift.”
What you’ll need
- White vinegar
- Baking soda
- Water
- Sponge/brush
Steps
- Boil a shallow layer of vinegar + water (Method 4) for a few minutes.
- Turn off the heat.
- Pour out most of the hot liquid (optional but helps prevent an overflow).
- Sprinkle in 1–2 tablespoons of baking soda; add a splash of warm water if needed.
- Let the fizz settle, then scrub and rinse.
Why it works: The bubbling is great at physically nudging loosened bits free. Also: using the ingredients in sequence often keeps them more effective than premixing them into a neutral puddle.
Safety note: Add baking soda off heat and go slowly. You’re cleaning a pot, not auditioning for a science fair volcano.
Method 6: Lemon + Baking Soda Scrub (Fresh-Smelling Victory)
Best for: Most cookware types, plus anyone who wants their kitchen to smell like “I have my life together.”
What you’ll need
- 1 lemon
- Baking soda
- Sponge or the lemon itself
Steps
- Rinse the pot and remove loose debris.
- Sprinkle ~1/4 cup baking soda onto the damp burnt area.
- Cut the lemon in half and scrub with the cut side.
- Rinse and repeat if needed, then wash with dish soap.
Why it works: Baking soda provides gentle grit; lemon’s acidity helps loosen grime and brighten metal surfaces.
Method 7: Coarse Salt Scrub (Cast Iron’s Best Friend)
Best for: Cast iron and carbon steel, or any time you want abrasion without harsh chemicals.
What you’ll need
- Coarse kosher salt
- A little warm water (or a few drops of oil for cast iron)
- Paper towel or soft cloth
Steps
- Make sure the pot is warm-ish (not hot) and mostly dry.
- Pour in a generous layer of coarse salt.
- Scrub in circles with a paper towel or cloth, using the salt as your “scrubbing crystals.”
- Dump the salt, rinse quickly, dry thoroughly.
- For cast iron: Apply a thin layer of oil afterward to protect seasoning.
Why it works: Salt is a simple abrasive that lifts stuck-on bits while being gentle on seasoning when used correctly.
Method 8: Cream of Tartar Paste (For Stains + Scorch Marks)
Best for: Stainless steel discoloration and light scorching, especially when the pot looks “burnt” even after food is gone.
What you’ll need
- Cream of tartar
- Water
- Soft sponge
Steps
- Mix 1 tablespoon cream of tartar with a few drops of water to form a paste.
- Spread it over stained or scorched areas.
- Let sit 15–20 minutes.
- Scrub gently, rinse, and wash.
Why it works: It’s mildly acidic, which helps lift discoloration and some burnt residue without going full “industrial cleaner.”
Method 9: Bar Keepers Friend (The “Pro Kitchen” Option)
Best for: Stainless steel pots and pans with stubborn stains or burnt-on residue.
What you’ll need
- Bar Keepers Friend (cookware-safe cleanser)
- Water
- Soft cloth or non-scratch sponge
Steps
- Dampen the pot.
- Make a paste (powder + a little water) and apply to the stained/burnt area.
- Let it sit briefly (follow label timingdon’t “set it and forget it”).
- Rub in a circular motion; rinse very well; wash with dish soap.
Why it works: It’s a targeted cleanser designed to tackle tough cookware stains effectively on non-porous surfaces.
Avoid: Nonstick coatings, delicate surfaces, and anything your manufacturer says “no” to. When in doubt, spot-test.
Method 10: Dishwasher Detergent (Soak or Tablet Scrub)
Best for: Serious baked-on messes on stainless steel and sturdy cookwarewhen dish soap waves a tiny white flag.
Option A: Soak with dishwasher detergent
- Fill the pot with warm water to cover burnt food.
- Add about 1 tablespoon dishwasher detergent (powder or liquid).
- Soak for 30–60 minutes (or longer for stubborn burns).
- Scrub with a non-scratch sponge, rinse extremely well, then wash with dish soap.
Option B: Tablet “eraser” scrub (stainless steel)
- Wet the pot and the dishwasher tablet.
- Rub the tablet directly on the burnt area like a concentrated scrub bar.
- Rinse and wash thoroughly.
Why it works: Dishwasher detergent is formulated to break down baked-on foodbecause dishwashers see things.
Important: Rinse thoroughly and don’t use this on delicate coatings unless the manufacturer says it’s safe.
How to Choose the Best Method by Pot Type
Stainless steel
Start with dish-soap simmer (Method 1). Escalate to baking soda simmer/paste (Methods 2–3). For heavy discoloration, try Bar Keepers Friend (Method 9) or dishwasher detergent (Method 10).
Nonstick
Stick to baking soda paste (Method 3) and gentle tools. Avoid abrasive powders, steel wool, and aggressive scrubbing. Your goal is “clean,” not “removed the coating in one heroic swipe.”
Cast iron / carbon steel
Go with coarse salt scrub (Method 7) and minimal water exposure. Avoid vinegar soaks and harsh cleaners that strip seasoning. Dry immediately and apply a thin oil layer afterward.
Enameled Dutch ovens
Use dish-soap simmer (Method 1) or baking soda simmer (Method 2) with gentle scrubbing. Let enamel cool before cleaning to prevent cracking.
Aluminum
Try baking soda paste (Method 3) and gentle scrubbing. If using acids (lemon/vinegar), keep contact brief and rinse wellreactive metals don’t love long acidic spa days.
FAQs
Should I use steel wool on a burnt pot?
Usually no. Steel wool can scratch stainless steel and is a hard no for nonstick and enamel. If you must use something more abrasive, choose a cookware-safe non-scratch pad and let chemistry + time do the heavy lifting first.
Does baking soda and vinegar actually “work,” or is it just foam?
Both. Mixing them directly can reduce their individual cleaning power, but the fizz can help mechanically loosen debris. The sweet spot is using them in sequence (vinegar heat/steam, then baking soda) rather than making a giant neutral bath and hoping for miracles.
How long should I soak a burnt pot?
For most methods: 15–60 minutes is a solid start. Overnight works best for baking soda paste on stubborn burnsespecially when you want the pot to do the work while you sleep.
What if the pot is clean but still looks stained?
That’s often discoloration from high heat or minerals. Try cream of tartar paste (Method 8) or a cookware-safe cleanser like Bar Keepers Friend (Method 9) on stainless steel.
Bonus: Burnt-Pot Stories & Lessons ( of “Yep, Been There”)
There’s a special moment in every kitchen when you realize the smell isn’t “toasty” anymoreit’s “we have crossed into a different culinary dimension.” The sauce is silent. The pot is suspiciously quiet. And your brain starts bargaining: Maybe it’s fine. Maybe the smoke is… ambience.
Most burnt pots happen the same way: a quick distraction with a long attention span. A “two-minute” email. A “real quick” phone call. A scroll through one harmless video that somehow turns into an award-winning documentary series. When you come back, the pot has staged a protest and is now fused with the food.
Here’s the lesson people learn the hard way: scrubbing harder is rarely the answer. Scrubbing earlier? Yes. Scrubbing smarter? Absolutely. Scrubbing like you’re trying to erase your past? That’s how nonstick gets scratched, enamel gets dull, and stainless steel ends up with a permanent “I survived” patina.
The best real-world move is the unglamorous one: soak right away (after the pot cools). Even plain warm water buys you time. Add dish soap and you’re already halfway to Method 1 without even trying. The longer burnt starches and sugars sit dry, the more they clinglike a toddler with a new sticker book.
Another thing you discover with experience: not all burns are equal. Burnt rice tends to be a brittle, crunchy villain that responds well to simmering (Methods 1–2). Burnt dairy (hello, milk and cheese sauces) can behave like glue and may need a paste or longer soak (Method 3). Burnt sugar is its own categorysweet, innocent, and then suddenly it’s basically kitchen asphalt. For sugar burns, simmering water first is a lifesaver because it dissolves what scrubbing can’t.
And yes, the internet will tell you to throw every ingredient in your pantry into the pot at once. But the best cooks and cleaners tend to do one simple thing: they escalate in levels. Start gentle. Then get slightly more aggressive. Then bring in the “okay, we tried being nice” method. This protects your pot’s finish and saves you from accidentally turning “burnt food” into “burnt food plus scratched cookware.”
Finally, the prevention pep talk: lower your heat more than you think you need to, stir thicker foods more often, and keep a cup of water or broth nearby to deglaze early if you see browning starting too fast. Also, if a recipe says “don’t walk away,” it’s not being dramatic. It’s being prophetic.
Conclusion + SEO Tags
Cleaning burnt food from a pot is mostly about three things: soften, lift, and repeatnot “attack.” Start with the mild stuff (soap simmer), level up to baking soda or vinegar when needed, and save heavy-duty cleaners for cookware that can handle it. With the right method, most burnt pots are totally salvageable… and your future self will thank you for choosing chemistry over chaos.


