Table of Contents >> Show >> Hide
- Why Build a Wood Hamper Instead of Buying One?
- Best Wood for a DIY Laundry Hamper
- Suggested Wood Hamper Dimensions
- Tools You Will Need
- Step 1: Plan the Hamper Design
- Step 2: Cut the Wood Panels
- Step 3: Add Ventilation
- Step 4: Assemble the Box
- Step 5: Install the Bottom Panel
- Step 6: Add Trim and Style Details
- Step 7: Build and Attach the Lid
- Step 8: Sand Everything Smooth
- Step 9: Apply Paint, Stain, or Clear Finish
- Step 10: Add a Removable Liner
- Optional Upgrades for a Better Wood Hamper
- Common Mistakes to Avoid
- Cleaning and Maintenance
- Real-World Experience: What I Learned Building a Wood Hamper
- Conclusion
Note: This guide is written for a practical home DIY project and is based on commonly recommended woodworking methods from reputable U.S. home improvement and woodworking resources, including guidance on simple box construction, pocket-hole joinery, sanding, wood finishing, removable liners, and laundry ventilation.
A wood hamper is one of those sneaky home projects that looks simple until your laundry pile starts judging you from the corner of the room. The good news? Learning how to build a wood hamper is absolutely doable for a careful beginner, and the finished piece can look far better than a plastic basket that has seen things no basket should ever see.
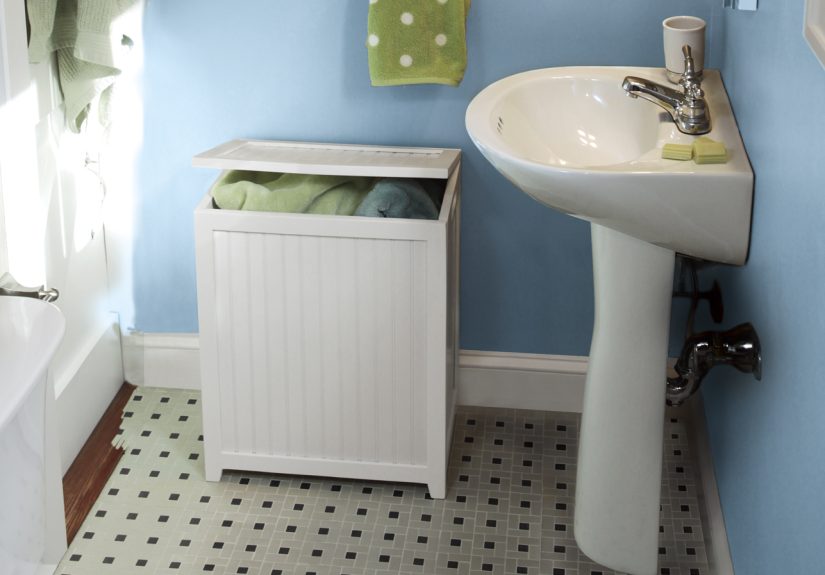
This project creates a sturdy wooden laundry hamper with a ventilated body, hinged lid, removable fabric liner, and clean furniture-style finish. It can live in a bathroom, bedroom, closet, laundry room, or mudroom without announcing, “Hello, I contain socks of questionable origin.”
In this guide, you will learn how to plan the dimensions, choose wood, cut panels, assemble the frame, add ventilation, install a lid, sand, finish, and customize your hamper. The design uses straightforward joinery and common materials, making it a smart weekend woodworking project for homeowners, renters, and brave souls who believe laundry can be both organized and mildly attractive.
Why Build a Wood Hamper Instead of Buying One?
A store-bought hamper works, technically. So does eating cereal from a measuring cup, but that does not mean we should celebrate it. A DIY wood laundry hamper gives you control over size, style, airflow, durability, and storage features.
Wood hampers are especially useful because they can be built to match your room. You can paint one white for a clean bathroom look, stain it walnut for a warm bedroom feel, or build it into a laundry station with multiple compartments. Unlike collapsible fabric hampers, a wooden hamper keeps its shape. Unlike plastic bins, it can look like intentional furniture instead of something you panic-bought during a cleaning spree.
Best Wood for a DIY Laundry Hamper
The best wood for a hamper depends on your budget, tools, and desired finish. For most DIY builders, cabinet-grade plywood is the easiest choice. It is stable, affordable, widely available, and less likely to warp than solid boards. A 3/4-inch plywood panel works well for the main structure, while 1×2 or 1×3 boards can be used for trim, face frames, slats, and lid support.
Recommended Materials
For a simple wood hamper, consider these materials:
- 3/4-inch plywood for the sides, bottom, back, and front panel
- 1×2 boards for trim, slats, or face frame details
- Wood glue for stronger joints
- 1 1/4-inch pocket-hole screws or wood screws
- Hinges for the lid
- A small handle or pull
- Removable fabric laundry bag or washable liner
- Sandpaper in 120-, 180-, and 220-grit
- Paint, stain, polyurethane, or water-based protective finish
If the hamper will sit in a bathroom or humid laundry room, choose a protective finish that can resist occasional moisture. The hamper should not be treated like a boat, of course, but it should survive damp towels, steamy showers, and the mysterious humidity that appears whenever someone says, “I’ll fold that later.”
Suggested Wood Hamper Dimensions
A comfortable single-bin hamper size is about 18 inches wide, 18 inches deep, and 28 to 32 inches tall. This gives enough room for several days of laundry without creating a giant wooden monument to procrastination.
For a family laundry room, you may want a double hamper that is about 36 inches wide, 18 inches deep, and 30 inches tall. That allows separate compartments for lights and darks, towels and clothes, or “wash today” and “ignore until emotionally ready.”
Sample Cut List for a Single Wood Hamper
For a hamper measuring approximately 18 inches wide, 18 inches deep, and 30 inches tall, use this sample cut list:
- Two side panels: 18 inches x 30 inches
- One front panel: 18 inches x 30 inches
- One back panel: 18 inches x 30 inches
- One bottom panel: 16 1/2 inches x 16 1/2 inches, adjusted for material thickness
- One lid panel: 19 inches x 19 inches
- Four 1×2 vertical trim pieces: 30 inches long
- Optional slats or vent strips: cut to fit your design
Always measure your actual material before cutting. Plywood thickness can vary slightly, and real-world boards sometimes enjoy pretending they are different sizes than their labels suggest.
Tools You Will Need
You do not need a luxury workshop to build a wooden hamper. A basic setup can handle the job.
- Circular saw or table saw
- Drill and driver bits
- Pocket-hole jig, optional but helpful
- Clamps
- Measuring tape
- Square
- Sander or sanding block
- Jigsaw or hole saw for ventilation openings
- Paintbrush or foam applicator
Use eye protection, hearing protection, and a dust mask when cutting or sanding. If you are a teen or beginner, work with an experienced adult when using power tools. Laundry may be chaotic, but your fingers deserve a calm and predictable life.
Step 1: Plan the Hamper Design
Before cutting wood, decide how your hamper will open and breathe. A top-opening hamper is the simplest design. A tilt-out hamper looks more like a cabinet and is great for tight spaces, but it requires more careful hinge placement and interior clearance. For a first build, a top-opening wood hamper is the friendlier option.
Think about where the hamper will go. Measure the space carefully, including baseboards, door swings, closet trim, and anything else that likes to surprise DIY projects at the last minute. If the hamper sits near a wall, leave enough room for the lid to open fully. If it sits in a bathroom, make ventilation a priority.
Step 2: Cut the Wood Panels
Mark your plywood using a square and measuring tape. Clean, accurate cuts are the difference between a hamper that looks custom-built and one that looks like it lost a small argument with geometry.
If using a circular saw, clamp a straight board as a guide. This helps keep long plywood cuts straight. Cut the side panels, front, back, bottom, and lid. Label each piece with painter’s tape so you do not accidentally install the back where the side belongs. Woodworking is humbling enough without creating your own puzzle box.
Cutting Tip
Cut slightly outside your line, then sand or trim to final size if needed. It is much easier to remove a little wood than to convince a too-short board to grow back.
Step 3: Add Ventilation
Ventilation is not decorative fluff. Dirty laundry can hold moisture, especially towels, gym clothes, socks, and anything that had an ambitious day. A wood hamper should allow airflow so odors and moisture do not get trapped inside.
You can add ventilation in several ways:
- Drill evenly spaced holes in the side panels
- Cut decorative openings with a jigsaw
- Use wood slats on the front or sides
- Leave small gaps between trim strips
- Install a mesh or fabric liner that allows air movement
For a clean look, drill rows of 1/2-inch holes on the side panels. Keep the holes evenly spaced and avoid placing them too close to the edges. Another attractive option is a slatted front panel using 1×2 boards with small gaps between each board. This gives the hamper a craftsman-style look while letting the laundry breathe.
Step 4: Assemble the Box
Dry-fit the panels before adding glue or screws. This is your chance to catch errors while everyone is still emotionally stable. Set the side panels upright, place the front and back panels between or over them depending on your design, and check that the box is square.
Apply wood glue along the joining edges. Clamp the panels together and fasten them using pocket-hole screws, countersunk wood screws, or brad nails with glue. Pocket-hole joinery is popular for cabinet-style projects because it creates strong, hidden joints and works well for beginners. If you use regular screws, pre-drill pilot holes to reduce splitting.
Keeping the Box Square
Measure diagonally from corner to corner. If both diagonal measurements match, your box is square. If not, gently adjust the frame before the glue dries. This step matters because a crooked hamper lid will announce every mistake with dramatic enthusiasm.
Step 5: Install the Bottom Panel
The bottom panel supports the laundry bag and gives the hamper structure. Place it inside the lower part of the box or attach it underneath, depending on your design. For a clean furniture look, install the bottom panel slightly above the floor and add trim around the base.
Use glue and screws to secure the bottom. If you want extra airflow, drill a few holes in the bottom panel as well, especially if the hamper will hold towels or athletic clothing. Just make sure the holes are smooth so they do not snag the liner.
Step 6: Add Trim and Style Details
Trim turns a plain plywood box into something that looks planned rather than apologetic. Add 1×2 boards to the front edges, top edge, and base. You can create a shaker-style front by attaching trim around the panel like a picture frame.
If you prefer a modern look, keep the lines simple and use minimal trim. If you like farmhouse style, add vertical slats, a stained wood lid, and a painted white body. For a spa-style bathroom, use light stain, cane webbing, or narrow horizontal slats.
Step 7: Build and Attach the Lid
The lid should overhang the hamper slightly, usually by about 1/2 inch on each side. Sand the lid edges smooth and soften the corners. A sharp wooden lid corner has a special talent for finding knees in the dark.
Attach the lid with two small hinges at the back. Mark the hinge positions carefully, pre-drill holes, and fasten the hinges to the lid first. Then attach the lid to the hamper body. Check that it opens and closes smoothly.
For a nicer user experience, consider adding a soft-close lid support or small chain to prevent the lid from falling backward. You can also add a knob, pull, or finger notch to make the lid easy to open.
Step 8: Sand Everything Smooth
Sanding is where a good wood hamper becomes touch-friendly. Start with 120-grit sandpaper to remove roughness, move to 180-grit for smoothing, and finish with 220-grit before applying paint or stain. Pay special attention to ventilation holes, lid edges, and inside corners.
Wipe away dust with a tack cloth or slightly damp cloth before finishing. Dust left on the surface can create bumps in the finish, and nobody wants a hamper that feels like it rolled through cracker crumbs.
Step 9: Apply Paint, Stain, or Clear Finish
The finish protects the wood and completes the design. Paint is best if you want a crisp, clean look or if your plywood has visible patches. Stain is best if you want the wood grain to show. A clear protective topcoat helps resist scratches, moisture, and everyday wear.
For bathrooms and laundry rooms, a durable water-based polyurethane or protective clear coat is a smart choice. Apply thin coats, allow proper drying time, and sand lightly between coats if the product directions recommend it. Always finish wood in a well-ventilated area and follow the label instructions.
Finish Ideas
- White paint with a natural wood lid for modern farmhouse style
- Warm walnut stain for a bedroom furniture look
- Matte black paint with brass hardware for a bold modern design
- Light oak stain for a clean Scandinavian-inspired hamper
- Soft sage or navy paint for a laundry room accent piece
Step 10: Add a Removable Liner
A removable liner makes the hamper much easier to use and clean. You can buy a fabric laundry bag that fits your hamper or sew a simple liner from washable cotton, canvas, or mesh. Attach it with small hooks, buttons, Velcro strips, or a removable wood frame that sits inside the top opening.
A liner also protects clothes from wood edges and keeps the inside of the hamper cleaner. Choose breathable fabric so air can circulate. If you regularly toss in damp towels, wash the liner often and let towels dry before burying them under the rest of the laundry like a tiny swamp.
Optional Upgrades for a Better Wood Hamper
Add Dividers
Install a center divider to create two compartments. This is perfect for sorting lights and darks. Use a thin plywood panel, smooth all edges, and secure it with glue and screws.
Add Casters
Small locking casters make the hamper easy to move for cleaning. Choose casters rated for the weight of the hamper plus laundry. Locking wheels are useful if the hamper sits on tile or hardwood floors.
Add a Shelf
If your hamper is part of a laundry station, add a top shelf or side shelf for detergent, dryer sheets, or folded towels. Just remember: the more shelves you add, the more likely they are to attract mystery objects.
Build a Tilt-Out Version
A tilt-out wood hamper hides laundry behind a cabinet-style door. This design is excellent for bathrooms and laundry rooms, but it requires careful hinge placement and a support frame for the basket. If you are comfortable building basic cabinets, it is a stylish upgrade.
Common Mistakes to Avoid
The biggest mistake is forgetting ventilation. A sealed wooden box full of worn clothes is not a hamper; it is a smell incubator with hinges. Add holes, slats, or breathable panels.
Another common mistake is skipping sanding inside the hamper. Rough edges can snag clothing or tear a liner. Sand every surface that fabric may touch.
Do not make the lid too heavy without proper hinges. A thick solid wood lid may look beautiful, but it can slam shut if not supported. If you have children or pets at home, consider soft-close hardware or a lid support for extra safety.
Finally, avoid using unfinished wood in a damp room. Even if the hamper looks rustic, bare wood can absorb moisture and odors. Seal it properly so the project lasts.
Cleaning and Maintenance
To keep your wood hamper fresh, wipe the interior occasionally with a lightly damp cloth and mild cleaner. Do not soak the wood. Wash the liner regularly, especially if it holds gym clothes, towels, or workwear. Leave the lid open sometimes to let the inside air out.
If the finish gets scratched, lightly sand the damaged area and reapply paint or clear coat. A well-built wood laundry hamper can last for years with basic care.
Real-World Experience: What I Learned Building a Wood Hamper
The first thing you learn when building a wood hamper is that laundry storage has opinions. On paper, a hamper is just a box with a lid. In real life, it needs to fit a room, breathe properly, hold weight, open easily, clean up well, and not look like a shipping crate that got promoted too quickly.
One of the most useful experiences is testing the hamper size before cutting wood. A cardboard mockup may feel silly, but it can save you from building a hamper that blocks a closet door or looks too bulky beside a vanity. Place a box, laundry basket, or taped outline in the intended location and live with it for a day. You will quickly notice whether the lid has enough room to open or whether the hamper sits exactly where your shin likes to travel at midnight.
Another lesson is that ventilation should be designed early, not added as an afterthought. Drilling holes after assembly is possible, but it is much easier to lay out a neat pattern while the side panels are flat on the workbench. A simple grid of holes can look modern and clean if the spacing is consistent. Slats look even better, but they take more time to align. Either way, airflow is worth the effort.
The removable liner is also more important than it seems. Without a liner, you may find yourself carrying armfuls of laundry from the hamper to the washer like a person trying to rescue laundry from a tiny wooden well. A fabric liner turns the whole project from “nice-looking box” into “actually convenient household object.” If you can lift the liner out, carry it to the laundry room, wash it, and put it back easily, you will use the hamper more often and complain about laundry slightly less. Slightly.
Finishing is another area where patience pays off. Paint hides plywood edges and gives a clean furniture look, but stained wood feels warmer and more custom. If staining plywood, test the stain on a scrap first. Some plywood takes stain unevenly, and the result can look blotchy. A pre-stain conditioner may help, depending on the wood species. Paint is more forgiving, especially for beginners.
Hardware choice matters too. Cheap hinges can work, but they may squeak, loosen, or make the lid feel wobbly. A simple pair of quality hinges and a small pull can make the hamper feel finished. If the lid is large, a lid stay or soft-close support is worth considering. Nobody needs a dramatic wooden clap every time someone contributes socks to the cause.
The final lesson is to build for the way your household actually handles laundry. If everyone sorts clothes before washing, add dividers. If laundry travels across the house, add casters. If the hamper sits in a bathroom, prioritize moisture-resistant finish and airflow. If the household includes people who treat laundry as a competitive floor-covering sport, build bigger than you think you need.
A DIY wood hamper is not just about hiding dirty clothes. It is about creating a piece that fits your space, improves your routine, and makes an everyday chore feel a little less chaotic. That is the quiet magic of woodworking: one weekend, some plywood, a few screws, and suddenly your laundry has a home with better architecture than it probably deserves.
Conclusion
Building a wood hamper is a rewarding DIY project because it combines storage, furniture-making, and everyday usefulness in one approachable build. With plywood or solid boards, simple joinery, good ventilation, a washable liner, and a protective finish, you can create a laundry hamper that looks custom and works better than many store-bought options.
The best wood hamper design is not necessarily the fanciest one. It is the one that fits your space, opens easily, lets laundry breathe, and survives real household use. Build it square, sand it smooth, finish it well, and your laundry room, bathroom, or bedroom will instantly feel more organized. Your socks may still disappear, but at least they will vanish from a much nicer container.


