Table of Contents >> Show >> Hide
- Clip-in vs. Fusion Hair Extensions: What DIYers Need to Know First
- How to Choose the Right Hair Extensions
- What You Need Before You Start
- Prep Work: The Step Most DIYers Rush and Then Regret
- How to Apply Clip-in Hair Extensions Step by Step
- How to Apply Fusion Hair Extensions Step by Step
- How to Make Hair Extensions Look Natural
- Hair Extension Aftercare for DIYers
- Common Mistakes That Ruin the Look
- When You Should Absolutely Call a Professional
- Final Thoughts: Which Method Is Best for DIYers?
- Extended Experience Section: What DIYers Commonly Learn the Hard Way
- SEO Tags
If you have ever stared at a set of hair extensions and thought, “I can totally do this,” you are both brave and about three YouTube videos away from a mild identity crisis. The good news? Some hair extensions really are DIY-friendly. The even better news? You do not need a glam squad, a red carpet, or a wind machine to get fuller, longer hair at home.
But here is the truth bomb: clip-in hair extensions and fusion hair extensions are not the same level of commitment, difficulty, or risk. Clip-ins are the easygoing friend who shows up on time and leaves without drama. Fusion extensions are the high-maintenance guest who needs tools, precision, patience, and a very steady hand. If you are a true beginner, clip-ins are the safest, smartest place to start. Fusion can look stunning, but it is much less forgiving when applied incorrectly.
This guide breaks down both methods in plain English, with real-world advice, practical steps, and enough caution to save your natural hair from a regrettable “learning experience.” Whether you want instant volume for a wedding, extra thickness for everyday styling, or mermaid-length hair just because Tuesday felt boring, this DIY guide will help you choose the right method and apply it more confidently.
Clip-in vs. Fusion Hair Extensions: What DIYers Need to Know First
Clip-in hair extensions
Clip-ins are temporary wefts with small pressure clips attached to the base. You section your hair, snap them in, blend them, and remove them when the day is done. They are ideal for beginners because they are fast, reusable, and low-commitment. They also let you experiment with placement, density, and length without turning your bathroom into a hair lab.
Fusion hair extensions
Fusion extensions, often called keratin-tip or bonded extensions, are installed strand by strand. The extension is attached near the root with a keratin bond, usually with a heating tool or specialized fusion system. They can look incredibly natural because the bonds are small and flexible. They are also semi-permanent, which sounds glamorous until you remember that mistakes do not simply “unclip.”
For most DIYers, the smartest strategy is simple: use clip-ins at home and treat fusion as an advanced method. If you are determined to try fusion yourself, do it slowly, use quality tools, avoid rushing, and understand that improper placement, excess tension, or sloppy removal can lead to breakage, discomfort, and even thinning around the hairline.
How to Choose the Right Hair Extensions
Before you start clipping, bonding, or dramatically flipping your hair in the mirror, choose the right extensions.
Pick the right hair type
Human hair extensions usually look the most natural and are easier to heat-style and blend. Remy human hair is often preferred because the cuticles are aligned, which helps reduce tangling and keeps the hair looking smoother longer. Synthetic hair is cheaper, but it may be shinier, stiffer, and harder to blend with natural hair.
Match the color correctly
One of the biggest mistakes beginners make is matching extensions to the roots instead of the mid-lengths and ends. Your ends are usually a little lighter, softer, or more dimensional than the roots. Since extensions show most at the bottom half of the hair, match to your lightest visible tones, not your darkest ones. When in doubt, slightly lighter usually blends better than slightly darker.
Choose a realistic length
If your natural hair is shoulder length and you buy waist-length extensions, blending may become a full-time job. A more believable jump is usually 4 to 8 inches longer than your natural hair unless you plan to curl everything or have the extensions professionally shaped after application.
Consider your density
Fine hair usually needs lightweight clip-ins and careful placement. Thick hair often needs more wefts or higher density to avoid the “my hair ends here, mystery curtain begins there” effect.
What You Need Before You Start
For clip-in extensions
- Clip-in extension set
- Tail comb
- Sectioning clips
- Soft bristle brush or extension brush
- Light hairspray or texture spray
- Mirror setup with good lighting
- Curling iron or flat iron for blending, if needed
- Heat protectant
For fusion extensions
- Keratin-tip or fusion extension strands
- Fusion heating tool or approved bond system
- Sectioning clips
- Tail comb
- Finger protectors or heat guards
- Bonding shields or separator discs
- Extension pliers if required by your system
- Extension-safe brush
- Patience, humility, and the willingness to stop if things look sketchy
Prep Work: The Step Most DIYers Rush and Then Regret
Great extensions start with boring preparation. Yes, boring. Still important.
Wash and dry your hair properly
Your hair should be clean, fully dry, and detangled before application. Clip-ins hold better when the roots have a little grip, so freshly washed hair may need a bit of texture spray or gentle teasing at the section line. Fusion extensions also need a clean base, especially because oils, residue, and heavy conditioners near the root can interfere with secure bonding.
Do a scalp check
If your scalp is irritated, tender, flaky, or already stressed from bleach, heat styling, or tight hairstyles, wait. Extensions should not be a hostage situation for your follicles.
Map out your placement
Do not place extensions too close to the hairline, crown, or nape where they can peek through. Leave enough natural hair around the perimeter to cover the wefts or bonds comfortably. This little detail makes the difference between “Who does your hair?” and “What is that back there?”
How to Apply Clip-in Hair Extensions Step by Step
Step 1: Section the bottom layer
Create a horizontal part about an inch or two above the nape of your neck and clip the rest of your hair up. Start low and work upward in rows.
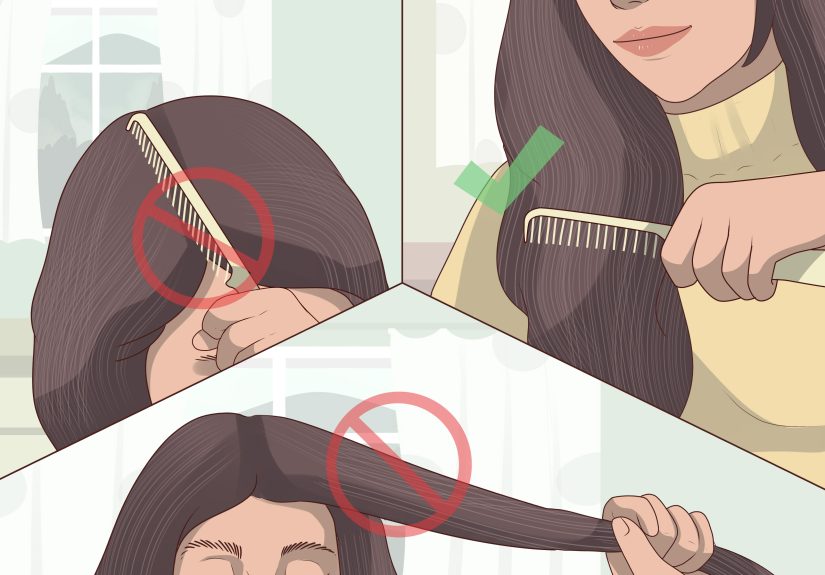
Step 2: Create grip at the roots
If your hair is silky or slippery, lightly tease the roots where the clips will attach, then mist with a touch of hairspray. You want grip, not a rat’s nest.
Step 3: Open the clips and place the weft
Take the widest weft for the back of the head. Snap the center clip first, then the side clips. Keep the weft flat and balanced. Leave some natural hair around the hairline for comfort and concealment.
Step 4: Continue row by row
Drop another layer of hair, create a new horizontal section, and repeat. Separate rows with enough natural hair to cover the wefts well. Smaller side wefts can go above the ears, but keep them far enough back that they do not show when you tuck your hair behind your ear.
Step 5: Check symmetry
Before styling, run your fingers around the placement. If one side feels bulky or the crown looks puffy, remove and reposition. This is the beauty of clip-ins: you can fix your mistakes without booking a rescue mission.
Step 6: Blend with your natural hair
Brush gently, then curl or wave your natural hair and the extensions together if needed. A shared texture helps everything look more seamless. If your natural ends are blunt, a few soft bends usually blend better than poker-straight styling.
How to Apply Fusion Hair Extensions Step by Step
First, the reality check: fusion extensions are not the ideal beginner method. They take longer, require tool control, and can damage hair if applied too tightly, too close to the scalp, or removed incorrectly. If clip-ins are the training wheels, fusion is the road race.
Step 1: Work on fully dry, product-free hair
Your roots should be clean and dry with no heavy oils, creams, or silicone-rich styling products. Fusion needs a clean attachment zone.
Step 2: Create clean sections
Work in neat horizontal rows. Use sectioning clips to keep everything controlled. Within each row, take very small, even subsections. Sloppy sections create bulky bonds and awkward tension.
Step 3: Protect the scalp and isolate the strand
Use your shield or separator tool to isolate a small section of natural hair. This helps keep neighboring hairs out of the bond and reduces the chance of messy attachment.
Step 4: Position the extension carefully
Place the keratin tip near the root, but not pressed against the scalp. The bond needs enough room for natural movement. Too close, and it can feel tight, painful, or stiff. Too far down, and it may twist, droop, or tangle more easily.
Step 5: Melt and shape the bond
Using the correct tool for your system, soften the bond just enough to attach it securely. Then roll or shape it according to the product instructions so it seals neatly around the subsection. The bond should be small, smooth, and consistent. If it looks chunky, sticky, or lopsided, stop and redo it before continuing.
Step 6: Repeat slowly, not heroically
Continue strand by strand, spacing bonds evenly and avoiding overloaded areas. Do not crowd the hairline or temple area. Comfort matters as much as appearance.
Step 7: Test mobility
After a few bonds, check that the hair moves naturally and does not pull when you tilt your head or run your fingers near the scalp. Pain is not a sign of “security.” It is a sign something needs fixing.
Step 8: Blend and refine
Once installed, trim or point-cut only if you know what you are doing. Fusion extensions usually blend best after light shaping and styling. If the ends look too thick or too separate from your natural haircut, a professional blending cut can save the entire look.
How to Make Hair Extensions Look Natural
Use fewer pieces around the crown
Too much density at the crown can create a helmet effect. Add fullness where hair naturally needs support: mid-lengths, back panels, and low sides.
Blend the texture
If your hair is naturally wavy, do not leave the extensions pin-straight. If your hair is blown smooth, do not expect crimpy extensions to magically behave. Style both together.
Trim for realism
Fresh-out-of-the-box extensions are often fuller at the bottom than natural hair. A tiny trim, face-framing blend, or soft layering can make a huge difference.
Hair Extension Aftercare for DIYers
For clip-ins
Remove them before bed unless your specific product and wear plan allow short-term wear comfortably. Store them brushed and neat. Wash only when they actually need it, such as when there is buildup, odor, or heavy product residue. Use gentle shampoo, avoid rough scrubbing, and let them dry thoroughly before storing.
For fusion extensions
Brush gently every day, especially near the roots, while supporting the bonded area with your hand. Use hydrating products through the lengths, but keep heavy oils and slippery treatments away from the bonds. Sleep with the hair loosely braided or secured to reduce tangling. Use heat protectant whenever you style, and avoid excessive heat near the bonds.
For both methods
Do not ignore discomfort. If your scalp feels sore, itchy, or constantly tight, remove the clip-ins or assess the fusion placement immediately. Repeated tension is how a fun beauty project turns into breakage and thinning.
Common Mistakes That Ruin the Look
- Matching color to the roots instead of the ends
- Using too much hair for fine-density natural hair
- Installing too close to the hairline
- Placing clip-ins unevenly so one side looks thicker
- Using too much heat without protection
- Sleeping carelessly with tangled extensions
- Attempting fusion removal without the proper method
- Assuming pain means the install is secure
When You Should Absolutely Call a Professional
There is a time for DIY and a time for handing over the comb.
Get professional help if:
- Your hair is already damaged, over-processed, or thinning
- You have a sensitive scalp or a history of traction-related breakage
- You want a full-head fusion install
- You are unsure how to remove bonded extensions safely
- Your natural haircut needs reshaping to blend the added length
- Your scalp hurts during or after application
There is no trophy for suffering through a bad install. There is only a hat.
Final Thoughts: Which Method Is Best for DIYers?
If you want the honest answer, clip-in hair extensions are the best choice for most DIYers. They are easier to apply, easier to remove, easier to correct, and usually kinder to natural hair when worn properly. They are perfect for special events, everyday volume, or testing whether longer hair even suits your vibe.
Fusion hair extensions can create a gorgeous, long-wearing result, but they demand more technique, more precision, and more respect. They are not impossible to learn, but they are definitely not the method to tackle five minutes before dinner plans.
So start with clip-ins, get comfortable with sectioning and blending, and only graduate to fusion if you are willing to invest in the right products, the right pacing, and the right aftercare. Great extensions should make you feel more polished, not more panicked.
In other words: aim for luxurious hair, not a personal documentary called When Good Wefts Go Bad.
Extended Experience Section: What DIYers Commonly Learn the Hard Way
One of the most common experiences DIYers report with clip-in extensions is that the first attempt almost always takes longer than expected. You think it will be a quick five-minute transformation, then suddenly you are standing in front of a mirror with a tail comb in your mouth, one clip open, one eye squinting, and a growing suspicion that your left side has somehow become twice as thick as your right. That is normal. Most people get dramatically better after two or three installs because they learn where their head shape needs support and where too much hair creates bulk.
Another frequent lesson is that placement matters more than price. Even beautiful, expensive extensions can look fake if they are clipped too high, too close to the front, or stacked without enough natural hair between rows. On the other hand, a reasonably priced set can look fantastic when the color is matched well and the wefts are placed strategically. DIYers often discover that the best-looking result comes from using fewer pieces than expected, then styling the natural hair and extensions together so everything moves as one unit.
People with fine hair often say clip-ins surprised them in two ways. First, they loved the instant fullness. Second, they quickly learned that heavyweight sets are not their friend. Too much density can make fine hair feel strained and can expose the wefts. The best results usually come from lightweight pieces, careful teasing at the root, and staying realistic about how much length the natural hair can support without obvious separation.
With fusion extensions, the learning curve is much steeper. DIYers who try them often say the biggest challenge is not attaching the bond itself but keeping the sections consistent and the spacing comfortable. Tiny differences in placement can change how the entire install feels. Bonds that are too close to the scalp may feel tight when sleeping or styling. Bonds that are too large can feel bulky. Bonds that are messy can tangle neighboring hairs. In other words, fusion tends to punish impatience.
Many people also underestimate the aftercare experience. Extensions, especially human hair extensions, do not magically stay silky because they cost money. They need gentle brushing, thoughtful product use, and smart heat styling. DIYers often learn that their extensions look best when they are brushed more carefully, stored better, and treated with less random product experimentation. A leave-in here? Great. Ten different oils, sprays, creams, and mystery serums layered together? That usually ends in buildup and disappointment.
There is also a confidence factor. Once DIYers learn how to section cleanly, check symmetry, and blend with heat or waves, the whole process becomes far less intimidating. The first install feels like assembling furniture without the instructions. The fourth feels like a beauty routine. That is why many people start with clip-ins, build skill, and then decide whether semi-permanent methods are truly worth it. The real experience lesson is simple: success with extensions is rarely about doing everything perfectly the first time. It is about choosing the right method for your hair, correcting mistakes early, and knowing when “good enough” already looks fabulous.


