Table of Contents >> Show >> Hide
- Start With a Plan (Because “Vibes” Are Not a Structural System)
- Choose Joist Size, Span, and Spacing (The Math That Saves Your Knees)
- Tools and Materials You’ll Want Before You Start
- Step-by-Step: How to Add Deck Joists
- 1) Build or verify the outer frame first
- 2) Decide your joist direction and mark a layout
- 3) Check the crown on every joist (yes, every one)
- 4) Install joist hangers (if framing into a ledger or rim)
- 5) Cut joists to length (and do it consistently)
- 6) Set the joists and fasten them properly at both ends
- 7) Add blocking/bridging to stiffen the frame and prevent roll
- 8) Confirm the joist tops are level and in plane
- Adding Joists to an Existing Deck Frame (Stiffening, Repairs, and “Oops” Fixes)
- Common Mistakes (AKA “How Decks Become Musical Instruments”)
- Pro Tips for a Flat, Solid Deck Frame
- A Quick Example: Joist Layout on a 12' x 16' Deck
- Conclusion: Joists Done Right Make Everything Else Easier
- Real-World Deck Joist Experiences (The Stuff People Learn the Hard Way)
Deck joists are the unsung heroes of outdoor living. They don’t get the glory like fancy railings or that grill you swear you’ll clean “after this weekend,” but joists do the heavy liftingliterally. Install them well and your deck feels solid, quiet, and flat. Install them poorly and you’ll be hosting the world’s first trampoline-themed dinner party.
This guide walks you through adding deck joists the right way: choosing the proper joist size and spacing, laying out a clean joist plan, installing hangers and connectors correctly, and locking everything together with blocking so your frame doesn’t twist like it’s auditioning for a soap opera. Whether you’re framing a brand-new deck or adding joists to stiffen an existing frame, the steps are similarthe difference is how much you’ll have to work around what’s already there.
Start With a Plan (Because “Vibes” Are Not a Structural System)
Check permits, codes, and your local reality
Most deck failures aren’t caused by “bad luck.” They’re caused by skipping the boring parts: permits, inspections, and code requirements for connections. Joists must be supported properly at both ends and restrained so they don’t rotate, and the way you attach joists to ledgers and beams matters just as much as the lumber size. If you’re unsure, ask your local building department what version of the residential code applies in your area and what details they expect on a plan.
Know what joists actually do
Joists are the horizontal framing members that carry deck loads (people, furniture, snow, the mysterious weight of a “small” hot tub) and transfer that load to beams, posts, and footings. They also provide the fastening surface for your decking boards. That means joist layout affects: deck stiffness, how flat your boards sit, how bouncy the deck feels, and how long the decking lasts.
Choose Joist Size, Span, and Spacing (The Math That Saves Your Knees)
Span is the boss; spacing is the boss’s boss
Joist sizing starts with span: the distance your joists must travel between supports (typically from ledger to beam, or beam to beam on a freestanding deck). The longer the span, the deeper the joist needs to begenerally speaking. But spacing also matters because tighter spacing reduces how much each joist has to carry.
A practical example using common span guidance: a Southern Pine 2×8 at 16 inches on center can span roughly around 11 feet 10 inches under standard residential deck loading assumptions, while a 2×10 at 16 inches on center can span around 14 feet. If you push spans, your deck can feel springy even if it’s technically “allowed,” so many builders choose the next size up for comfort.
Spacing depends on your decking layout and material
For typical decking installed perpendicular to joists, 16 inches on center is the common standard. If you install decking diagonally, you often need tighter spacingcommonly 12 inches on centerto reduce “between-joist” flex (especially with composite decking). Some thicker wood boards or certain product lines may allow wider spacing, but always follow the decking manufacturer’s installation requirements because they’re based on how the board itself performs, not just the frame.
Overhangs: yes, but keep them on a leash
Joists can cantilever (overhang past a beam) in some designs, but overhang length is limited. A safe rule in prescriptive deck framing guidance is that the maximum overhang is constrained and typically cannot exceed one-quarter of the actual main span. Translation: you can’t just hang joists into the air and call it “modern.”
Tools and Materials You’ll Want Before You Start
- Joist lumber: commonly pressure-treated 2x material (size per your span/plan)
- Rim joists: matching depth, straight stock for the perimeter
- Ledger (if attached to a house): properly flashed and fastened
- Joist hangers: sized to your joists (2×8 hanger for a 2×8 joist, etc.)
- Fasteners: corrosion-resistant nails/screws approved for the hardware
- Connectors: hurricane ties/joist-to-beam connectors where required
- Chalk line, tape measure, speed square: layout accuracy is everything
- Level/string line/laser: to keep the top of joists in plane
- Saw + safety gear: eye/ear protection, gloves, and a healthy respect for blades
- Blocking material: offcuts are fine if they’re straight and sound
- Optional but awesome: joist tape for water protection on the joist tops
One important materials note: modern pressure-treated lumber often uses copper-based preservatives, which can accelerate corrosion of standard hardware. Use connectors and fasteners rated for treated lumber and your environment (especially if you’re near saltwater or use de-icing salts).
Step-by-Step: How to Add Deck Joists
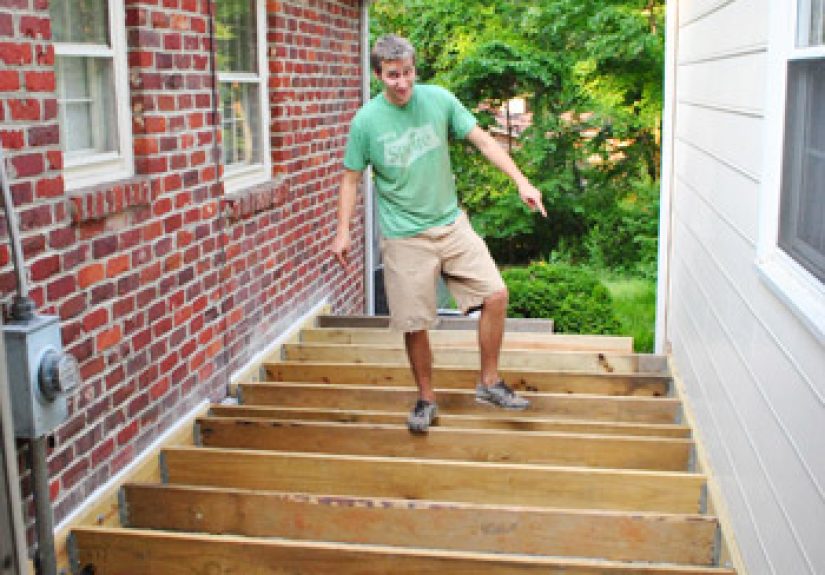
1) Build or verify the outer frame first
A clean outer frame (ledger + rim joists and headers, or rim + beams for freestanding decks) makes joist installation faster and more accurate. If you’re adding joists to an existing frame, inspect the rim joist and ledger area for rot, splitting, or loose fasteners. Fix the skeleton before you add ribs.
Make sure the frame is square: measure diagonals corner-to-corner. If they match, you’re square. If they don’t, adjust nowbecause joists will faithfully preserve whatever weird parallelogram you accidentally built.
2) Decide your joist direction and mark a layout
Joists usually run perpendicular from the house (ledger) to an outer beam. On a freestanding deck, joists might run between beams and attach to a rim board. Pick your direction based on support locations, stairs, and how you want your decking boards to run.
Layout tip: always measure from the same starting corner and mark your spacing on the ledger and the opposite rim/beam line. For 16-inch on-center layout, you’re marking the centerline of each joist at 16, 32, 48 inches, and so on. Put an “X” on the side of the line where the joist will sit, so you don’t accidentally install your joists on the “wrong side of the line” and slowly drift off layout across the deck.
3) Check the crown on every joist (yes, every one)
Most lumber has a slight curve called crown. Install joists with the crown facing up. Over time, load tends to flatten them, which helps your deck stay level. If you install crowns randomly, the deck surface can end up wavylike the ocean, but without the soothing soundtrack.
4) Install joist hangers (if framing into a ledger or rim)
If your joists “frame into” the side of a ledger board or beam (instead of bearing on top), you’ll typically use approved joist hangers. Match the hanger size to your joist depth (don’t shove a 2×10 into a 2×8 hanger and hope it “settles”). Align hangers so the top of the joist will be flush with the top of the ledger/rimthis helps your decking lie flat.
Fastener rule that saves headaches: use the hardware manufacturer’s specified nails or structural screws for hangers and connectors. “Deck screws” are great for decking boards but are generally not rated for joist hanger holes. Also, many hangers have different hole sizes for different fasteners don’t play fastener roulette. Install fasteners in the required holes so the connector reaches its rated strength.
5) Cut joists to length (and do it consistently)
Measure the required joist length based on your frame: from ledger face to beam face (or from rim to rim in a freestanding design), plus any intentional overhang. If your deck design includes a rim board that captures joist ends, cut so the joist ends land neatly flush. For speed and accuracy, many builders “gang-cut” multiple joists at once after confirming the first cut is perfect.
If you’re adding joists between existing ones (to stiffen the deck or meet a composite decking requirement), measure each bay individually. Lumber isn’t always identical in thickness, and old framing can drift. A “one-size-fits-all” cut can turn into “why won’t this fit?” in a hurry.
6) Set the joists and fasten them properly at both ends
Slide each joist into its hanger (or place it on top of the beam if it bears). Check that the joist is seated fully. The top edge should be in plane with neighboring joists. If you find one joist sitting proud, fix it nowshim where allowed, plane where appropriate, or swap the piece. Your future decking boards will thank you by not squeaking.
At the beam end, you’ll typically do one of three things:
- Bear on top of the beam: joist rests on beam; use mechanical connectors as required.
- Attach to the side of the beam with hangers: useful for flush beams or specific designs.
- Use a flush beam and rim board strategy: common when you want a clean fascia line.
Don’t ignore uplift. Wind can lift deck framing, and people jumping around (kids, parties, your cousin who thinks he’s still 22) can introduce movement. Connectors like hurricane ties and joist-to-beam connectors help keep joists locked where they belong.
7) Add blocking/bridging to stiffen the frame and prevent roll
Blocking is short pieces of lumber installed between joists. It reduces twist, stiffens the deck, and helps distribute loads. A common approach is mid-span blocking along a chalk line, staggered from bay to bay for easier nailing. If you’re using joist hangers at the ends, blocking also helps keep joists from rotating, which keeps the deck flatter and quieter.
If your deck will have rail posts mounted at the perimeter, strengthen the rim area with additional blocking or a doubled rim board where appropriate. The goal is to create a perimeter that’s rigid enough to resist bounce and provide solid attachment points.
8) Confirm the joist tops are level and in plane
Before decking goes down, sight across the joists and use a long level, straightedge, or string line. Minor variations are normal with wood framing, but big highs/lows lead to ugly board joints and squeaks. Fix problems now. Once decking is installed, the only way to fix a hump is to remove boardsor become emotionally attached to the hump and give it a name.
Adding Joists to an Existing Deck Frame (Stiffening, Repairs, and “Oops” Fixes)
When would you add joists after the fact?
- You’re switching to composite decking and need tighter joist spacing.
- The deck feels bouncy and you want a stiffer floor.
- You’re adding features like a picture-frame border, diagonal decking, or heavy planters.
- You’ve discovered damaged, split, or sagging joists that need reinforcement.
How to add joists between existing ones
First, confirm your perimeter framing and beam are sound. Then measure each bay and cut joists to fit. If your original frame used hangers, add matching hangers at the ledger and rim. If joists bear on a beam, ensure the new joists are supported properly and tied down as required.
Pro move: add solid blocking at the beam line and near the ends if you’re trying to reduce bounce. Also consider installing joist tape on the new joists to protect the top edge from waterespecially helpful if your deck boards have gaps that let water sit on joist tops.
How to “sister” a joist (reinforce an existing one)
Sistering means fastening a new joist alongside a damaged or sagging joist. Use a matching depth piece whenever possible. Make sure the new joist bears properly at supports (don’t just glue it in midair). Clamp it tight, align the tops in plane, and fasten with structural screws or bolts as appropriate. This technique is often used for localized repairs or to stiffen a span before adding heavier loads.
Common Mistakes (AKA “How Decks Become Musical Instruments”)
1) Using the wrong fasteners in hangers
Joist hangers and connectors are engineered systems, not decorative metal. If the manufacturer specifies connector nails or structural screws, use them. Substituting drywall screws is like wearing flip-flops to hike a mountain: bold, optimistic, and usually regrettable.
2) Ignoring corrosion compatibility
Treated lumber + the wrong metal can equal fastener corrosion faster than you’d expect. Choose connectors and fasteners rated for contact with treated lumber and your environment, especially in wet, coastal, or de-icing-salt conditions.
3) Sloppy layout
If your on-center spacing drifts across the deck, your decking boards won’t land where you want them, and fasteners may miss joists. Mark accurately, use consistent reference points, and re-check after every few joists.
4) Skipping blocking
Blocking isn’t “extra.” It’s what keeps joists from rolling, helps the deck feel stiffer, and gives you better performance long-term. If your deck squeaks, flexes, or feels loose, missing blocking is often part of the story.
Pro Tips for a Flat, Solid Deck Frame
- Choose the straightest boards for the rim: the perimeter is visible and sets the plane.
- Snap chalk lines for blocking: a straight line makes the whole frame look professional.
- Consider 12-inch spacing for premium feel: especially with diagonal or composite decking.
- Seal cut ends: field cuts on treated lumber benefit from end-cut preservative where recommended.
- Paint or darken joist tops (optional): can reduce visible joist “striping” through deck board gaps.
A Quick Example: Joist Layout on a 12′ x 16′ Deck
Let’s say your deck is 12 feet wide (parallel to the house) and 16 feet deep (out from the house). You plan to run joists out from the house and install decking perpendicular to the house. If you choose 16 inches on center spacing, you’ll mark the ledger and front rim/beam line at 16-inch intervals.
Rough joist count estimate: 12 feet = 144 inches. 144 ÷ 16 = 9 spaces. Add one joist at the start, and you’re around 10 joists totalplus potential extras for edges, picture framing, or stair framing. If you go 12 inches on center for diagonal decking or extra stiffness: 144 ÷ 12 = 12 spaces, so you end up around 13 joists (again, plus extras for details).
The point isn’t to memorize a formula. The point is to see how spacing impacts both performance and material count. More joists cost more, but they also make the deck feel better underfootand can be required for some decking products and patterns.
Conclusion: Joists Done Right Make Everything Else Easier
Adding deck joists isn’t just “put boards here, nail boards there.” It’s a system: choose a joist size that fits your span, choose spacing that matches your decking material and layout, install hangers/connectors with the correct fasteners, and add blocking so joists stay upright and in plane. Do that, and you’ll get a deck that feels sturdy, looks flat, and stays that way for years.
Real-World Deck Joist Experiences (The Stuff People Learn the Hard Way)
If you hang around deck builders long enough, you’ll notice a theme: nobody regrets making a deck frame stronger. People regret making it “just strong enough.” That regret usually shows up as bounce, squeaks, or boards that feel a little too alive when guests start moving around.
One common “experience upgrade” is tightening joist spacing even when the minimum rules allow wider. Homeowners who switch from 16 inches on center to 12 inches on center often describe the deck as feeling more “indoor-floor solid,” especially with composite boards. Composite decking can be less stiff than thick wood planks, and diagonal patterns increase the effective span between supports. Builders who’ve done both will tell you: the labor difference is small, but the feel difference is huge. The deck stops announcing every footstep like it’s narrating a documentary.
Another lesson that comes up repeatedly: joist hangers are only as strong as the fasteners in them. On projects where someone tried to save time (or money) by using whatever screws were in the truck, the result is often loose hardware, squeaks, and connectors that don’t perform as designed. The “experienced” approach is boring but effective: buy the correct connector nails or structural screws, fill the required holes, and make sure the hanger sits tight to the ledger/rim without gaps. That half-hour of doing it right can save years of annoying movement.
Real decks also teach you that wood isn’t a perfect materialit’s a living, twisting, sometimes dramatic bundle of fibers. That’s why crown direction matters. People who skip crowning usually don’t notice right away. The deck looks okay at first. Then a season passes, the joists settle, and one board line starts to look like a gentle wave. The fix is never fun once decking is installed. Builders with scars (emotional and literal) tend to crown every joist like it’s a ritual. Because it is.
Blocking is another “experience divider.” A deck can meet span rules and still feel bouncy if joists are free to twist or if loads aren’t shared well. Builders who install mid-span blocking routinely report less bounce, fewer squeaks, and an easier time keeping joists aligned during decking installation. Homeowners notice it tooespecially when furniture doesn’t wobble and rail posts feel more confident. If you’ve ever leaned on a railing and felt the deck respond like it’s thinking about it, you already understand why perimeter blocking and a stiff rim matter.
Weather exposure creates its own set of “experience notes.” People who add joist tape or protect the top edges of joists tend to see less checking and rot over time, especially on decks with wide board gaps where water routinely lands on joist tops. The tape isn’t magic, but it’s a smart defense at the most vulnerable spot. Likewise, folks who choose corrosion-rated connectors near the coastor where de-icing salts are commonavoid the unpleasant surprise of fasteners that look like they’ve been marinating in regret.
Finally, experienced builders often talk about “building for the next person.” That doesn’t mean you expect to move. It means you build so future repairs are possible and inspections are straightforward. Keep framing logical, keep connectors visible where practical, and avoid weird one-off shortcuts. Decks live outside. They will age. A well-framed joist system makes that aging graceful instead of chaotic. And graceful aging is the whole pointboth for decks and, ideally, for the people enjoying them.


