Table of Contents >> Show >> Hide
- Why an Old Dresser Is Worth Saving
- Before You Start: Know What You Are Working With
- How to Do a DIY Old Dresser Makeover the Right Way
- 10 Stylish DIY Old Dresser Makeover Ideas
- Common Mistakes That Can Ruin a Dresser Makeover
- What a Budget-Friendly Makeover Might Cost
- Real-World DIY Dresser Makeover Experiences and Lessons Learned
- Conclusion
- SEO Metadata
An old dresser is the ultimate underdog of home decor. It sits there looking tired, slightly offended, and maybe a little sticky from a life well lived. But with the right DIY old dresser makeover idea, that sad piece can become the star of a bedroom, entryway, nursery, or even a dining room. Yes, the same dresser you almost donated for the price of a coffee can end up looking like a boutique find with personality, storage, and a much better attitude.
The secret is not just throwing paint at it and hoping for the best. A beautiful dresser makeover comes from understanding the piece, prepping it properly, choosing a finish that suits the material, and adding small design details that make it feel custom. The best part is that you do not need a giant workshop, a design degree, or supernatural patience. You just need a plan, a little elbow grease, and the confidence to say, “This old thing? I made it fabulous.”
In this guide, you will learn how to transform an outdated dresser step by step, which makeover styles work best, what mistakes to avoid, and how to stretch your budget without making the result look cheap. Whether your dresser is solid wood, veneer, laminate, or a mysterious material that seems to have been invented by a bored factory in 1997, there is a makeover path for it.
Why an Old Dresser Is Worth Saving
A dresser makeover is one of the smartest upcycling projects because it combines style and function. Unlike trendy decor that only looks good on a shelf, a dresser earns its keep every day. It stores clothes, corrals clutter, and gives a room visual weight. When you update one, you are not just making something prettier. You are improving how the room works.
Older dressers are also often better built than many inexpensive new pieces. Solid wood frames, sturdy drawers, and heavier construction give them real makeover potential. Even a worn dresser with scratches, dated hardware, and a finish straight out of another decade can become a polished, modern, farmhouse, vintage, or mid-century-inspired statement piece.
And then there is the budget factor. A thrifted or hand-me-down dresser can cost far less than buying new furniture of similar size. A few supplies like cleaner, sandpaper, primer, paint, and hardware can deliver a dramatic before-and-after without requiring designer-level spending.
Before You Start: Know What You Are Working With
Not every dresser should be treated the same way. A solid wood dresser gives you the most flexibility because it can be sanded, stained, painted, or refinished more aggressively. Veneer can also be updated beautifully, but it requires a gentler touch because the top layer is thin. Laminate needs special attention too, especially when it comes to proper cleaning, light sanding, and using a bonding primer so the paint does not peel off like bad sunburn.
You should also pause before painting a truly valuable antique. Some old pieces are worth more in original or professionally restored condition than they are after a trendy makeover. If the dresser is unusually old, finely crafted, or has historic value, it may be smarter to preserve it rather than cover it in a cheerful shade of sage.
Safety matters too. If the dresser is very old and has existing paint, especially if it may date back to before 1978 in the United States, do not casually start sanding. Lead-based paint is a real concern in older pieces and homes. In that situation, test first or use lead-safe practices rather than launching a dust storm in your garage.
How to Do a DIY Old Dresser Makeover the Right Way
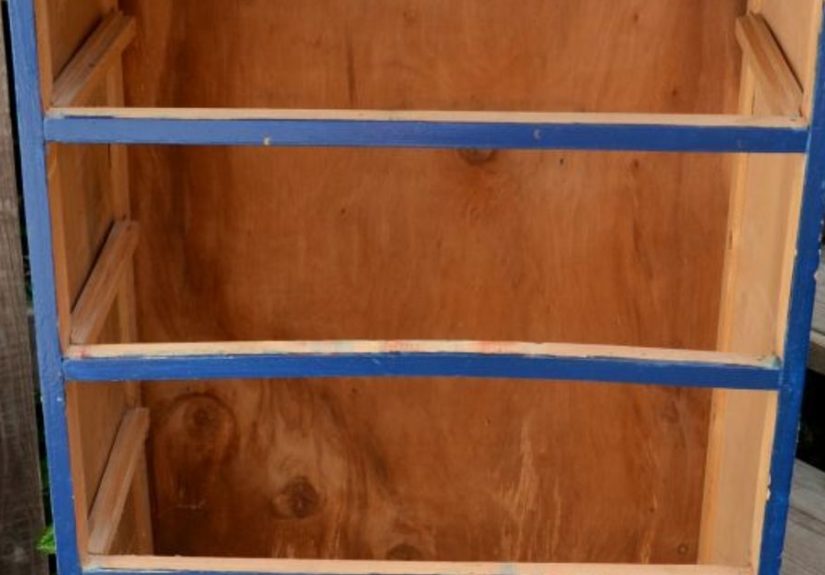
1. Empty It Out and Remove the Hardware
Take out all drawers, knobs, pulls, and any removable trim. Label the hardware if you plan to reuse it. This makes cleaning and painting much easier, and it saves you from awkward brush gymnastics later. It also gives you a chance to inspect drawer slides, loose joints, and hidden damage.
2. Clean First, Always
This is the least glamorous step and one of the most important. Old furniture collects wax, dust, body oils, furniture polish, and mystery grime. If you paint over that mess, your beautiful finish may not stick well. Use a degreasing cleaner or a gentle soap solution, wipe every surface thoroughly, and let the piece dry fully before moving on.
3. Make Repairs Before the Pretty Part
Fill dents, chips, and old hardware holes with wood filler if needed. Tighten screws, glue loose joints, and check that drawers open smoothly. If one drawer sticks like it is holding a personal grudge, fix that now. A makeover should improve function as well as appearance. Cosmetic upgrades look far more impressive when the dresser actually behaves like a proper piece of furniture.
4. Sand or Degloss Smartly
You do not always need to strip a dresser down to bare wood, but you usually do need to dull the surface so primer and paint can grip. A light sanding with fine or medium grit sandpaper is often enough for painted finishes, sealed wood, MDF, and laminate. The goal is not destruction. The goal is adhesion.
If you are staining bare wood, proper sanding matters even more because stain highlights flaws instead of hiding them. Sand with the grain, smooth the surface, and remove all dust before moving on. Dust is sneaky. It will ruin a smooth finish faster than you can say, “Why does this look crunchy?”
5. Prime Like You Mean It
Primer is the bridge between old surface and new finish. On wood, it helps with coverage and stain blocking. On laminate or slick factory finishes, it is essential for adhesion. On dark dressers being painted a lighter color, it saves you from applying endless coats while slowly losing the will to live.
Use the right primer for the material. Bonding primers are great for laminate, veneer, and glossy surfaces. Stain-blocking primers help when knots, water marks, or old wood tannins want to show through. Apply thin, even coats and let them dry properly.
6. Choose the Right Finish
This is where your DIY old dresser makeover idea starts to show personality. Paint is the most popular option because it covers flaws and opens the door to endless styles. A satin or semi-gloss furniture-friendly enamel works well for durability and easier cleaning. Chalk-style paint can create a soft, matte, vintage look, though many projects still benefit from a protective topcoat. If the wood grain is attractive, a stain-and-seal approach can look rich, warm, and far more expensive than the actual cost.
A two-tone finish is another strong option. Think painted body with stained drawers, natural wood top with a deep green frame, or creamy off-white paired with black hardware. The contrast adds dimension and can make a basic dresser look intentionally designed rather than simply repainted.
7. Paint in Thin Coats
Resist the urge to glob on paint to “save time.” Thick coats lead to drips, long dry times, and a finish that announces itself as homemade in the wrong way. Use thin, even coats with a good brush, small foam roller, or sprayer if you have one. Let each coat dry properly. Lightly sand between coats if needed for a smoother result, especially on high-use furniture.
8. Protect the Finish
Dressers are hardworking pieces, so protection matters. Depending on your paint type and desired sheen, a clear topcoat, wax, polyurethane, or durable furniture enamel may help guard against scratches and scuffs. This is especially useful for children’s rooms, rental properties, or any household where furniture regularly gets bumped, dragged, leaned on, or otherwise treated like a member of the family.
9. Upgrade the Hardware
If paint is the makeover’s outfit, hardware is the jewelry. Swapping old knobs and pulls can completely change the dresser’s style. Brass adds warmth, matte black looks modern, acrylic feels airy, and wood knobs lean minimalist and Scandinavian. You can also paint existing hardware if the shape is good but the finish is dated.
10. Add Designer Details
This is the step that separates a plain refresh from a memorable transformation. Add fluted trim with thin wood dowels, line the drawers with wallpaper, attach cane webbing to drawer fronts, stencil a geometric pattern, or install tapered legs for a mid-century look. These details do not just improve the dresser. They tell a story.
10 Stylish DIY Old Dresser Makeover Ideas
1. The Classic Painted Dresser
A single solid color in navy, white, black, olive, or greige creates a timeless, easy-to-style piece. Pair it with updated hardware for an instant upgrade.
2. Two-Tone Contrast
Paint the frame one color and the drawers another, or leave the top stained wood. This adds visual depth without much extra cost.
3. Fluted Front Trend
Attach wood dowels or trim vertically to drawer fronts, then paint the whole piece one color. It creates texture and a high-end look that feels custom.
4. Mid-Century Modern Refresh
Think warm walnut stain, olive or rust accents, slim brass pulls, and tapered legs. This works beautifully on simple boxy dressers.
5. Farmhouse Charm
Use a soft white, muted sage, or dusty blue, then distress edges lightly and add cup pulls. It feels cozy without looking forced.
6. Moody Modern Drama
A deep charcoal, forest green, or black dresser with sleek hardware makes a room feel grounded and sophisticated.
7. Cottage Floral Accent
Add painted flowers, wallpapered drawer fronts, or subtle stencil work. Great for guest rooms, kids’ rooms, or anyone who likes furniture with personality.
8. Natural Wood Revival
If the grain is beautiful, strip the old finish, sand carefully, apply stain, and seal it. This approach celebrates the original material instead of hiding it.
9. Color-Blocked Pop
Use painter’s tape to create arches, stripes, or bold drawer panels. This idea works especially well in playful or creative spaces.
10. Luxe Hardware-First Makeover
Sometimes the biggest upgrade is not the paint but the styling. A fresh neutral finish with oversized brass pulls or elegant ring hardware can make a basic dresser look custom-made.
Common Mistakes That Can Ruin a Dresser Makeover
The most common mistake is poor prep. Skipping cleaning, rushing sanding, or using the wrong primer can lead to chipping, bleed-through, or a finish that never really feels bonded. Another classic error is painting a laminate dresser like it is solid wood. Laminate needs a more careful adhesion strategy.
People also underestimate dry time. Furniture projects are not ideal for impatience. Paint may feel dry to the touch long before it is fully cured. Reinstalling drawers too quickly can cause sticking, smudging, and dents that somehow appear exactly where you do not want them.
Finally, do not ignore scale and styling. Tiny modern pulls on a chunky vintage dresser can look awkward, while overly distressed finishes can feel more “flea market confusion” than “curated charm.” Match the finish, hardware, and room style so the piece feels intentional.
What a Budget-Friendly Makeover Might Cost
A simple dresser makeover can be surprisingly affordable. If you already own a few supplies, your biggest expenses may be primer, paint, sandpaper, and hardware. A no-frills refresh often costs less than replacing the dresser with something of similar size and quality. Even if you add trim, wallpaper liner, or new legs, the project can still deliver strong value compared with buying a brand-new statement piece.
The trick is knowing where to spend. Invest in good prep materials and decent paint. Save money by reusing hardware when possible, shopping secondhand for the dresser itself, or choosing one standout detail instead of ten smaller upgrades fighting for attention.
Real-World DIY Dresser Makeover Experiences and Lessons Learned
One of the most useful things about any DIY old dresser makeover idea is that real experience teaches you what glossy before-and-after photos never do. In real life, dressers are often a little warped, one drawer always sticks, one knob hole is mysteriously off-center, and the back panel may look like it survived a small emotional crisis. That does not mean the project is doomed. It means the project is normal.
Many DIYers discover that the transformation really begins when they stop expecting perfection and start looking for potential. A scratched-up dresser from a thrift store can feel underwhelming at first. The finish may be dull, the hardware may be ugly, and the entire piece may smell faintly like old attic and regret. But once it is cleaned, sanded, and stripped of visual clutter, the shape becomes easier to appreciate. The proportions matter more. The drawer layout starts to look useful. Suddenly the piece no longer looks like junk. It looks like a blank canvas.
Another common experience is realizing that prep takes much longer than painting. Nearly everyone goes into the project excited about color and completely unexcited about cleaning, sanding, and priming. Then, halfway through, it becomes obvious that these boring steps are doing all the heavy lifting. A dresser with careful prep usually looks smoother, feels sturdier, and holds up better over time. The projects that fail fastest are usually the ones rushed through the “nobody will notice” stage.
Hardware changes also tend to deliver more impact than expected. People often think the paint will do all the magic, but the hardware is what finishes the sentence. Swapping clunky dated pulls for simple brass handles or sleek black knobs can make the dresser feel intentional and current. It is one of those small updates that makes guests ask where you bought it, which is deeply satisfying when the answer is, “Technically, it used to be embarrassing.”
There is also the lesson of restraint. Many first makeovers start with five big ideas at once: bold color, stencil, new legs, drawer liners, trim, distressing, and maybe a dramatic emotional monologue. Usually the best results come from choosing one strong design direction and letting it breathe. A dresser painted in a rich olive with elegant hardware can look more expensive than one overloaded with every trend in the craft aisle.
Perhaps the biggest takeaway from real dresser makeover experiences is confidence. Once you finish one piece, furniture stops feeling fixed and intimidating. You start seeing possibility everywhere: nightstands, side tables, cabinets, media consoles. An old dresser makeover is rarely just about one dresser. It often becomes the project that teaches you how to trust your eye, build practical skills, and create a home that reflects your taste instead of whatever happened to be on sale in a box store.
That is why these projects stick with people. They are affordable, useful, and deeply personal. You are not just repainting furniture. You are rescuing something, learning something, and making your home feel a little more yours.
Conclusion
A great DIY old dresser makeover idea is equal parts preparation, imagination, and restraint. Start with a solid plan, respect the material, and do not skimp on cleaning, sanding, priming, or dry time. Then have fun with color, finish, and details that fit your space. Whether you go for a simple painted refresh, a stained wood revival, or a dramatic fluted designer look, the goal is the same: take a tired piece and give it a second life that looks intentional, functional, and surprisingly beautiful.
Old dressers may come with scratches, stains, and questionable hardware choices from decades past, but they also come with character and possibility. And honestly, that is more than can be said for a lot of flat-pack furniture. With the right makeover, your old dresser can become one of the hardest-working and best-looking pieces in your home.


