Table of Contents >> Show >> Hide
- What Is an “Ice Crystal” Votive, Exactly?
- Why This DIY Is Actually $5-Friendly
- Supplies You’ll Need
- Before You Start: Prep Like You Mean It
- Method 1: Classic Ice Crystal Coat (Easiest + Most “Frozen” Looking)
- Method 2: “Glacier Shards” Texture (Raised Ice Crystal Details)
- Method 3: Soft Frosted Glass (Matte “Snow Drift” Look)
- Lighting: LED vs. Real Flame
- Design Ideas That Look Expensive (But Aren’t)
- Common Mistakes (and How to Fix Them Fast)
- Care, Storage, and How to Make Them Last
- DIY Variations (So You Can Make a Whole “Collection”)
- Wrapping It Up
- Extra: Real-World “Experience” Tips (How It Usually Goes When You Make These)
Winter decor has a personality type. It’s the friend who shows up wearing sequins at noon and somehow makes it look reasonable. This DIY “ice crystal” votive is exactly that energy: a plain glass holder that gets a frosty, sparkly makeover for about five bucks (or less if your pantry is already basically a craft store).
The vibe: icy lake at sunset. The reality: Epsom salt + glue + a little patience. And you don’t need a hot glue gun arsenal or an art degreejust a willingness to get tiny “snow” crystals everywhere for the next 48 hours. (You’ll find them later. In places. We accept this.)
What Is an “Ice Crystal” Votive, Exactly?
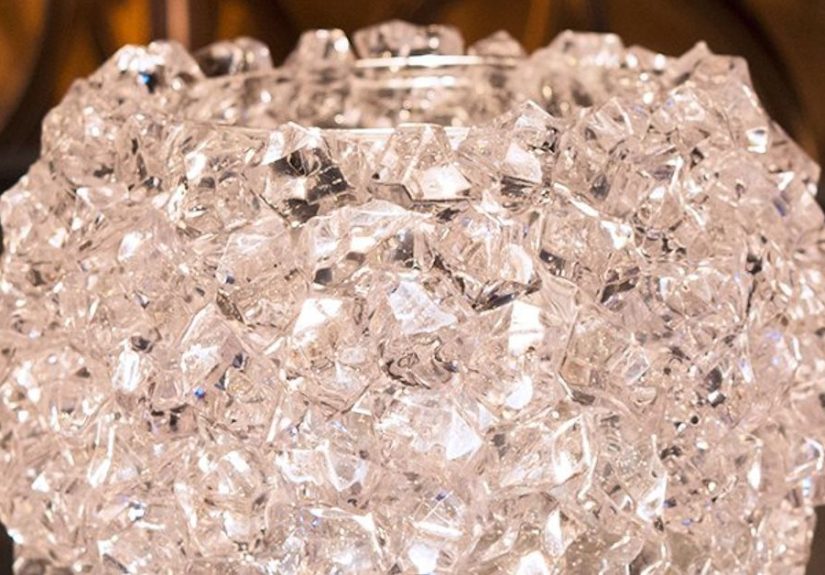
An ice crystal votive is a candle holder (usually glass) decorated to look like it’s been kissed by winterfrosted, crystalline, and slightly magical. Most versions use a simple adhesive (like decoupage glue or craft glue) and textured crystals (often Epsom salt) to create that “frozen windowpane” look. Add a candle or LED tealight inside and the whole thing glows like it has secrets.
Why This DIY Is Actually $5-Friendly
You’re not buying “specialty frost paste” with a fancy label. You’re making a high-end look with basic supplies and smart substitutions. Here’s the budget breakdown:
| Item | Budget Option | Typical Cost (US) | Notes |
|---|---|---|---|
| Glass votive or small jar | Dollar store / thrift / repurposed candle jar | $0–$2 | Upcycling = instant savings. |
| Epsom salt | Generic brand | $1–$2 | Texture matters: “coarse” looks extra crystalline. |
| Glue | White school glue or decoupage glue | $1–$2 | Decoupage glue dries clearer; school glue still works. |
| Brush or sponge | Foam brush (cheap) or makeup sponge | $0–$1 | You can also use a clean kitchen sponge edge. |
| Optional sparkle | White/clear glitter (tiny amount) | $0–$1 | Optional, but it does bring the drama (in a good way). |
Total: As low as $3 if you reuse a jar, or around $5 if you buy everything in mini form. The trick is choosing one glue and one crystal. You don’t need a cart full of “winter aesthetic essentials.”
Supplies You’ll Need
- Clean glass votive holder, mason jar, or a recycled candle jar
- Epsom salt (coarse or regular)
- Decoupage glue (or white school glue)
- Foam brush or sponge brush
- Plate, shallow tray, or baking sheet (for catching the “snowstorm”)
- Painter’s tape (optional, for a crisp clean rim)
- LED tealight (recommended) or a real votive candle (use safety notes below)
- Optional: white/iridescent glitter, twine, ribbon, mini pine sprigs, acrylic sealer spray
Before You Start: Prep Like You Mean It
Most “my crystals fell off” heartbreak comes from skipping prep. Glass loves to hold onto invisible oilslike fingerprints, soap residue, and the ghost of the pizza you ate while crafting. Here’s the fix:
- Wash the glass with warm, soapy water. Rinse well.
- Dry completely. Water + glue = patchy frosting.
- Optional but helpful: Wipe the outside with rubbing alcohol and let it evaporate.
- Tape the rim if you want the top edge to stay clear and clean.
Method 1: Classic Ice Crystal Coat (Easiest + Most “Frozen” Looking)
This is the go-to method because it’s quick, forgiving, and looks like you bought it from a boutique that sells $18 votives next to artisanal matches.
Step-by-Step Instructions
- Pour Epsom salt into a tray. Use enough to roll or press the jar into it. (If you’re sprinkling instead, use a bowl + spoon.)
- Brush glue onto the glass in sections. Work in small areas because decoupage glue dries fast. Coat evenlythin-to-medium is your sweet spot. Too thick can drip.
- Add the “ice crystals.” Choose your application style:
- Sprinkle method: Spoon salt over the glued section while turning the jar.
- Roll method: Gently roll the glued jar in the salt tray for an even coat.
- Press method (extra crystal-y): Lightly press salt into the glue with clean fingers, then shake off excess.
- Repeat until covered. Leave the bottom bare or lightly coated so it sits flat.
- Let it dry. Give it at least 1 hour before touching, and a few hours before decorating.
How to Make It Look Like Real Ice (Not Just “Salty”)
- Mix textures: Combine coarse Epsom salt with a little regular Epsom salt for varied crystal size.
- Add a whisper of glitter: Mix a tiny pinch of white or iridescent glitter into your salt. Think “snow shimmer,” not “disco ball.”
- Layer strategically: After the first coat dries, dab a few random “patches” of glue and sprinkle more salt to create chunky crystal clusters.
- Leave breathing room: A few thinner spots make it look more like natural frost rather than a breaded chicken cutlet (delicious, but wrong category).
Optional: Seal It (Especially If You Live Somewhere Humid)
Epsom salt can pull moisture from the air. In dry climates, you may never notice. In humid conditions, the crystals can soften or shed. A light coat of clear acrylic sealer spray can help lock things in. Let the glue fully dry first, then spray in light passes outdoors or in a ventilated space.
Method 2: “Glacier Shards” Texture (Raised Ice Crystal Details)
If you want your votive to look like it has little frozen ridgeslike the edge of an icy ponduse this raised-detail trick.
What You’ll Do
- Make raised lines with a thin bead of hot glue on the outside of the glass (zigzags, vertical drips, or geometric shards).
- Let the glue cool fully.
- Brush glue over and around the raised lines (decoupage glue or white glue).
- Sprinkle Epsom salt heavily so it catches on the raised areas.
- Dry + optionally seal.
Result: It looks like ice crystals formed along ridgeshigh-texture and extra glowy when lit.
Method 3: Soft Frosted Glass (Matte “Snow Drift” Look)
If you prefer a smoother, cloudy frost (less sparkle, more Scandinavian cabin vibes), you can create a paste-like paint by mixing white glue with a little baking soda. Brush it on in thin layers for a chalky, snowy finish. It won’t look as crystalline, but it’s very “cozy winter minimal.”
Lighting: LED vs. Real Flame
Let’s talk glowbecause a votive without light is basically just a fancy cup.
LED Tealights (Recommended)
- Cool to the touch, safer around dried greenery and ribbon.
- Perfect for kids’ rooms, party tables, and leaving on during movie night.
- Bonus: many flicker realistically now, so you still get the romance.
Real Votive Candles (If You Choose This Route)
- Keep all crystal coating on the outside only. Do not glue salt inside the holder.
- Use thick glass that’s meant for candles (true votive holders are best).
- Keep flames away from ribbon, twine, pine, and anything flammable.
- Never leave a burning candle unattended. Ever. Not even “for one second.” That’s how legends begin.
Design Ideas That Look Expensive (But Aren’t)
Once your icy coating is dry, you can keep it simple or go full winter wonderland. Here are options that feel polished without getting fussy:
1) Minimalist Frost
- Leave the jar plain (just crystals), add a warm LED tealight.
- Cluster three sizes together for a centerpiece that looks styled.
2) Woodland Winter
- Wrap twine around the neck.
- Tuck in a tiny sprig of faux pine or rosemary.
- Add a small bell or wooden bead if you’re feeling festive.
3) Icy Blue “Frozen Lake”
- Mix a drop of blue acrylic paint into your glue (test first; too much turns cloudy).
- Or place a blue-tinted LED tealight inside for a cool glow without changing the exterior.
4) Party-Ready Place Settings
- Write guests’ names on a small tag.
- Tie it to the votive with twine.
- Instant place card + decor + “I definitely planned this” energy.
Common Mistakes (and How to Fix Them Fast)
Problem: Bald patches (glass shows through)
Fix: Once dry, dab glue on the patch and sprinkle salt again. Layering is allowed. Winter is not a one-coat season.
Problem: Glue drips
Fix: Use a thinner coat next time. If you see a drip forming, rotate the jar and brush it out immediately.
Problem: Crystals shedding everywhere
Fix: Tap off loose salt after the first sprinkle, then consider a light clear sealer coat after everything dries.
Problem: Clumpy crystals (looks like cottage cheese)
Fix: Your glue layer may be too thick. Try applying in thinner sections and sprinkling lightly first, then adding a second pass only where you want chunky “ice.”
Problem: It looks “dusty,” not icy
Fix: Mix in coarse salt, add a micro-pinch of glitter, or create a few raised “glacier shard” lines (Method 2) for dimension.
Care, Storage, and How to Make Them Last
- Keep them dry. Humidity is the frenemy of Epsom salt crafts.
- Store gently. Wrap in tissue paper, not plastic (plastic can trap moisture).
- Don’t wipe with a wet cloth. Dust gently with a dry brush or a soft, dry cloth.
- If crystals soften: Let the votive sit in a dry spot for a day, then reseal lightly if needed.
DIY Variations (So You Can Make a Whole “Collection”)
If you’re making more than one, small tweaks keep it interesting while still looking cohesive:
- Ombre frost: Heavy crystals at the bottom fading upward.
- Frost band: Only coat the lower half, leaving the top clear.
- Snowfall speckle: Use a toothbrush to flick watered-down glue lightly, then sprinkle salt for a scattered frost effect.
- Lantern upgrade: Add a wire handle (from craft wire) for a jar-lantern lookespecially pretty on a porch (with LED only).
Wrapping It Up
A DIY ice crystal votive is one of those projects that delivers a ridiculous “wow” for very little effort. It’s fast, forgiving, and flexible: rustic, glam, minimalist, woodland, icy-blueyou can steer it wherever your decor mood is going. Make one as a cozy accent, or make a whole set and suddenly your dining table looks like it’s hosting a holiday magazine photo shoot.
And the best part? You didn’t spend $18 per candle holder. You spent $5 and got the satisfaction of saying, “Oh this? I made it.” (Try to say it casually. Even if you’re extremely proud. Especially if you’re extremely proud.)
Extra: Real-World “Experience” Tips (How It Usually Goes When You Make These)
If you’re making just one votive, this project feels like a quick craft break. If you’re making a batchsay, for a party, a winter wedding, a classroom table, or a “my house will be cozy if I decide it is” momentthere are a few things that tend to happen, and it’s nice to be prepared.
1) Assembly-line crafting is your best friend
Making multiple ice crystal votives is way easier when you treat it like a mini production line. Wash and dry all jars first. Lay out your salt tray and a “drying zone” (cardboard, parchment, or an old baking sheet). Then do glue on jar #1, salt on jar #1, glue on jar #2, salt on jar #2… and so on. You’ll stay in the rhythm, and you won’t end up with half-dried glue that refuses to hold crystals because it got bored waiting for you.
2) The rim is the secret to a professional finish
A clean rim makes the whole thing look store-bought. Painter’s tape helps, but even without it, you can “design” the rim intentionally: either keep it clear or coat it fully. What usually looks accidental is a halfway rim with random crystal crumbs stuck where your fingers held the jar. The easy workaround is to hold the jar from the inside while you work (fingers inside the opening), then do the rim last once the sides are coated.
3) Humidity changes everything
In drier climates, these can look perfect for weeks. In humid areas, you might notice the crystals softening or getting slightly damp-looking over time. This doesn’t mean you did it wrongEpsom salt naturally attracts moisture. The two practical solutions people tend to love are: (a) use LED candles and treat the votives as seasonal decor that you refresh as needed, or (b) seal the outside with a clear acrylic sealer once everything is fully dry. Light coats matter; heavy spraying can darken or melt the “fluffy frost” look.
4) Not all jars glow the same
Tall jars give you a softer lantern glow. Short votives give you a brighter, punchier sparkle. If you’re decorating a table, mixing heights usually looks intentional and styledlike you had a plan, not just a drawer full of random glass. A really reliable “looks good every time” set is: one taller jar, one medium, one small votive, grouped together. It creates that layered light effect people associate with holiday centerpieces.
5) The “sparkle level” is a personal decision
Some people want barely-there frost. Others want full ice queen energy. The easiest way to control sparkle without making it look like a craft explosion is to use glitter sparingly and choose the right kind: white, clear, or iridescent. A tiny amount mixed into the salt gives a soft shimmer when lit. If you go heavy, the crystals can start looking more like “glitter glue accident” than “winter magic.” (Unless that’s your aesthetic. No judgment. Glitter has fans for a reason.)
6) Gifts and party favors: presentation does half the work
If you’re gifting these, people tend to love two things: (1) a votive with a flameless tealight already inside, and (2) a simple tag with a cozy message“Warm wishes,” “Winter glow,” “Light in the dark,” etc. Wrap the base in tissue paper, tie twine around the neck, and you’ve got a handmade gift that looks thoughtfully curated rather than last-minute (even if you made it while watching a show). For party favors, pairing them with a small bag of hot cocoa mix or a couple of fancy matches turns the whole thing into a mini “winter comfort kit.”
7) The cleanup is realplan for it
Salt gets everywhere, but it’s manageable if you work over a tray and keep a dedicated “catch zone.” A dry paintbrush is surprisingly good for sweeping loose crystals off the jar once it dries. And if you’re making a bunch, put a towel under your trayyour future self will appreciate being able to pick it up and shake it outside like a dramatic snow scene.
In other words: this DIY is beginner-friendly, but it’s also “batch-friendly.” With a little setup and a few smart moves, you can crank out a whole set of ice crystal votives that look coordinated, glowy, and genuinely impressivewithout spending more than a coffee-shop run.


