Table of Contents >> Show >> Hide
- Why Pumpkin Carving Feels Bigger, Smarter, and More Stylish Now
- Start Like a Pro: Pick the Right Pumpkin
- The Tools That Actually Make a Difference
- Design First, Carve Second
- The Techniques That Take Pumpkin Carving Up a Notch
- Creative Pumpkin Carving Ideas That Feel Fresh
- How to Keep Your Jack-o’-Lantern Looking Good Longer
- Safety Matters, Even When You Are Feeling Artistic
- Do Not Waste the Pumpkin Guts
- The Real Secret to Better Pumpkin Carving
- Experience Section: What Pumpkin Carving Feels Like in Real Life
- Conclusion
There was a time when pumpkin carving meant two triangle eyes, one crooked smile, and a candle doing its best impression of a fire hazard. Charming? Absolutely. Sophisticated? Not exactly. But modern pumpkin carving has evolved into something far more creative. Today’s jack-o’-lanterns can look elegant, funny, dramatic, architectural, or downright gallery-worthy. In other words, pumpkin carving has gone from “cute porch tradition” to “seasonal art form with a side of pumpkin goo.”
If you have ever stared at a beautifully carved pumpkin and thought, “How did they do that without summoning a wizard?” the answer is technique. The secret is not just talent. It is choosing the right pumpkin, using the right tools, planning a smart design, and understanding that not every great pumpkin has to be hacked straight through like an action movie prop. Some of the best Halloween pumpkin designs rely on shaving, etching, layering, drilling, and combining carved details with paint or accessories.
This guide breaks down how to take your pumpkin carving ideas to the next level without making the whole project feel like a stressful arts-and-crafts final exam. Whether you want a polished front-porch centerpiece, a funny family project, or a pumpkin so impressive the neighbors slow down to stare, you are in the right place.
Why Pumpkin Carving Feels Bigger, Smarter, and More Stylish Now
One reason advanced pumpkin carving is having a moment is simple: people no longer think in terms of one face and done. Home decor trends have pushed seasonal decorating into full-scene storytelling. That means pumpkins are now part of porch styling, party tables, entry displays, and even photo backdrops. A carved pumpkin is not just a decoration anymore. It is a design element.
Another big shift is the rise of mixed technique carving. Instead of cutting every line all the way through, experienced carvers combine full cutouts with etched surfaces, shaved textures, drilled dots, and layered visual depth. This creates shadows, contrast, and more professional-looking results. A pumpkin can now glow softly in one area, shine brightly in another, and show textured details in daylight. That is a whole new level of pumpkin carving, and it is much more interesting than the old “big grin, small candle, hope for the best” method.
Start Like a Pro: Pick the Right Pumpkin
Great results begin at the pumpkin patch, grocery store, or farmers market. The best carving pumpkin is firm, fresh, and shaped for the design you want to make. If your stencil includes delicate details, flatter pumpkins often work better because they give you a more stable and predictable surface. If you want something dramatic and sculptural, taller or bumpier pumpkins can add personality before you even touch a tool.
What to look for
- A sturdy stem and firm shell
- No soft spots, deep bruises, or active rot
- A flat bottom so it does not roll around while you carve
- A size that matches your design ambitions
This is not the time to choose a pumpkin based solely on “vibes.” A tiny pumpkin cannot gracefully hold a haunted house skyline. A huge pumpkin can swallow a simple face and make it look weirdly underachieving. Match the gourd to the goal.
The Tools That Actually Make a Difference
You do not need an entire television prop department, but you do need better tools than the kitchen knife your uncle insists is “totally fine.” Good pumpkin carving tools give you cleaner cuts, tighter control, and a much lower chance of turning your masterpiece into abstract squash.
Useful pumpkin carving tools
- Small serrated pumpkin saw for controlled cutting
- Awl, needle tool, or pin for transferring patterns
- Scraper or scoop for cleaning out the inside
- Linoleum cutter or carving tool for etched details
- Loop tool for thinning walls and shaving flesh
- Drill or hand drill for dotted patterns and geometric effects
- Dry-erase or washable marker for sketching designs
The game-changing idea here is that advanced carving is often less about “cut harder” and more about “cut smarter.” Specialty tools help you create fine details, soft texture, and cleaner curves. They also make your work look more intentional, which is the difference between “crafty” and “spectacular.”
Design First, Carve Second
One of the biggest mistakes people make is starting with enthusiasm and no plan. Enthusiasm is lovely, but it is not a stencil. Before cutting anything, sketch your design on paper or print a pattern. Then transfer it onto the pumpkin with small pinpricks or a tracing tool. This step may not feel glamorous, but it saves you from the classic carving tragedy of realizing the eyes are too close together and the mouth somehow drifted into an existential crisis.
Design ideas that instantly feel more elevated
- Layered floral patterns instead of spooky faces
- Haunted houses, windows, doors, and miniature scenes
- Animal silhouettes, moons, branches, and ravens
- Typography, monograms, and welcome messages
- Stacked pumpkin characters with coordinated expressions
- Etched skulls, lace patterns, feathers, or woodgrain textures
Not every pumpkin has to be scary. Some of the most stylish designs are whimsical, elegant, or even funny. A set of pumpkins with exaggerated eyebrows and tiny expressions can be more memorable than one overcomplicated monster face. A white pumpkin etched with botanical patterns can look sophisticated enough to sit next to expensive fall decor and not feel insecure.
The Techniques That Take Pumpkin Carving Up a Notch
1. Cut from the bottom or side
Traditional top-cut lids are familiar, but cutting from the bottom or back often works better. It keeps the stem intact, improves the overall look, and makes it easier to clean out the inside. It also gives you more freedom when placing a light source. If the front of the pumpkin is the star, do not interrupt the silhouette with a lopsided hat-shaped lid unless the design truly needs it.
2. Thin the walls
If you want your pumpkin to glow dramatically, you need to think about wall thickness. Thick pumpkin flesh can block light and make carved details look muddy. Thinning the interior in the areas you plan to carve or etch allows more glow and sharper contrast. This is especially important for advanced pumpkin carving designs that rely on shaved surfaces instead of full cutouts.
3. Try etching and shaving
Etching is where pumpkin carving really starts showing off. Instead of cutting all the way through, you remove only the outer skin or shave away a controlled layer of flesh. This creates pale, glowing areas with subtle depth. It is perfect for feathers, fur, lettering, facial shading, floral motifs, and patterns that need detail without collapsing the structure of the pumpkin.
Think of etching as the difference between line art and sculpture. A cutout says, “Here is the shape.” An etched area says, “Here is the mood.”
4. Use drilling for texture
A drill can make stars, polka dots, constellation patterns, or decorative borders with impressive precision. This technique works especially well when paired with a simple carved silhouette. Picture a moon carved into one side and dozens of drilled stars glowing around it. Suddenly your jack-o’-lantern is not just cute; it has atmosphere.
5. Build in layers
Some of the most striking Halloween pumpkin ideas mix multiple techniques on the same pumpkin. For example, you might carve open windows in a haunted house, etch roof shingles, drill tiny stars above it, and add painted trim around the edges. That combination creates depth, contrast, and visual storytelling. The pumpkin looks richer because your eye sees more than one texture at once.
Creative Pumpkin Carving Ideas That Feel Fresh
If you want inspiration that goes beyond the standard grin, here are some pumpkin carving ideas that feel current without being impossible.
Modern porch favorites
- Minimal face pumpkins: Just eyes, brows, or one quirky expression for a graphic look
- Stacked pumpkins: Create a totem effect with different faces or themes
- House pumpkins: Tiny windows and doors turn pumpkins into glowing cottages
- Nature silhouettes: Bats, owls, leaves, branches, and crescent moons
- Text pumpkins: Carve “Boo,” “Hello Fall,” or a family name for a personalized display
More advanced statement pieces
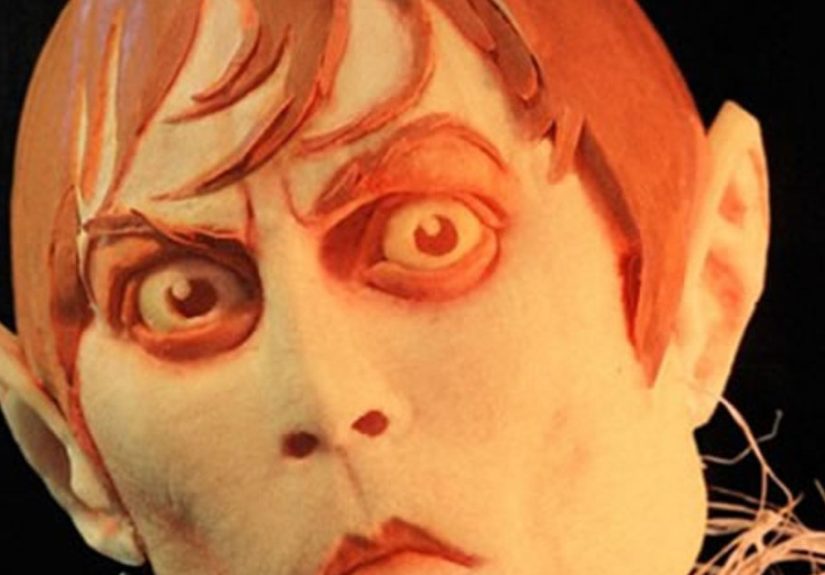
- Etched portrait-style pumpkins: High effort, high drama, very impressive
- Lace or filigree pumpkins: Great for elegant Halloween decor
- Mixed media pumpkins: Combine carving with paint, pins, paper hats, or accessories
- Faux pumpkins for keeps: Ideal for designs you want to save year after year
A smart trick is to create a group display instead of putting all your ambition into one pumpkin. A trio of coordinated pumpkins often looks more polished than a single overloaded one. One can feature a face, one can carry a pattern, and one can stay mostly intact with a painted accent. Together they tell a better visual story.
How to Keep Your Jack-o’-Lantern Looking Good Longer
Nothing humbles a talented carver faster than a pumpkin that starts collapsing before the guests arrive. Pumpkin preservation matters because carved flesh dries out, softens, and attracts mold quickly. A few practical habits can buy you more display time and better results.
Simple ways to extend the life of a carved pumpkin
- Wash the pumpkin before carving and clean your tools
- Remove as much pulp and stringy material as possible
- Keep the pumpkin in a cool, shaded, dry spot
- Use LED or battery-operated lights instead of real candles
- Seal exposed carved areas lightly if that suits your method
- Wait to carve until closer to the day you want it on display
Also, do not place your pumpkin directly on wet ground and then act shocked when it starts looking tragic. Pumpkins prefer cool, dry conditions. They are festive, not invincible.
Safety Matters, Even When You Are Feeling Artistic
Halloween fun should not end with a bandage and an awkward story. If kids are involved, adults should handle the actual cutting. Children can help draw, trace, scoop, sort seeds, and judge everyone else’s design choices with startling honesty. Flameless lights are the safer option, especially when you are already working with dry fall decor, door mats, and an abundance of decorative things that would really prefer not to catch fire.
It is also smart to take breaks during detailed carving. Fatigue leads to sloppy cuts, and sloppy cuts are how a charming pumpkin night suddenly becomes a life lesson.
Do Not Waste the Pumpkin Guts
There is no rule that says pumpkin carving must end with a trash bag. The seeds can be rinsed, seasoned, and roasted into a crunchy snack. The innards can go into compost. If you garden, saving seeds from a healthy pumpkin can become a fun project for next season. Using more of the pumpkin adds a practical, low-waste twist to the tradition, which feels especially satisfying after you have spent an hour carving a haunted mansion into produce.
The Real Secret to Better Pumpkin Carving
The truth is, the best pumpkin carving is not about making the most complicated design in the neighborhood. It is about intention. Pick a design that fits the pumpkin. Use a method that matches your skill level. Create contrast with light and texture. Think like a stylist, not just a cutter. When you do that, even a simple jack-o’-lantern can look elevated.
A whole new level of pumpkin carving does not require perfection. It requires curiosity, a little planning, and the willingness to try something beyond the old triangle face. Once you experiment with etched details, layered textures, or a coordinated porch display, it becomes obvious: pumpkins have been underselling themselves for years.
Experience Section: What Pumpkin Carving Feels Like in Real Life
One of the best things about pumpkin carving is that it creates a very specific kind of memory: messy, slightly ridiculous, and weirdly satisfying. You start with a perfectly normal pumpkin and a totally reasonable plan. Then, about twenty minutes in, you are surrounded by seeds, debating whether your bat stencil looks “mysterious” or “like a squashed umbrella,” and somehow having the time of your life.
For families, pumpkin carving often becomes less about the final result and more about the ritual. Someone always insists on saving every seed. Someone else wants a design so complex it belongs in a museum. Another person gives up halfway through and starts naming the pumpkins instead. That is part of the charm. The experience is collaborative, chaotic, and surprisingly funny. Even when the carving goes off-script, the memory usually gets better.
For adults decorating their own space, the experience can feel a lot like seasonal therapy with a serrated tool. There is something deeply satisfying about slowing down, sketching a design, and making something with your hands that will glow on the porch that night. It is temporary, a little imperfect, and highly visible. That combination makes it feel special. Pumpkin carving asks you to enjoy the process, not obsess over permanence.
If you have ever hosted a carving night with friends, you already know the emotional arc. It begins with confidence. Everyone says things like, “I’m keeping mine simple.” Thirty minutes later, somebody is carving tiny window shutters into a haunted cottage while somebody else has decided to attach a witch hat, fake crows, and a dramatic backstory. Snacks disappear, playlists get better, and the pumpkins begin to look like odd little personalities gathered for a reunion.
There is also the quiet thrill of lighting a finished pumpkin for the first time. In daylight, a design can look good. Once the light turns on, it comes alive. Etched details glow softly, cutouts shine sharply, and little choices you made earlier suddenly matter. That first reveal is the reward. It is the moment the pumpkin stops being a craft project and becomes a piece of atmosphere.
Even the failures become stories. Maybe the mouth cracked. Maybe the cat looked more like a squirrel with opinions. Maybe the “elegant botanical design” turned into abstract spaghetti. None of that ruins the experience. In fact, those are often the pumpkins people remember most. Perfection is not really the point. Character is.
That is why pumpkin carving keeps coming back every fall, even in an era full of quick decorations and instant purchases. It gives people something screens cannot: a tactile, shared, seasonal experience. It smells like pumpkin, sounds like scraping and laughter, and ends with a glowing object you made yourself. That is a pretty good deal for one humble gourd.
So yes, you can absolutely approach pumpkin carving like an art project and create something gorgeous. But the deeper experience is even better. It is about gathering people, making a mess, trying an idea, laughing when it gets weird, and putting something handmade into the world for a few glowing autumn nights. And honestly, that may be the most beautiful level of pumpkin carving of all.
Conclusion
Pumpkin carving has officially outgrown the old cookie-cutter approach. With better tools, smarter techniques, and more creative design ideas, a simple pumpkin can become a dramatic centerpiece, a playful porch display, or a genuinely impressive piece of seasonal decor. Whether you love classic jack-o’-lantern faces, etched botanical patterns, spooky house scenes, or stacked pumpkin characters, the best results come from thoughtful planning, safe carving, and a willingness to experiment. The magic is not just in the final glow. It is in the process of making something memorable, messy, and unmistakably yours.


