Table of Contents >> Show >> Hide
- Why Build a Large Wooden Planter?
- Best Wood for a DIY Large Wooden Planter
- Recommended Size for a Large Wooden Planter
- Tools and Materials You Will Need
- Step-by-Step: How to Build a DIY Large Wooden Planter
- Step 1: Decide the Final Dimensions
- Step 2: Cut the Corner Posts
- Step 3: Cut the Side Boards
- Step 4: Assemble the Long Sides
- Step 5: Attach the Short Sides
- Step 6: Build the Bottom Support
- Step 7: Drill Drainage Holes
- Step 8: Add a Liner the Smart Way
- Step 9: Sand and Finish the Outside
- Step 10: Fill With the Right Soil Mix
- Drainage Mistakes to Avoid
- What Can You Grow in a Large Wooden Planter?
- Maintenance Tips for a Long-Lasting Planter
- Real-World Experience: Lessons From Building a DIY Large Wooden Planter
- Conclusion
A large wooden planter is one of those DIY projects that looks impressive, works hard, and does not require you to own a workshop that smells like fresh cedar and destiny. With a few boards, screws, basic tools, and a sensible plan, you can build a sturdy planter box for vegetables, herbs, flowers, shrubs, or that one tomato plant you swear will not take over the patio this year.
The beauty of a DIY large wooden planter is control. You choose the size, the wood, the finish, the height, the drainage, and the style. Store-bought planters are fine, but many are either too small, too flimsy, too expensive, or designed by someone who apparently believes basil only needs enough soil to fill a coffee mug. Building your own lets you create a planter that fits your porch, deck, backyard, balcony, or garden path perfectly.
In this guide, you will learn how to build a large wooden planter box from start to finish, including material choices, measurements, assembly steps, drainage tips, soil advice, finishing ideas, and practical experience from real-world planter building. The goal is simple: a planter that looks good, drains well, lasts for years, and does not collapse dramatically the first time it rains.
Why Build a Large Wooden Planter?
A large wooden planter gives plants more root space than a small container, which usually means healthier growth, better moisture retention, and more design flexibility. You can use it for compact vegetables, ornamental grasses, annual flowers, dwarf shrubs, pollinator plants, or a mix of “thriller, filler, and spiller” plants if you enjoy garden design phrases that sound like a movie trailer.
Large planters are especially useful when your yard soil is poor, rocky, compacted, or nonexistent. They also make gardening more accessible because you can raise the planting area closer to waist height. On patios and decks, a planter can define an outdoor room, create privacy, or hide that one corner where everyone keeps stacking extra pots.
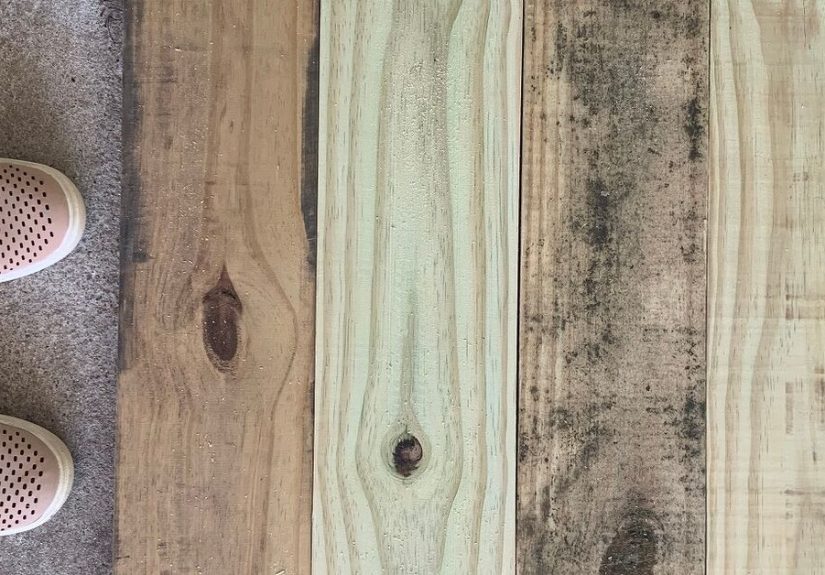
Best Wood for a DIY Large Wooden Planter
The best wood for a large planter is durable, weather-resistant, and strong enough to hold wet soil. Wet soil is heavy. Not “oops, this bag of mulch is awkward” heavy, but “why did I build a small wooden swimming pool for carrots?” heavy. That is why lumber choice matters.
Cedar
Cedar is one of the most popular choices for wooden planter boxes because it naturally resists decay and insects better than many common softwoods. It is lightweight, attractive, easy to cut, and smells like a forest decided to open a spa. Cedar costs more than pine, but it usually lasts longer outdoors.
Redwood
Redwood is another excellent rot-resistant option. It looks beautiful and performs well outside, but it can be expensive or harder to find depending on where you live. If your budget allows it, redwood makes a premium planter that ages gracefully.
Pressure-Treated Lumber
Modern pressure-treated lumber is widely available and often cheaper than cedar or redwood. If you use it for a planter, choose lumber labeled for ground contact and consider lining the inside walls to reduce direct contact between the soil and wood. Avoid old reclaimed treated wood, railroad ties, or mystery lumber from the “my neighbor said it’s probably fine” category, especially for edible gardens.
Pine or Fir
Pine and fir are budget-friendly, easy to work with, and available almost everywhere. The trade-off is durability. Untreated pine will usually rot faster outdoors, especially when soil is pressed against it. If you choose pine, use a liner, raise the planter on feet, and apply an exterior-safe finish to the outside.
Recommended Size for a Large Wooden Planter
A practical large planter size for most patios is about 48 inches long, 20 to 24 inches wide, and 20 to 24 inches tall. This size is large enough for herbs, flowers, lettuce, peppers, compact tomatoes, or decorative shrubs, but still manageable for a weekend DIY project.
For vegetables, depth matters. Leafy greens and herbs can do well in 8 to 12 inches of soil. Peppers, carrots, and many flowers appreciate 12 to 18 inches. Tomatoes and deeper-rooted plants prefer more room. If the planter is decorative and you are using nursery pots inside it, you can build it shallower or add a false bottom to save soil.
Tools and Materials You Will Need
Tools
- Tape measure
- Pencil
- Circular saw, miter saw, or handsaw
- Drill and drill bits
- Driver bit for screws
- Clamps
- Square
- Sandpaper or sanding block
- Safety glasses and work gloves
Materials
- Four 4×4 posts for corner legs
- 1×6 or 2×6 boards for side panels
- 2×4 boards for bottom supports and frame rails
- Exterior-grade deck screws
- Landscape fabric, hardware cloth, or breathable planter liner
- Optional pond liner or heavy plastic for side walls only
- Exterior wood stain or sealant for the outside
- Potting mix or raised bed mix
For a 48-inch by 24-inch by 24-inch planter, you can use four corner posts cut to 24 inches, side boards cut to length, and internal 2×4 supports for the base. The exact cut list depends on board thickness and design, but the structure is simple: four legs, four walls, a supported bottom, drainage, and a liner.
Step-by-Step: How to Build a DIY Large Wooden Planter
Step 1: Decide the Final Dimensions
Start with the location. Measure your patio, deck, porch, or garden area before buying lumber. Leave room around the planter for watering, pruning, sweeping, and admiring your handiwork with a beverage in hand. A planter that blocks a walkway will become annoying faster than a dull drill bit.
For beginners, a rectangular planter is easier than a square one because it gives you more planting space while keeping the width reachable. A width of 24 inches or less is comfortable if you can only access the planter from one side. If you can reach from both sides, you can go wider.
Step 2: Cut the Corner Posts
Cut four 4×4 posts to the height of your planter. These posts create strength and give the side boards something solid to attach to. Sand the rough edges after cutting. Splinters are not a personality trait, and your hands deserve better.
Step 3: Cut the Side Boards
Cut your long and short side boards. If you are using 1×6 boards and want a planter around 24 inches tall, four stacked boards per side will get you close, depending on the true board width. Dry-fit the boards on the ground before screwing anything together. This helps you catch mistakes while they are still “minor adjustments” instead of “creative design changes.”
Step 4: Assemble the Long Sides
Place two corner posts on a flat surface. Position the long boards across them, making sure the ends line up evenly. Use clamps to hold the boards in place, check with a square, and fasten each board to the posts with exterior screws. Use two screws per board end for better strength.
Repeat this process for the second long side. When both long panels are finished, you will have two sturdy wall sections ready to connect.
Step 5: Attach the Short Sides
Stand the long panels upright and connect them with the short side boards. This is easier with a helper, but clamps can act like a quiet assistant who never complains. Check that the planter is square by measuring diagonally from corner to corner. If both diagonal measurements match, your planter is square. If not, gently adjust before fully tightening the screws.
Step 6: Build the Bottom Support
A large wooden planter needs a strong bottom. Wet soil can weigh hundreds of pounds, so do not rely on thin boards floating in space like they have confidence issues. Attach 2×4 support rails inside the planter near the bottom. Then add bottom boards or slats across the supports.
Leave small gaps between bottom boards for drainage. If you prefer a more open bottom for garden placement, you can skip a solid floor and use hardware cloth plus landscape fabric. For patios and decks, a supported bottom gives the planter more structure and makes it easier to move before filling.
Step 7: Drill Drainage Holes
Drainage is not optional. Plants need water, but they also need air around their roots. Without drainage, a planter becomes a soggy wooden soup bowl. Drill several drainage holes through the bottom boards, spacing them evenly. Multiple holes are better than one lonely hole trying to save an entire planter by itself.
If the planter sits on a deck or balcony, raise it on feet or blocks so water can escape and air can circulate underneath. This helps protect both the planter and the surface below it.
Step 8: Add a Liner the Smart Way
A liner can extend the life of your wooden planter by reducing constant soil-to-wood contact. For edible plants, many gardeners use landscape fabric, hardware cloth, or a heavy plastic liner on the sides. The key is to avoid trapping water. If you use plastic, line the interior walls but leave drainage open at the bottom, or cut holes so water can escape freely.
Landscape fabric works well because it holds soil while allowing water to pass through. Hardware cloth can add support if you are worried about fabric sagging. Do not seal the planter so tightly that moisture has nowhere to go. Wood lasts longer when it can dry between watering and rain.
Step 9: Sand and Finish the Outside
Sand rough corners, edges, and screw areas. Then apply an exterior-rated stain or sealant to the outside of the planter. Avoid coating the inside with anything that is not intended for garden use, especially if you plan to grow herbs or vegetables.
A natural finish lets the wood age into a soft gray. A stain can help match your deck, fence, or outdoor furniture. Paint can look fantastic, but choose exterior paint and understand that painted wood outdoors may need touch-ups over time. The sun, rain, and temperature swings are not gentle roommates.
Step 10: Fill With the Right Soil Mix
Do not fill a large planter with dense yard soil. Garden soil can compact in containers, slowing drainage and limiting oxygen around plant roots. Use a high-quality potting mix for containers or a raised bed mix if the planter is open to the ground or very large. For vegetables and flowers, a blend with compost and aeration materials such as perlite, pine bark fines, or coarse sand can improve structure.
Fill the planter gradually, lightly moistening the mix as you go. Do not stomp it down. Soil should settle naturally, not be packed like a suitcase five minutes before a flight.
Drainage Mistakes to Avoid
One old gardening myth says you should add a layer of rocks or gravel at the bottom of a planter to improve drainage. In containers, that layer often does not help the way people expect. Good drainage comes from drainage holes, a proper soil mix, and airflow under the planter.
Another mistake is placing the planter directly on wood decking without feet. Moisture trapped underneath can damage both the planter and the deck. Add small feet, rubber risers, or blocks to create a drainage gap.
Finally, avoid liners that block every exit for water. A liner should protect the wood, not turn your planter into a bathtub with herbs.
What Can You Grow in a Large Wooden Planter?
A large wooden planter is flexible. For a kitchen garden, try basil, parsley, chives, lettuce, kale, spinach, peppers, radishes, or compact tomatoes. For flowers, petunias, marigolds, salvia, zinnias, geraniums, and trailing sweet potato vine can create a full, colorful display. For a modern patio look, use ornamental grasses, dwarf evergreens, lavender, or rosemary.
Match plants with similar water and sunlight needs. A cactus and a thirsty mint plant in the same planter will not become friends. Also remember that mint spreads aggressively, so it is often better kept in its own pot placed inside the wooden planter.
Maintenance Tips for a Long-Lasting Planter
Check the planter at least twice a year. Tighten loose screws, inspect the bottom for rot, clear blocked drainage holes, and refresh the finish if needed. In hot weather, large planters still dry out faster than in-ground beds, especially on sunny patios.
At the end of each growing season, remove dead plants, top off the soil with compost, and check whether the mix has compacted. If water puddles on the surface or drains slowly, refresh part of the soil with new potting mix and aeration material.
Real-World Experience: Lessons From Building a DIY Large Wooden Planter
The first thing you learn when building a large wooden planter is that “large” becomes very real once soil enters the chat. An empty planter may feel manageable. A filled planter becomes a piece of outdoor furniture with the emotional density of a piano. Build it where it will live, or at least move it into position before filling it.
One practical lesson is to predrill screw holes near board ends. This reduces splitting, especially with cedar or dry lumber. It adds a few minutes, but it saves you from that heartbreaking crack sound that makes every DIYer stare into the distance like they just lost a tiny wooden friend.
Another experience-based tip: buy slightly more lumber than your plan requires. Boards can be warped, cracked, twisted, or weirdly shaped in ways that only become obvious once you are home. Choosing straight boards at the store helps, but having one extra board gives you breathing room. It is cheaper than making a second trip while covered in sawdust and mild regret.
Drainage also deserves more attention than most beginners give it. A beautiful planter with poor drainage will disappoint you quickly. Waterlogged roots lead to weak plants, yellow leaves, and sad gardening energy. Drill enough holes, keep the bottom raised, and use soil that drains well. Your plants will reward you by not behaving like dramatic houseguests.
When lining the planter, the best results usually come from protecting the sides while respecting the bottom. In other words, help the wood avoid constant wet soil contact, but do not block the water from leaving. Landscape fabric is forgiving and easy to staple. Heavy plastic can work on the walls, but it needs drainage openings. Pond liner looks tough, but if installed like a sealed bag, it can create problems.
Finishing the outside is another area where patience pays off. Sanding may feel boring, but rough edges catch hands, sleeves, and garden gloves. A smooth planter looks more professional and is nicer to use. If you stain or seal the wood, let it dry fully before filling the planter. Rushing this step is like frosting a cake while it is still sliding out of the oven.
Plant choice matters too. A large planter can hold a lot, but overcrowding still causes problems. Give vegetables and flowers enough room for air circulation. A planter packed too tightly may look lush for two weeks, then turn into a mildew convention. Start with fewer plants than you think you need, then let them grow into the space.
Finally, remember that outdoor wood is never maintenance-free. Even cedar and redwood age. That is not failure; that is weather doing weather things. A seasonal checkup, decent drainage, and occasional refinishing can keep your DIY wooden planter useful and attractive for years. The reward is worth it: fresh herbs near the kitchen, flowers by the patio, or homegrown vegetables in a box you built yourself. That is a small backyard victory with very nice curb appeal.
Conclusion
Building a DIY large wooden planter is a satisfying weekend project that combines practical gardening with simple woodworking. You do not need advanced carpentry skills, just a clear plan, straight cuts, strong screws, smart drainage, and the wisdom to avoid filling a sealed wooden box with wet soil and hoping for the best.
Choose durable wood such as cedar or redwood if your budget allows, or use appropriate pressure-treated lumber with a thoughtful liner. Build a strong frame, support the bottom, drill multiple drainage holes, raise the planter slightly off the ground, and fill it with a container-friendly soil mix. Once planted, your large wooden planter can become a hardworking garden feature that adds beauty, food, fragrance, and personality to your outdoor space.
Best of all, every time someone asks where you bought it, you get to say, “I built it.” Try to say this casually. You have earned the moment.


