Table of Contents >> Show >> Hide
- How to Use This Guide (So You Actually Finish a Pumpkin)
- Choosing the Right Pumpkin for Your Stencil
- 60 Printable Pumpkin Carving Stencils and Free Pattern Ideas
- Classic Jack-o’-Lantern Faces (Beginner-Friendly)
- Cute & Kid-Friendly Characters (Easy to Moderate)
- Spooky Halloween Icons (Moderate)
- Fall & Cozy Autumn Patterns (Beginner to Moderate)
- Animals That Look Surprisingly Cool in Pumpkin Form (Moderate)
- Intricate “Whoa, You Made That?” Patterns (Advanced)
- How to Print, Resize, and Transfer a Pumpkin Stencil
- Tools That Make Carving Easier (and Safer)
- Carving Techniques That Level Up Any Pattern
- Step-by-Step: Carve a Pumpkin Using Any Printable Stencil
- Lighting Your Jack-o’-Lantern: Glow Without the Drama
- How to Make a Carved Pumpkin Last Longer
- Food Safety Note (Because Someone Always Asks)
- of Real-World “I Wish Someone Told Me This” Pumpkin Carving Experiences
- Conclusion
Pumpkin carving is the rare hobby where you can be both an artist and a person who aggressively scoops slime out of a gourd with a kitchen spoon. It’s messy, it’s oddly therapeutic, and it’s basically the official sport of October.
If you’re hunting for printable pumpkin carving stencils that look impressive without requiring a fine arts degree (or a steady hand powered by pure caffeine), you’re in the right patch. Below you’ll find 60 free pattern ideas you can print, scale, and traceplus practical tips on tools, carving techniques, lighting, and keeping your jack-o’-lantern from turning into a sad pumpkin puddle before the big night.
How to Use This Guide (So You Actually Finish a Pumpkin)
Here’s the simplest approach:
- Pick a design category (cute, spooky, fancy, kid-friendly, etc.).
- Choose a skill level you can realistically do without inventing new curse words.
- Print + resize the template to match your pumpkin.
- Transfer the pattern, carve (or etch), then light it up.
- Preserve it so it still looks alive on Halloween.
Choosing the Right Pumpkin for Your Stencil
Not all pumpkins are created equal. Some are tall and skinny, some are wide and flat, and some are shaped like they spent the summer doing squats. To match pumpkin to pattern, think in terms of “canvas space.”
Quick pumpkin matching tips
- Big, bold faces (classic jack-o’-lantern grins, chunky silhouettes): pick a medium-to-large pumpkin with a smooth front.
- Detailed patterns (portraits, lace effects, intricate scenes): choose a larger pumpkin with flatter sides and minimal ridges.
- Wrap-around designs (vines, geometric bands): go rounder and more symmetrical.
- Kid-friendly stencils: pick a pumpkin that sits steady and won’t roll away mid-carve like a gourd-shaped escapee.
Pro move: before buying, gently rotate the pumpkin and “audition” the flattest side as your main carving stage.
60 Printable Pumpkin Carving Stencils and Free Pattern Ideas
The patterns below are organized by vibe and difficulty. They’re written as printable stencil ideas you can find in free template collections (and then personalize). For each design, you can do either: cut-through carving (light shines through holes) or surface etching (light glows through thinner pumpkin skin).
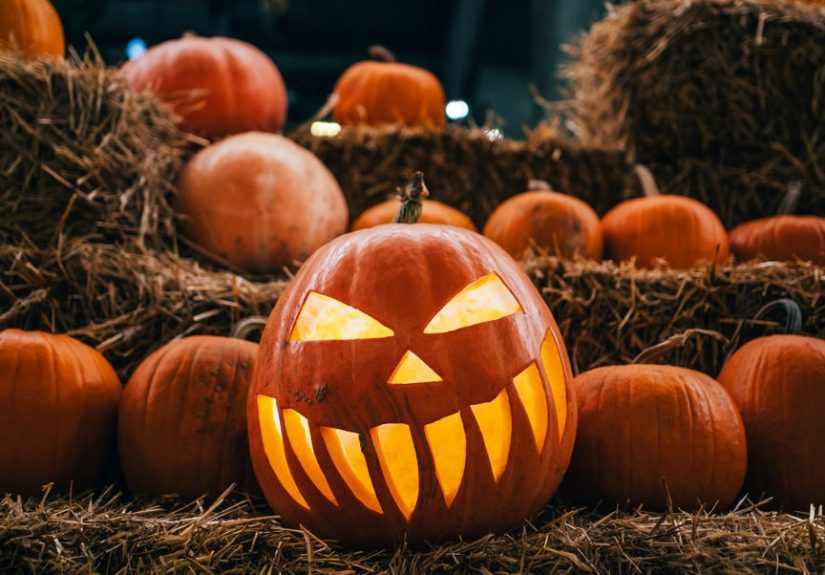
Classic Jack-o’-Lantern Faces (Beginner-Friendly)
- Classic triangle eyes + toothy grin
- Sleepy eyes with a crooked smile
- Big round eyes + surprised “O” mouth
- Winking face with a goofy tongue
- Angry eyebrows + jagged monster mouth
- Gap-toothed grin (like a pumpkin missing a few dental appointments)
- Cat-eye slant + mischievous smirk
- Heart eyes + happy smile (spooky romance!)
- Wide grin with stitched “seam” marks
- Side-eye face that looks like it overheard your group chat
Cute & Kid-Friendly Characters (Easy to Moderate)
- Friendly ghost with rosy cheeks (etched)
- Smiling bat silhouette
- Cartoon owl with big eyes
- Simple black cat (arched tail optional)
- Happy candy corn
- Baby spider with tiny feet (more “aww” than “ahh”)
- Playful dinosaur profile
- Unicorn head with a starry mane (etched details)
- Rainbow + clouds (great for etching)
- “Boo!” speech bubble with a friendly face
Spooky Halloween Icons (Moderate)
- Haunted house silhouette
- Witch hat + broom
- Full moon with flying bats
- Spiderweb corner design (great for beginners leveling up)
- Gravestone with “RIP” lettering
- Skull silhouette (simple cutout version)
- Creepy candle with dripping wax (etched + carved combo)
- Black crow on a branch
- Frankenstein-style face (blocky features)
- Mummy wrap pattern (etched bandages)
Fall & Cozy Autumn Patterns (Beginner to Moderate)
- Maple leaf
- Oak leaf + acorn
- Sunflower face (etched petals)
- Pumpkin-on-pumpkin (a pumpkin carving a pumpkin… pumpkinception)
- Harvest wheat bundle
- “Hello Fall” script (etched letters with carved outline)
- Plaid pattern band (etched)
- Cozy mug with steam curls
- Simple barn silhouette
- Vintage truck carrying pumpkins (silhouette style)
Animals That Look Surprisingly Cool in Pumpkin Form (Moderate)
- Howling wolf + moon
- Butterfly wings (etched symmetry)
- Fox face (bold shapes, etched fur)
- Hedgehog silhouette
- Hooting owl on a branch (more detailed version)
- Black cat sitting in a crescent moon
- Fish skeleton (fun and weird, in a good way)
- Raven with star speckles (etched)
- Bee + honeycomb pattern
- Dragon profile (starter version: bold silhouette)
Intricate “Whoa, You Made That?” Patterns (Advanced)
- Portrait-style face (surface carve with depth)
- Detailed skull with shading (surface carve)
- Day-of-the-dead floral skull (etched + carved)
- City skyline at night (window cutouts)
- Forest silhouette with layered trees (depth carving)
- Mandala circle (etched lines + cutouts)
- Victorian lace pattern (etched)
- Stormy night: clouds + lightning (etched gradients)
- Mythical creature (dragon/unicorn) with textured scales
- Horror-movie “hands on the glass” silhouette (bold + dramatic)
Tip: if you want your pumpkin to look “advanced” without doing advanced things, pick a high-contrast silhouette (like a haunted house or wolf) and add extra drama with etched shading around it. The stencil stays simple, but the glow looks fancy.
How to Print, Resize, and Transfer a Pumpkin Stencil
Printable templates are only “easy” if they actually fit your pumpkin. Here’s how to make that happen without guesswork.
Step 1: Measure your pumpkin’s “front stage”
Measure the height and width of the flattest side where your stencil will sit. Example: if your pumpkin’s carving area is about 7 inches wide and your printed stencil is 9 inches wide, you’ll want to scale down to roughly 75–80%.
Step 2: Resize when printing
- On a computer print dialog, look for Scale or Custom Size.
- If you’re not sure, print a draft on regular paper first and hold it up to the pumpkin.
- For big pumpkins, consider printing at 110–125% and taping pages together for a larger template.
Step 3: Transfer the design
The classic method: tape the stencil to the pumpkin and poke holes along the lines with a pin tool (or a pushpin, toothpick, or the point of a small paring knife). When you remove the paper, you’ll have dotted lines to follow.
Faster method: trace the design with a marker by pressing firmly over the lines (this works best for bold shapes). Just don’t use a marker you’d be sad to see “ghosted” on the pumpkin if your lines wander.
Tools That Make Carving Easier (and Safer)
You can carve a pumpkin with a big kitchen knife. You can also cut your own bangs with office scissors. Both are possible. Neither is recommended.
Starter toolkit
- Scoop (or an ice cream scoop): removes guts fast.
- Serrated pumpkin saw: better control than a chef’s knife for cutouts.
- Detail carver / linoleum cutter: excellent for clean edges and small shapes.
- Poker tool: for dot patterns, shading, and transferring stencils.
- Scraper / etching tool: for surface carving and “glow” effects.
If you’re doing etched designs (mandalas, lace, portraits), a small carving tool that can scrape and shave the pumpkin skin makes a huge difference. For bold beginner stencils, the saw + scoop combo is plenty.
Carving Techniques That Level Up Any Pattern
1) Classic cut-through carving
This is the standard jack-o’-lantern method: cut out shapes completely so light shines through. It’s perfect for faces, silhouettes, and big, graphic stencils.
2) Surface etching (the “looks fancy” hack)
Instead of cutting all the way through, scrape off the dark outer skin to reveal the lighter layer underneath. The result glows warmly and can look more detailedeven with a simple template.
3) Depth carving (advanced, but worth it)
You carve at different depths to create shading. This is how portrait pumpkins get that “how is this even a pumpkin?” look. If you’re trying it for the first time, practice on a small section before committing to a whole face.
Step-by-Step: Carve a Pumpkin Using Any Printable Stencil
- Wash and dry the pumpkin (outside and inside).
- Cut the opening (bottom or back keeps the stem intact for a classic look and easier lid alignment).
- Scoop thoroughly and scrape the wall thin where you’ll carve (about 1 inch is a friendly target).
- Attach the stencil with tape and transfer lines using the poke-hole method.
- Cut large shapes first, then move to smaller details.
- Pop pieces out gently (don’t “pry like a crowbar” unless you want jagged edges).
- Clean edges with a small blade or detail tool.
- Light it up with an LED candle or small string lights.
Lighting Your Jack-o’-Lantern: Glow Without the Drama
If you’re carving at home with kids, pets, or a porch that gets windy, battery-powered lights are the chill option. LEDs also reduce heat inside the pumpkin, which helps it last longer. For brighter designs, use a short string of micro LEDs tucked inside; for softer glow, a single LED tea light works.
How to Make a Carved Pumpkin Last Longer
The enemy is a three-headed monster: dehydration, microbes, and heat. Your mission is to slow all three.
Preservation checklist
- Keep it cool: display in a cooler spot when possible (shade helps).
- Disinfect the cut surfaces: a mild bleach solution can reduce mold and rot.
- Seal exposed edges: petroleum jelly can slow drying on cut areas.
- Use LED lights instead of a real candle for less heat inside.
Practical routine: after carving, lightly mist or wipe the carved surfaces with a diluted disinfecting solution, let it dry, then apply a thin layer of petroleum jelly to the exposed edges. If you’re using a real candle (not recommended with petroleum jelly), skip the jelly because it’s flammable. Use LED lighting instead.
Food Safety Note (Because Someone Always Asks)
Carved pumpkins are for decorating, not snacking. Once a pumpkin has been cut open and sitting out, treat it like perishable food: time, temperature, and exposure matter. If you want roasted pumpkin seeds, take them out early and roast them promptlydon’t wait until the pumpkin has been chilling on the porch for days like it owns the place.
of Real-World “I Wish Someone Told Me This” Pumpkin Carving Experiences
Even with the best printable stencils, pumpkin carving has a way of teaching you lessons quicklyusually right after you’ve taped the template on crooked. Here are the most common “experience-based” takeaways people share after carving a few seasons, presented so you can skip the chaos and get straight to the brag-worthy porch glow.
First: the stencil always looks bigger on paper. You print an awesome haunted house pattern, hold it up to your pumpkin, and realize the pumpkin is basically a clementine with delusions of grandeur. The fix is simple: measure the carving area first, then scale your printout before you commit. If you’re carving with kids, scaling down also keeps details chunkier, which means fewer delicate cutouts that snap off and vanish into the pumpkin like tiny orange confetti.
Second: thin walls are your friend. People often scoop “good enough” and start carving, then wonder why their design looks dim. When you scrape the inside wall thinner behind the stencil area, the light shines brighter and details read cleaner. It’s the difference between “cute jack-o’-lantern” and “why is my pumpkin quietly whispering in the dark?”
Third: etching is the secret weapon for last-minute carvers. If you’re short on time, choose a design that uses scraping (etching) plus a few bold cutouts. You get the wow factor of shading without the fragile cut-through pieces. Bonus: etched designs often look crisp even if your lines aren’t museum-perfect. They glow warmly, and any tiny wobbles get forgiven by the candlelight… or, better yet, your LED.
Fourth: pumpkins hate heat like vampires hate daylight. A carved pumpkin in direct sun will dry out fast and invite mold sooner. If your porch gets afternoon sun, consider displaying it in shade, bringing it inside overnight, or carving closer to Halloween. People who carve super early often end up doing “pumpkin CPR” (aka rehydrating, disinfecting, and pep-talking it) by the time trick-or-treaters arrive.
Fifth: the best carving nights are organized chaos. If you’re carving with friends or family, set up a “mess zone” with newspapers, paper towels, a trash bag, and a bowl for seeds. Put the stencil station on one side, the carving station on another, and the lighting station somewhere safe. That way, you’re not trying to tape paper while someone else is doing pumpkin surgery two inches from your elbow. Add music, give everyone a stencil category, and suddenly it feels less like a chore and more like a tradition.
Finally: the best stencil is the one you’ll actually finish. A clean, bold silhouette can look more striking than an overly intricate design that ends in frustration and “abstract art.” Start with something you can complete confidently, then level up next year. Pumpkin carving rewards momentumand your porch will still look like Halloween showed up on purpose.
Conclusion
Whether you’re going for cute, creepy, cozy, or “how did you do that,” printable stencils make pumpkin carving faster, cleaner, and more funespecially when you match the design to your pumpkin size and your patience level. Pick one of the 60 ideas above, print and scale your template, carve (or etch), then preserve and light it like a pro. Your porch glow awaits.


