Table of Contents >> Show >> Hide
- Before You Start: 5 Minutes of Prep That Saves You Hours
- Way #1: The Gentle Soap-and-Water Scrub (Your “Do This First” Method)
- Way #2: Targeted Treatments for Stains, Moss, and White Haze (A.K.A. “The Patio’s Greatest Hits”)
- Option A: Oxygen bleach for organic grime (often kinder to plants)
- Option B: Diluted bleach for moss, mold, and stubborn dark spots (use carefully)
- Option C: Degreaser or poultice for grill grease and oil stains
- Option D: Efflorescence remover for white, powdery haze (use with extra caution)
- What to avoid on natural stone
- Way #3: Pressure Washing (Fast, Satisfying, and Easy to Overdo)
- Keeping It Clean Longer (So You’re Not Doing This Again Next Weekend)
- Conclusion: Pick the Method That Matches the Mess
- Real-World Lessons and “Been-There” Scenarios (The Extra Stuff That Makes This Easier)
- SEO Tags
A stone patio is basically your yard’s welcome mat: it catches muddy footprints, pollen, grill grease, leaf stains, and that mysterious green “patina” that shows up the moment you buy nice outdoor furniture.
The good news: you don’t need to declare war on it (or accidentally etch it into a sad, chalky science project).
With the right approach, you can clean stone safely, keep the joints intact, and avoid turning your landscaping into a chemical slip ’n slide.
This guide walks you through three reliable methodsstarting gentle and working upso you can match the cleanup to the mess.
Along the way, you’ll learn what to avoid (spoiler: “whatever’s under the sink” is not a stone-care strategy), how to handle common patio stains, and how to keep the patio from getting gross again two weeks later.
Before You Start: 5 Minutes of Prep That Saves You Hours
1) Identify your stone (because stone is not “just stone”)
“Stone patio” can mean dense, tougher materials (like bluestone or granite) or more delicate, calcareous stones (like limestone, travertine, and some marbles).
The delicate ones can react badly to acidic cleaners (including some “natural” DIY favorites).
If you’re not sure what you have, treat it like a sensitive material: start with the mildest method and do a spot test.
2) Clear, sweep, and pre-rinse
- Move furniture, planters, grills, and rugs off the patio.
- Sweep thoroughly (grit is basically sandpaper once you add scrubbing).
- Rinse with a garden hose to float off dust and loosen grime.
3) Protect plants and nearby surfaces
Even “mild” cleaners can scorch leaves or discolor adjacent materials if runoff sits too long.
Lightly wet nearby plants first (so they’re less likely to absorb runoff), cover sensitive beds if you’re using stronger cleaners, and rinse everything when you’re done.
4) Grab the right tools
- Stiff nylon brush or deck brush (not wirewire can scratch and leave rust marks)
- Bucket, hose, and a spray bottle or pump sprayer
- Microfiber cloths or old towels for quick wipe-ups
- Gloves and eye protection (especially for stain removers or bleach solutions)
5) Always spot test
Pick an inconspicuous corner, apply your chosen solution, wait the recommended time, scrub lightly, and rinse.
If the color changes, the surface dulls, or it looks “etched,” stop and switch tactics.
Way #1: The Gentle Soap-and-Water Scrub (Your “Do This First” Method)
If your patio is mostly dusty, grimy, or lightly stained, this is the safest methodand honestly, it’s the one most patios need most of the time.
Think of it as skincare for stone: consistent, boring, effective. (The dream.)
Best for
- General dirt, pollen, and traffic grime
- Light food spills
- Routine seasonal cleaning (spring/fall)
- Most natural stone and stone pavers
Supplies
- Warm water
- pH-neutral stone cleaner or a small amount of mild dish soap
- Stiff nylon brush or deck brush
Step-by-step
- Sweep and rinse. Remove loose grit so you’re not grinding it into the stone.
-
Mix a mild solution. In a bucket, combine warm water with a small squirt of mild dish soap (or use a pH-neutral stone cleaner as directed).
More soap is not “more clean”it can leave a film that attracts dirt. - Scrub in sections. Work in 3-by-3 foot areas so the solution doesn’t dry before you rinse.
- Rinse thoroughly. Leftover soap can streak and turn your next rainfall into a bubble machine.
- Repeat for stubborn spots. A second gentle pass beats one aggressive pass.
Common mistakes to avoid
- Wire brushes: They can scratch stone and leave rust marks.
- Over-soaping: Too much soap can leave a residue that dulls the look.
- Letting cleaner dry on the stone: Especially on hot dayswork early morning or late afternoon.
If Way #1 gets you 80% of the way there, you’re winning. For the remaining 20%moss, black spots, greasy grill halosmove on to targeted treatments.
Way #2: Targeted Treatments for Stains, Moss, and White Haze (A.K.A. “The Patio’s Greatest Hits”)
Stone patios don’t get dirty in one universal way.
They collect types of mess: organic growth in shade, grease near the grill, rusty marks under metal chairs, and sometimes a chalky white haze that looks like your patio tried baking.
The trick is matching the cleaner to the problembecause using the wrong one can damage stone (or just do absolutely nothing, which is its own kind of rude).
Option A: Oxygen bleach for organic grime (often kinder to plants)
Oxygen bleach (often sold as “oxygen cleaner” powders) is popular for outdoor grime because it can lift stains from mildew, algae, and general gunk without being as harsh as some alternatives.
It’s a solid next step when soap and water isn’t enough.
- Pre-wet the patio. A damp surface helps the solution spread more evenly.
- Mix per label directions. Use warm water if recommended so the powder dissolves completely.
- Apply and let it dwell. Give it time to work (but don’t let it dry on the stone).
- Scrub and rinse. A stiff nylon brush plus thorough rinsing usually does the job.
Option B: Diluted bleach for moss, mold, and stubborn dark spots (use carefully)
In shaded or damp areas, patios can develop black or green growth that’s slick underfoot (the kind of “fun” that ends with someone sliding into a chair like a sitcom stunt).
A properly diluted bleach solution can be effectivebut it requires caution: spot test, protect plants, and rinse thoroughly.
- Spot test first. Some stones or finishes can discolor.
- Mix a dilute solution. Use a conservative dilution and follow reputable guidance (and any manufacturer instructions for your specific stone/pavers).
- Apply with a sprayer. Avoid soaking surrounding soil or grass.
- Scrub lightly. Let the solution do the heavy lifting.
- Rinse extremely well. Then rinse nearby plants and hardscape edges, too.
Safety note: Never mix bleach with ammonia, vinegar, or acidic cleaners. Keep products separate, and use good ventilation even outdoors.
Option C: Degreaser or poultice for grill grease and oil stains
Grease stains usually look like a dark “shadow” that refuses to leave, especially near grills or outdoor kitchens.
Start mild, then escalate:
- Step 1: Try warm water + dish soap and a stiff brush.
- Step 2: If it persists, use a degreaser that’s suitable for masonry/stone (follow label directions and rinse well).
-
Step 3: For deep stains, a simple poultice can help: sprinkle an absorbent powder (like baking soda) on the stain, add just enough water to make a paste, cover loosely, let it dry, then sweep up and repeat.
This works best on fresh-ish stains; older oil may need a specialized stone poultice product.
Option D: Efflorescence remover for white, powdery haze (use with extra caution)
Efflorescence is that chalky white deposit that can appear on porous masonry, pavers, or mortar.
It’s often mineral salts migrating to the surface with moisture.
Sometimes it fades with time, brushing, and normal weathering; other times it needs an efflorescence remover.
Many removers are acid-based, so they must be used carefully to avoid etching and color change.
- Dry brush first. Start with a stiff nylon brush to remove loose powder.
- Wash with soap and water. Sometimes that’s enough.
- If it persists, use an efflorescence remover. Follow the product instructions exactly, work fast, and rinse thoroughly.
- Keep dwell time short. Many removers work quicklyleaving them on longer can increase risk of etching.
What to avoid on natural stone
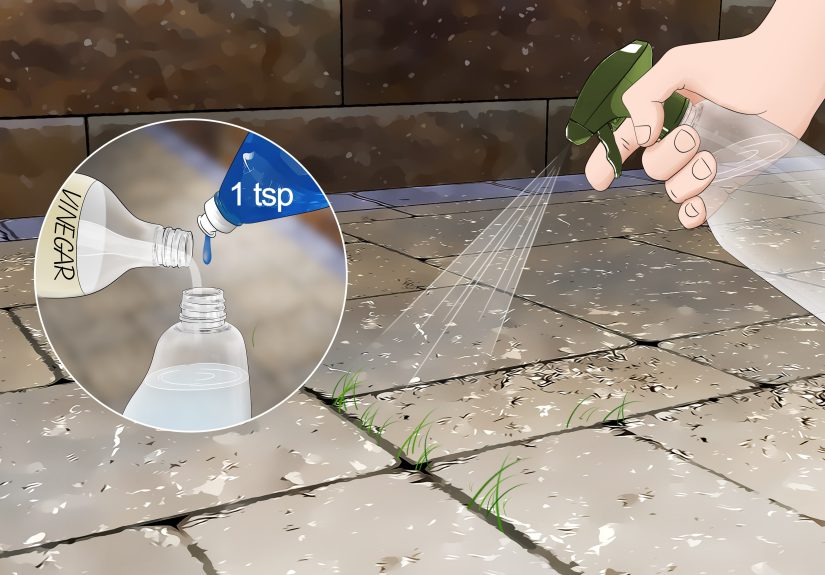
- Acidic cleaners (including vinegar) on calcareous stone like limestone, travertine, marble, and dolomitethese can dull or etch the surface.
- Random rust removers that aren’t stone-safe; some contain acids that can damage multiple stone types.
- “Viral hacks” involving salt for weedssalt can harm surrounding soil and may leave residues.
If you’ve tackled stains and growth but want the fastest all-over refresh, Way #3 is your high-speed optionjust don’t point a pressure washer at your patio like it owes you money.
Way #3: Pressure Washing (Fast, Satisfying, and Easy to Overdo)
Pressure washing can make a stone patio look dramatically better in a short timeespecially when you’re dealing with built-up grime, algae film, or embedded dirt.
But the same force that blasts away gunk can also blast away joint sand, expose aggregate on some pavers, and rough up softer stone if you get too close or too aggressive.
The goal is “clean,” not “sandblasted.”
Best for
- Large patios with heavy surface grime
- Algae film and slippery buildup
- Textured stone that holds dirt in pits and grooves
Step-by-step: a safer pressure-wash approach
- Sweep and pre-rinse. Remove grit and leaves first.
-
Choose the right tip and setting.
Start with a wider fan tip and the lowest effective pressure.
Avoid “turbo” or pinpoint tips that can scar surfaces. - Hold the wand at an angle. Keep a shallow angle (not straight down) and maintain a consistent distance from the surface.
- Keep moving. Don’t linger in one spot, or you’ll carve “clean stripes” that look like abstract art (the bad kind).
- Work in sections. Overlap passes slightly for an even finish.
- Avoid blasting joints. Spraying directly into joints can remove sand or mortar and invite weeds later.
- Rinse thoroughly. You want the dirty water off the patio, not re-drying into streaks.
After pressure washing: what most people forget
-
Resand joints if needed.
If your patio has polymeric or joint sand between pavers and you removed some, refill it once the patio is fully dry. -
Let it dry before sealing.
If you plan to seal, make sure the patio is dry and free of efflorescence first.
Many installers and manufacturers recommend waiting after installation to allow any efflorescence to appear and be removed before sealing. -
Fix the “why” behind recurring grime.
If algae keeps returning, look at shade, drainage, and runoff patternsnot just cleaning products.
Pressure-washing red flags
- The surface looks fuzzier or rougher than before (too much pressure).
- Joint sand disappears instantly (angle/pressure too aggressive).
- You see “wand marks” or stripes (moving too slowly or too close).
Keeping It Clean Longer (So You’re Not Doing This Again Next Weekend)
Cleaning is great. Not having to clean as often? Even better.
Here are low-effort habits that make a big difference:
- Sweep regularly. Dirt plus moisture becomes grime faster than you think.
- Rinse after messy cookouts. Especially near grillsfresh spills are easier than fossilized grease.
- Lift planters occasionally. Pots trap moisture and can stain stone underneath.
- Improve drainage. Persistent puddles encourage algae, moss, and efflorescence.
- Spot-clean early. A small stain today is a “character-building project” next month.
- Consider sealing when appropriate. Not all stone needs it, but the right impregnating sealer can add stain resistance and make future cleaning easier.
Conclusion: Pick the Method That Matches the Mess
If you take one thing from this guide, let it be this: start gentle, and get more targeted only when you need to.
For routine dirt, Way #1 (soap and water) is usually enough.
For moss, stains, or white haze, Way #2 lets you treat the actual problem without punishing the entire patio.
And for big, satisfying refreshes, Way #3 (pressure washing) can work beautifullyso long as you treat the joints and the stone with a little respect.
Your patio doesn’t need to be “perfect.” It needs to be clean enough that you’ll actually want to use it.
Because a stone patio is meant for iced drinks, bare feet, and that one friend who always says, “Wow, your backyard is so nice,” as if you live inside a home improvement show.
Real-World Lessons and “Been-There” Scenarios (The Extra Stuff That Makes This Easier)
In real life, patios don’t get cleaned in a calm, controlled laboratory environment.
They get cleaned on a Saturday when you realize guests are coming, the weather is 87 degrees, and your hose decides to kink like it’s auditioning for a drama.
So here are the practical patterns people run into again and againplus what tends to work best.
Lesson 1: Most patios only need “boring clean,” not “nuclear clean.”
A lot of folks jump straight to harsh chemicals or max-pressure washing because the patio looks “old.”
But in many cases, it’s just accumulated dust, pollen, and grime that’s bonding with moisture.
A good sweep, rinse, and mild scrub often reveals the stone’s color againwithout the risk of etching or stripping joint sand.
The surprise is how much better it looks once the loose grit is gone and the surface is evenly rinsed.
Lesson 2: The shadiest corner is always the grossest corner.
If you have a section that never gets sun, that’s where algae and moss will set up camp.
Cleaning it once helps, but the real long-term win is reducing how long it stays damp.
Even small changestrimming back plants for airflow, redirecting a downspout, fixing a low spot where water poolscan slow regrowth.
It’s less dramatic than blasting it with chemicals, but it’s a lot more permanent.
Lesson 3: Vinegar is not “universal.”
Vinegar has a strong online fan club, but natural stone has strong opinions.
On calcareous stone (like limestone and travertine), acidic solutions can dull the surface.
That’s one of those mistakes you can’t fully rinse away.
If you’re ever unsure what stone you have, assume it’s sensitive and stick to pH-neutral cleaners, oxygen cleaners, or manufacturer-recommended products.
When in doubt, spot testand if the stone reacts poorly, stop immediately.
Lesson 4: Pressure washing is a finishing tool, not a personality trait.
The people who love pressure washing really love pressure washing.
But patios (especially paver patios) have joints that matter.
If you spray directly into joints, you can remove the sand that helps lock everything in place.
Then weeds move in, ants throw a tiny block party, and you’re wondering why your “quick clean” created a whole new hobby.
A safer approach is lower pressure, a fan tip, a consistent distance, and avoiding direct joint blasting.
Afterward, expect you may need to resand.
Lesson 5: Efflorescence plays mind games.
White haze can look like damage, but it’s often mineral salts migrating to the surface.
Sometimes it fades; sometimes it needs a remover.
The hard part is patience: rushing to strong acid cleaners can discolor or etch.
If you go the remover route, do it by the bookshort dwell times, thorough rinsing, and a spot test first.
And if water is regularly moving through the patio (poor drainage, constant runoff), the haze may return until the moisture issue is fixed.
Lesson 6: “Clean” doesn’t always show up until it’s dry.
Wet stone can hide stains or make everything look evenly dark, so people keep scrubbing because they don’t see immediate results.
A smarter move: clean one section, rinse well, and let it dry enough to evaluate.
You’ll avoid over-cleaning and you’ll know exactly which spots truly need a second pass.
The bottom line: stone patio cleaning gets easier when you treat it like a processgentle baseline cleaning, targeted stain treatment, and careful machine cleaning when needed.
Do that, and you’ll spend more time enjoying the patio than arguing with it.
Which is ideal, because patios are supposed to host brunch, not drama.


